Administering the instance
This chapter is for instance operators: the superusers who run a DeviceChain installation for everyone on it. If you work inside one tenant, you will not see these screens, and you can skip this chapter.
The admin console is where you create and delete tenants, decide what each tenant is packaged at, manage the people who sign in and the roles they hold, connect outside identity providers, review what was changed across the instance, and set instance-wide defaults.
Opening the admin console
A superuser who signs in lands in the admin console straight away, without choosing a tenant. From the tenant console, the user menu also offers Admin console (the user menu). The admin console opens for a superuser only; anyone else is sent back to the sign-in page.
The sidebar reads Admin Console under the logo, and an Admin badge sits at the right of the page header. Its entries, under Platform, are:
- Tenants, with List, Tiers and Deletions.
- Identities, with List, Roles and Identity providers.
- AI Providers, Audit and Settings.
Tenants
Tenants → List is the instance's tenant registry. A tenant is a record the platform keeps, not something it provisions: creating one takes effect at once, with no new servers or services.
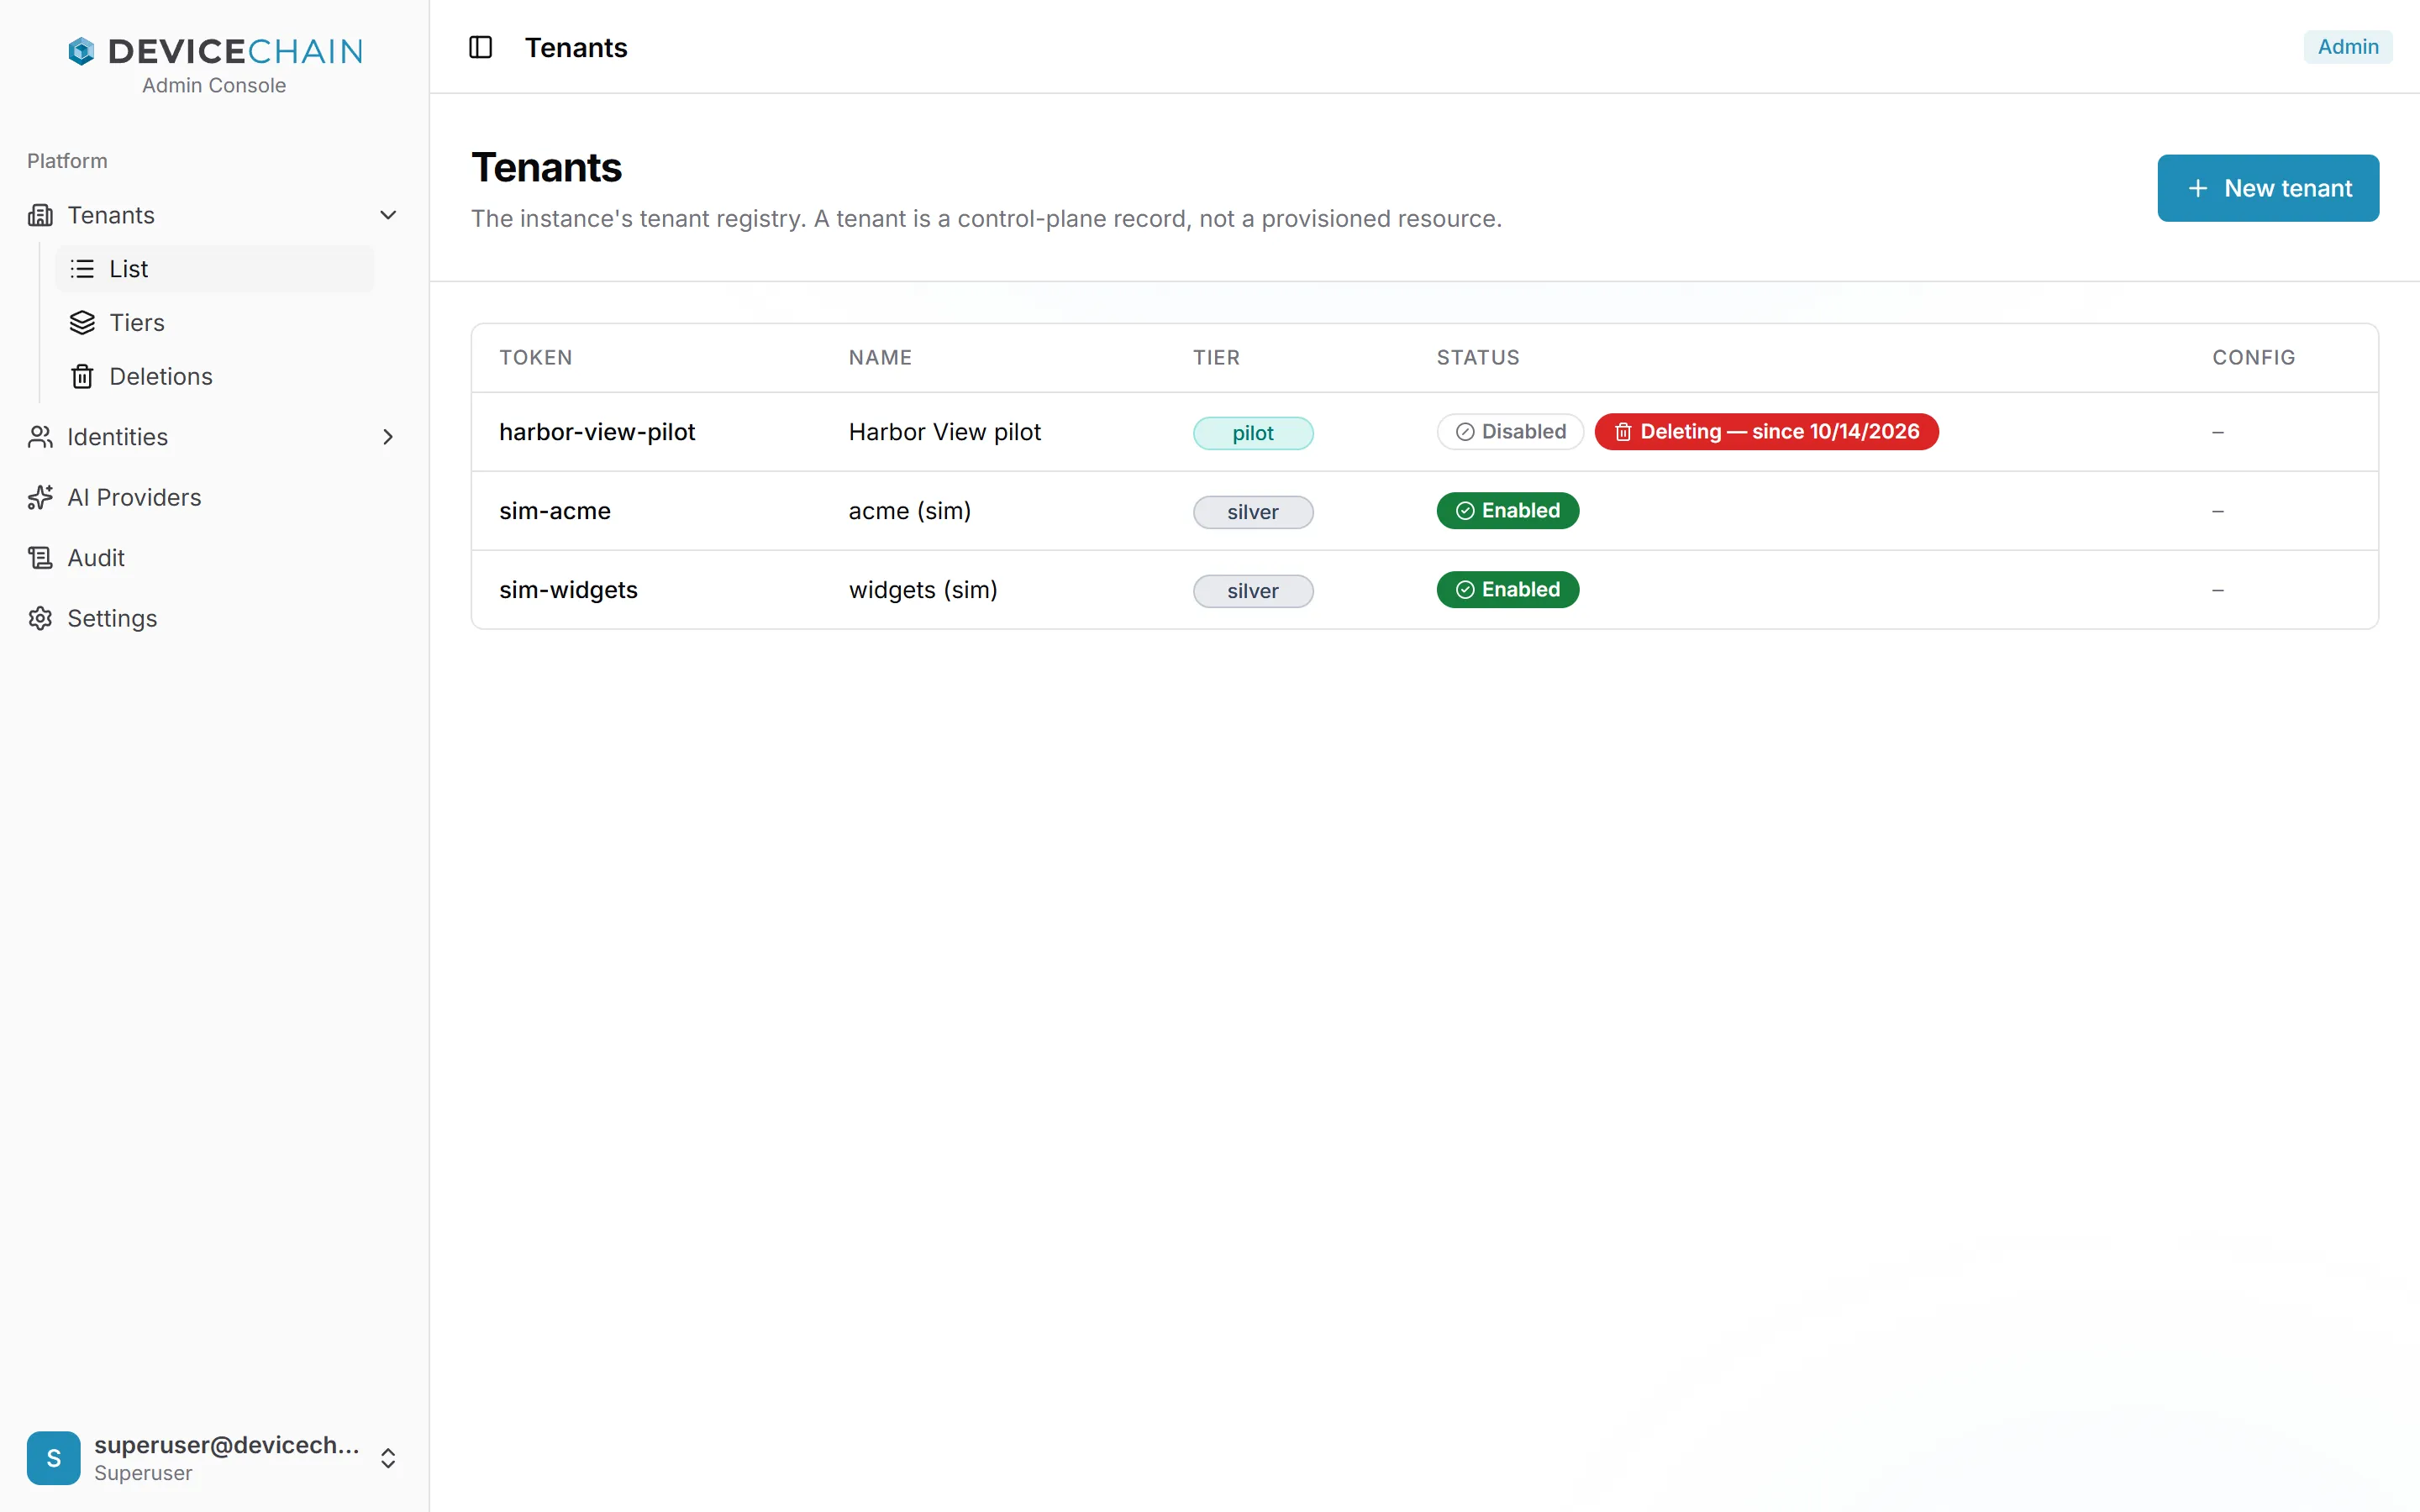
Each row shows the tenant's token and name, its tier as a coloured pill, its status and any freeform configuration. A tenant that is being deleted keeps its row, marked Deleting with the date the deletion started, until the deletion finishes.
Creating a tenant
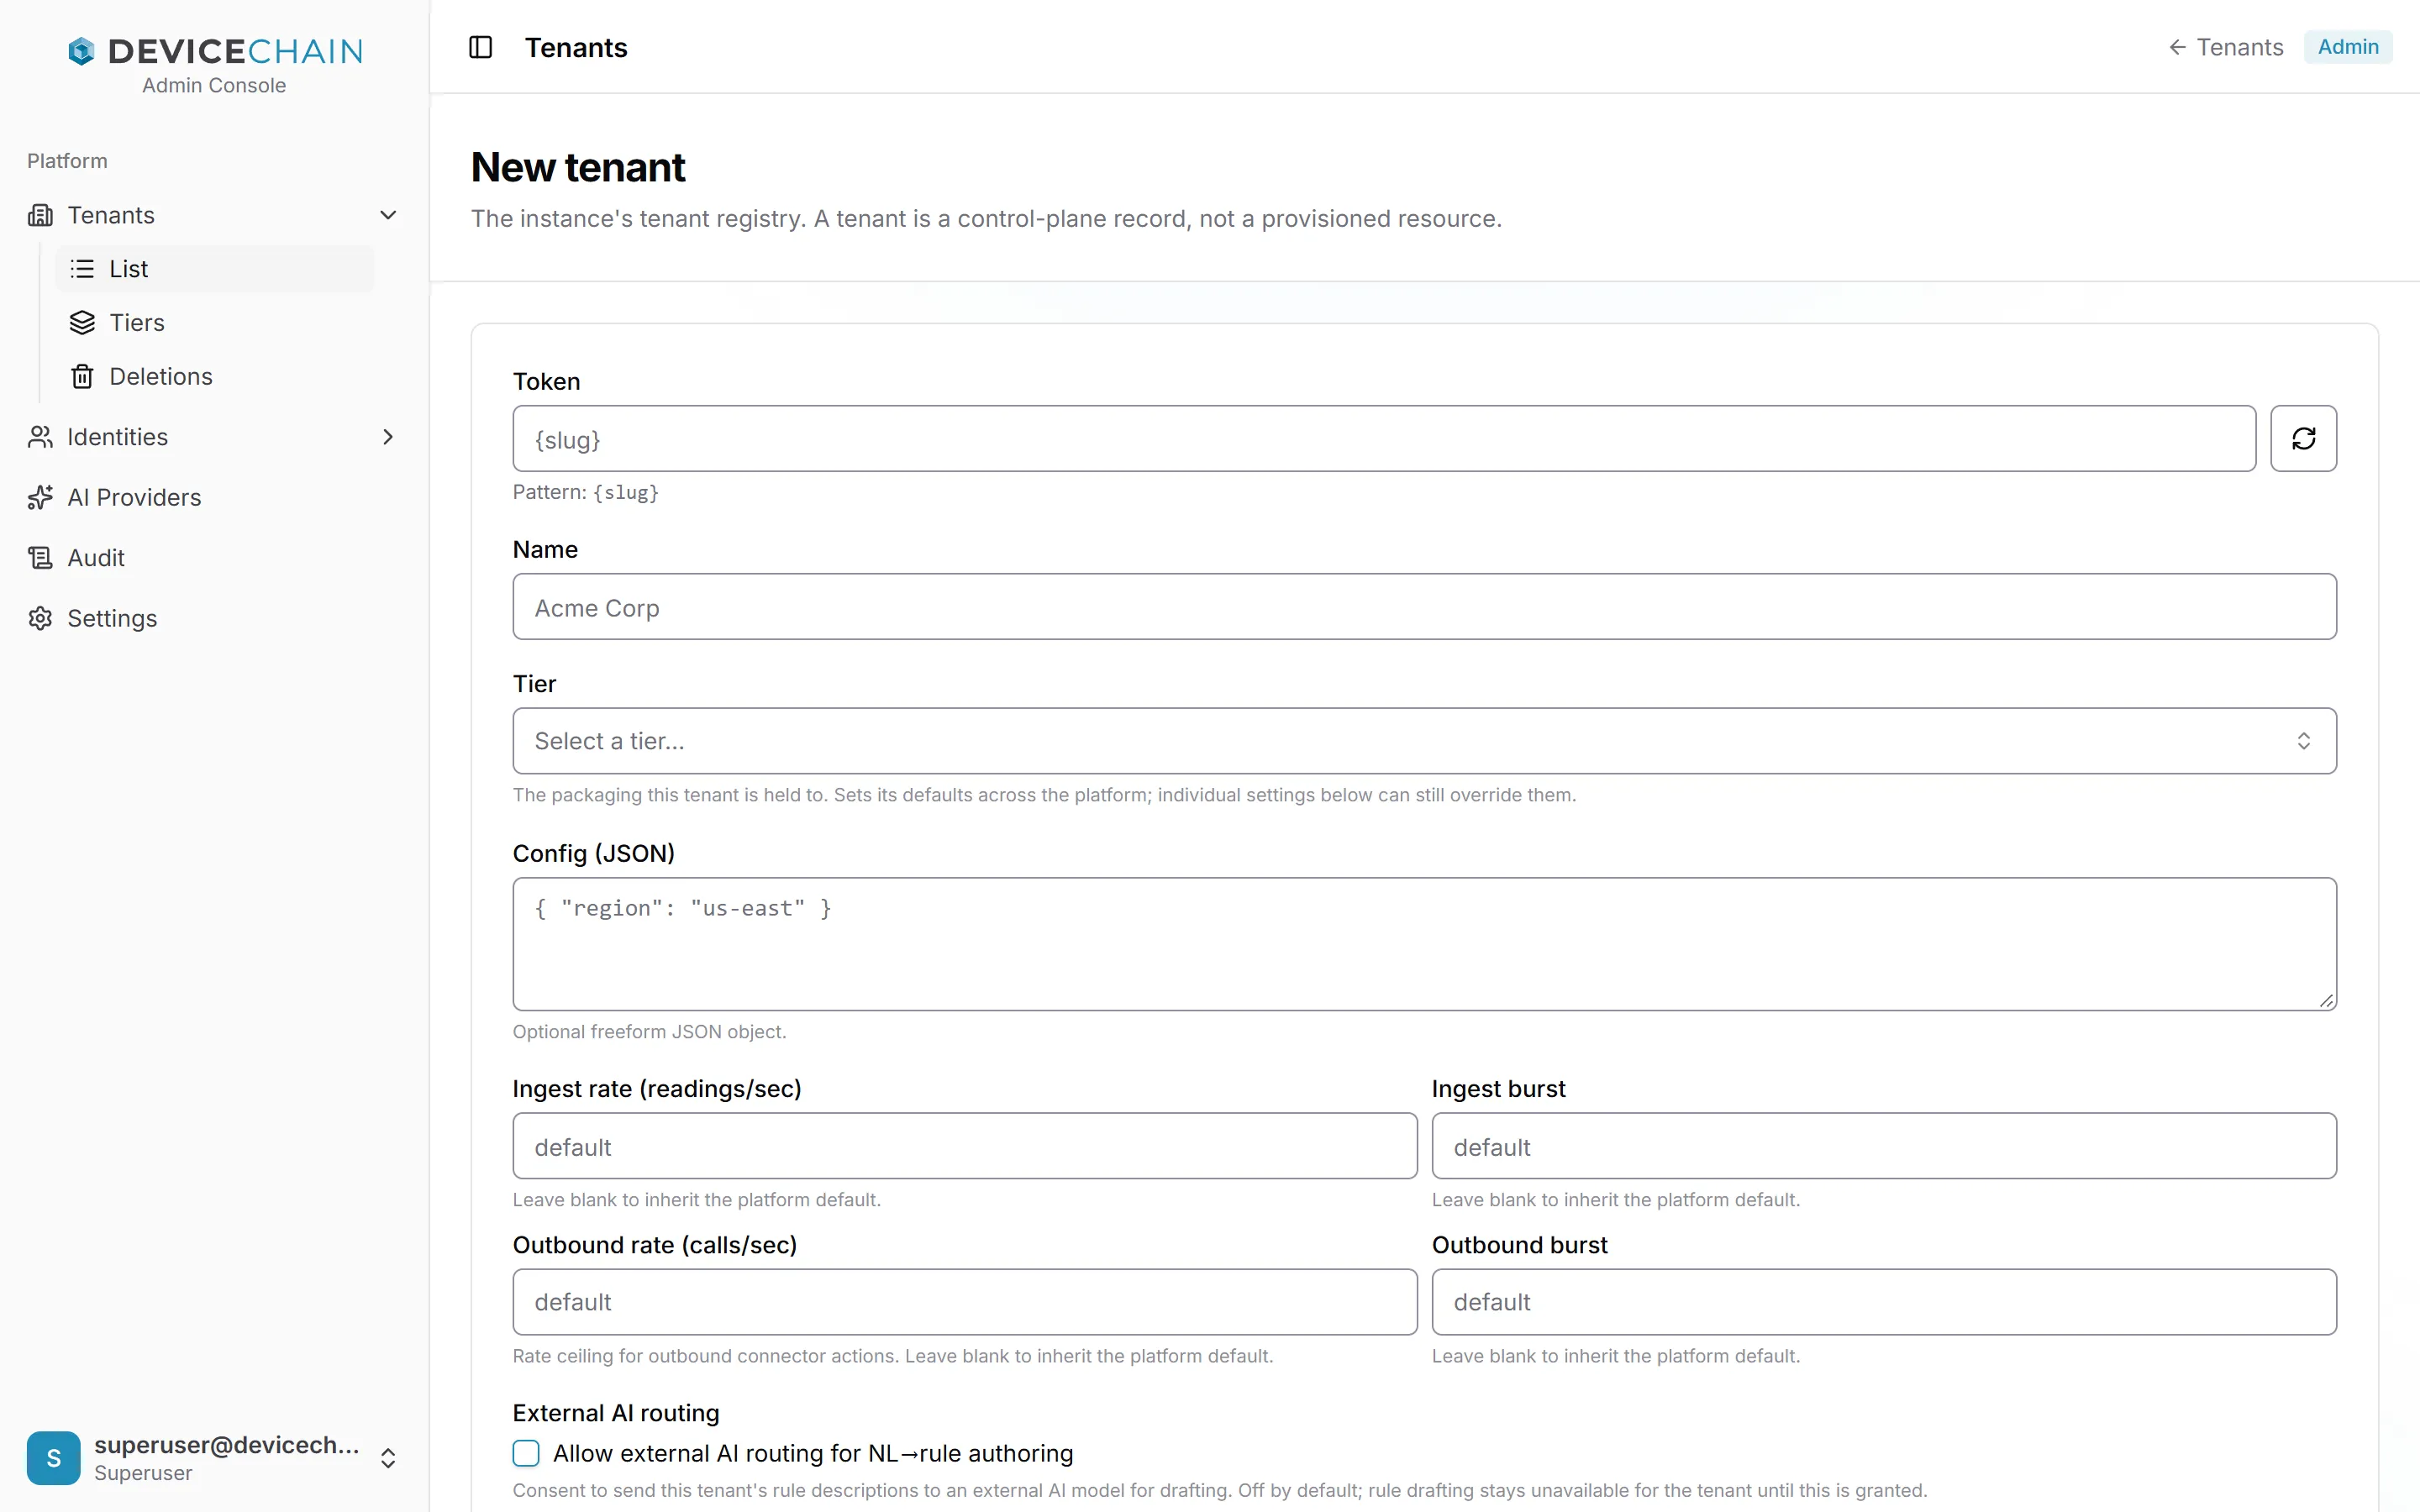
Choose New tenant. The form asks for:
- Token: the tenant's id across the platform. It is generated from the name using the instance's token mask, shown under the field, and the button beside it generates another. It cannot be changed later.
- Name: a display name.
- Tier: the packaging the tenant is held to (see Tiers). Every tenant has one.
- Config (JSON): an optional freeform JSON object.
- The tenant's own limits, described under Settings below. Leave them blank to inherit.
Then choose Create tenant.
A tenant's page
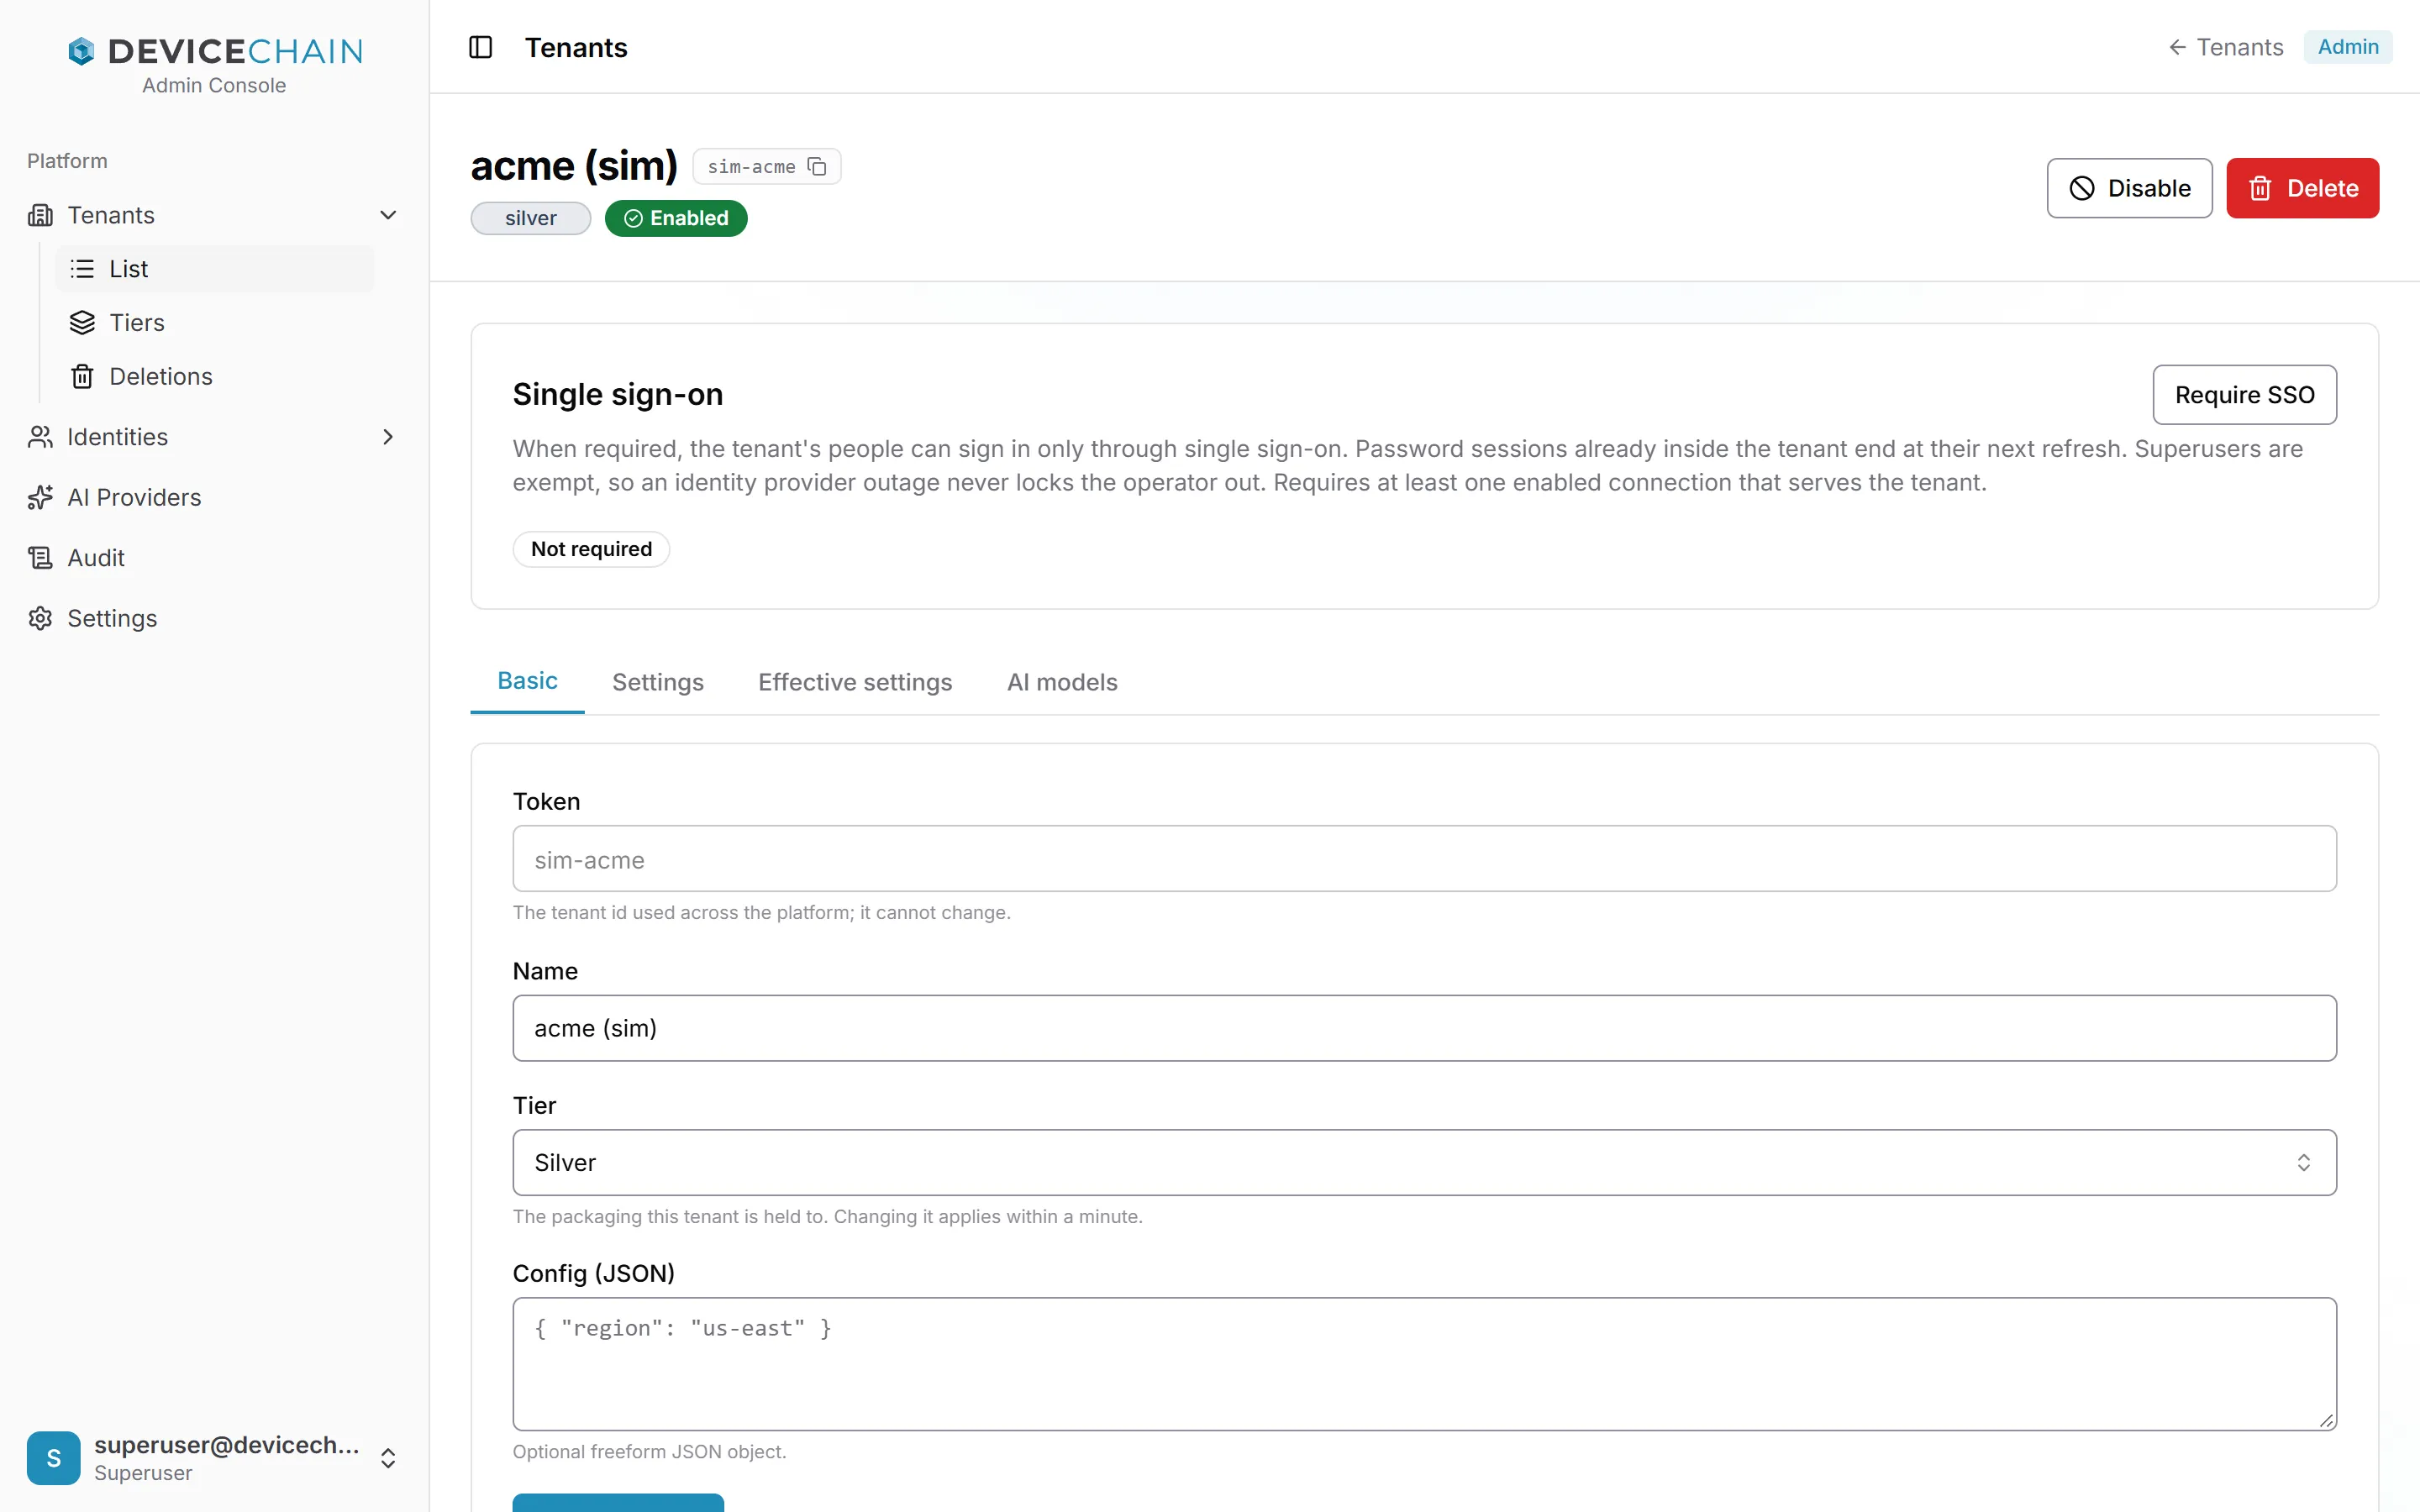
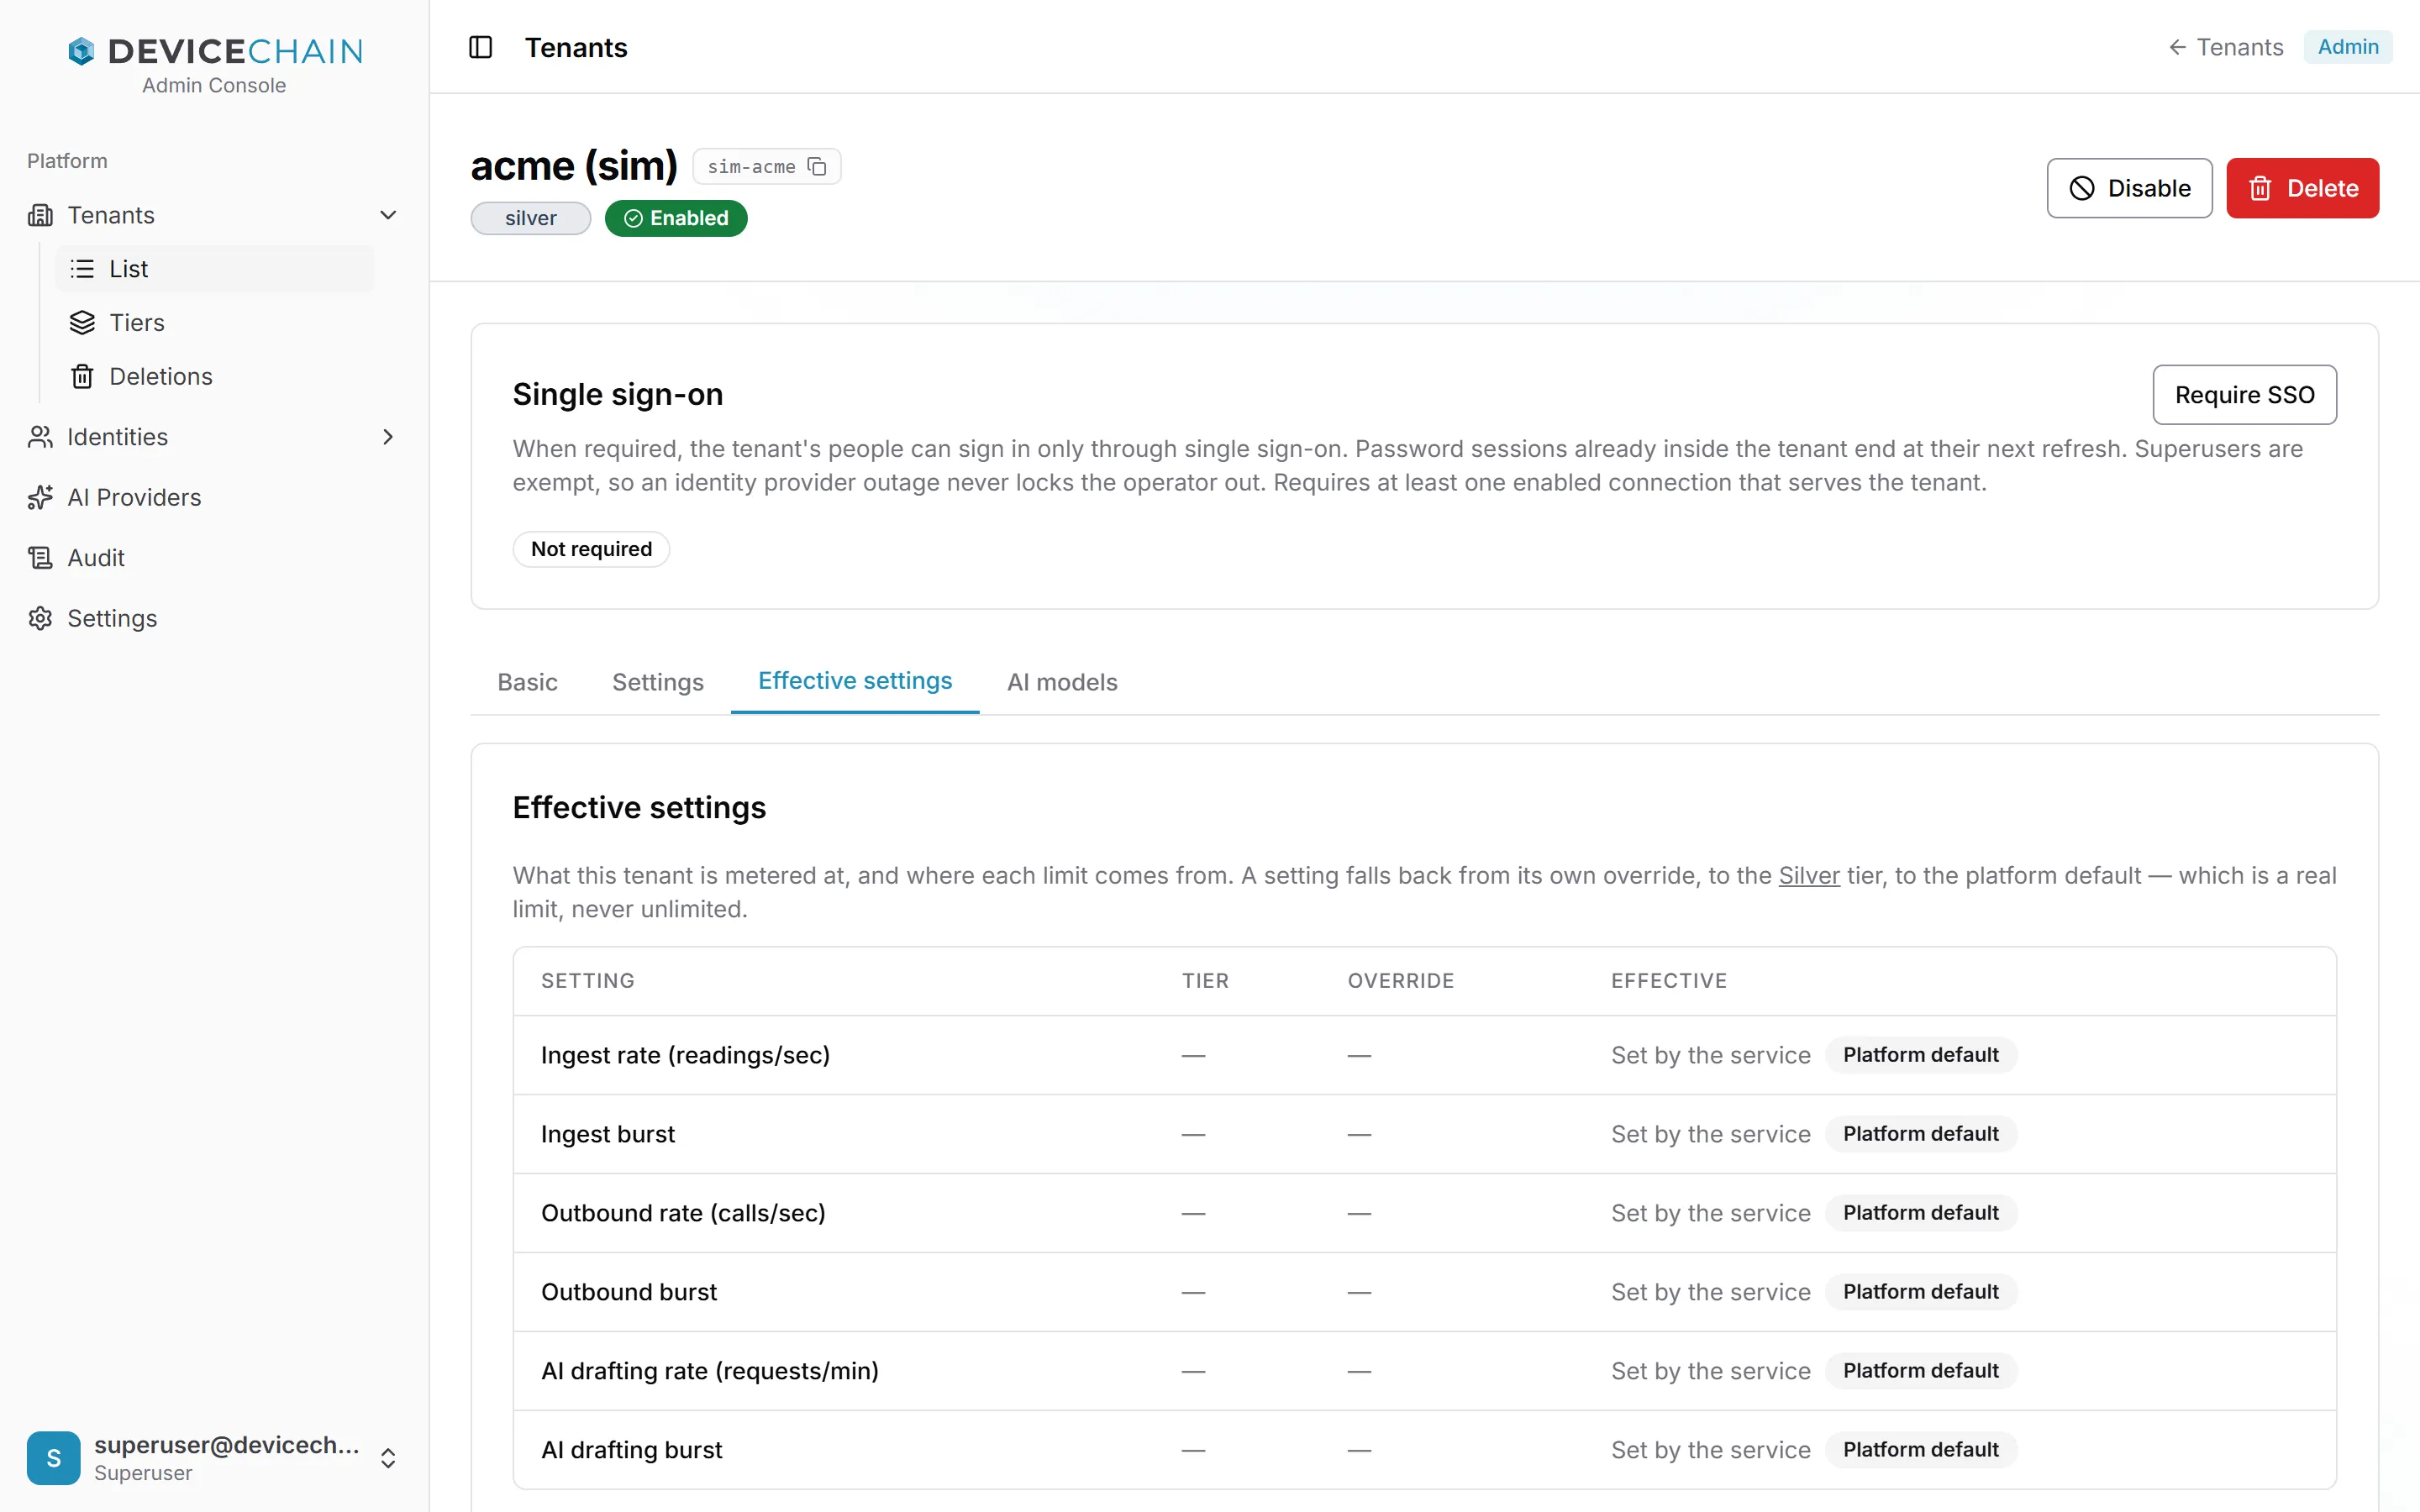
Open a tenant to edit it. Its page shows the name with the token beside it, the tier and status badges, and two actions: Disable (or Enable) and Delete. A disabled tenant admits nobody until you enable it again.
Above the tabs, the Single sign-on panel says whether the tenant's people must sign in through single sign-on. Require SSO asks you to confirm first, because the tenant's password sessions end at their next refresh. It is refused unless at least one enabled identity provider connection serves the tenant. Superusers are never held to it, so an identity provider outage cannot lock you out. See Requiring single sign-on.
The Basic tab edits the name, the tier and the config. The token is shown but cannot change. Changing the tier applies within a minute.
A tenant's settings
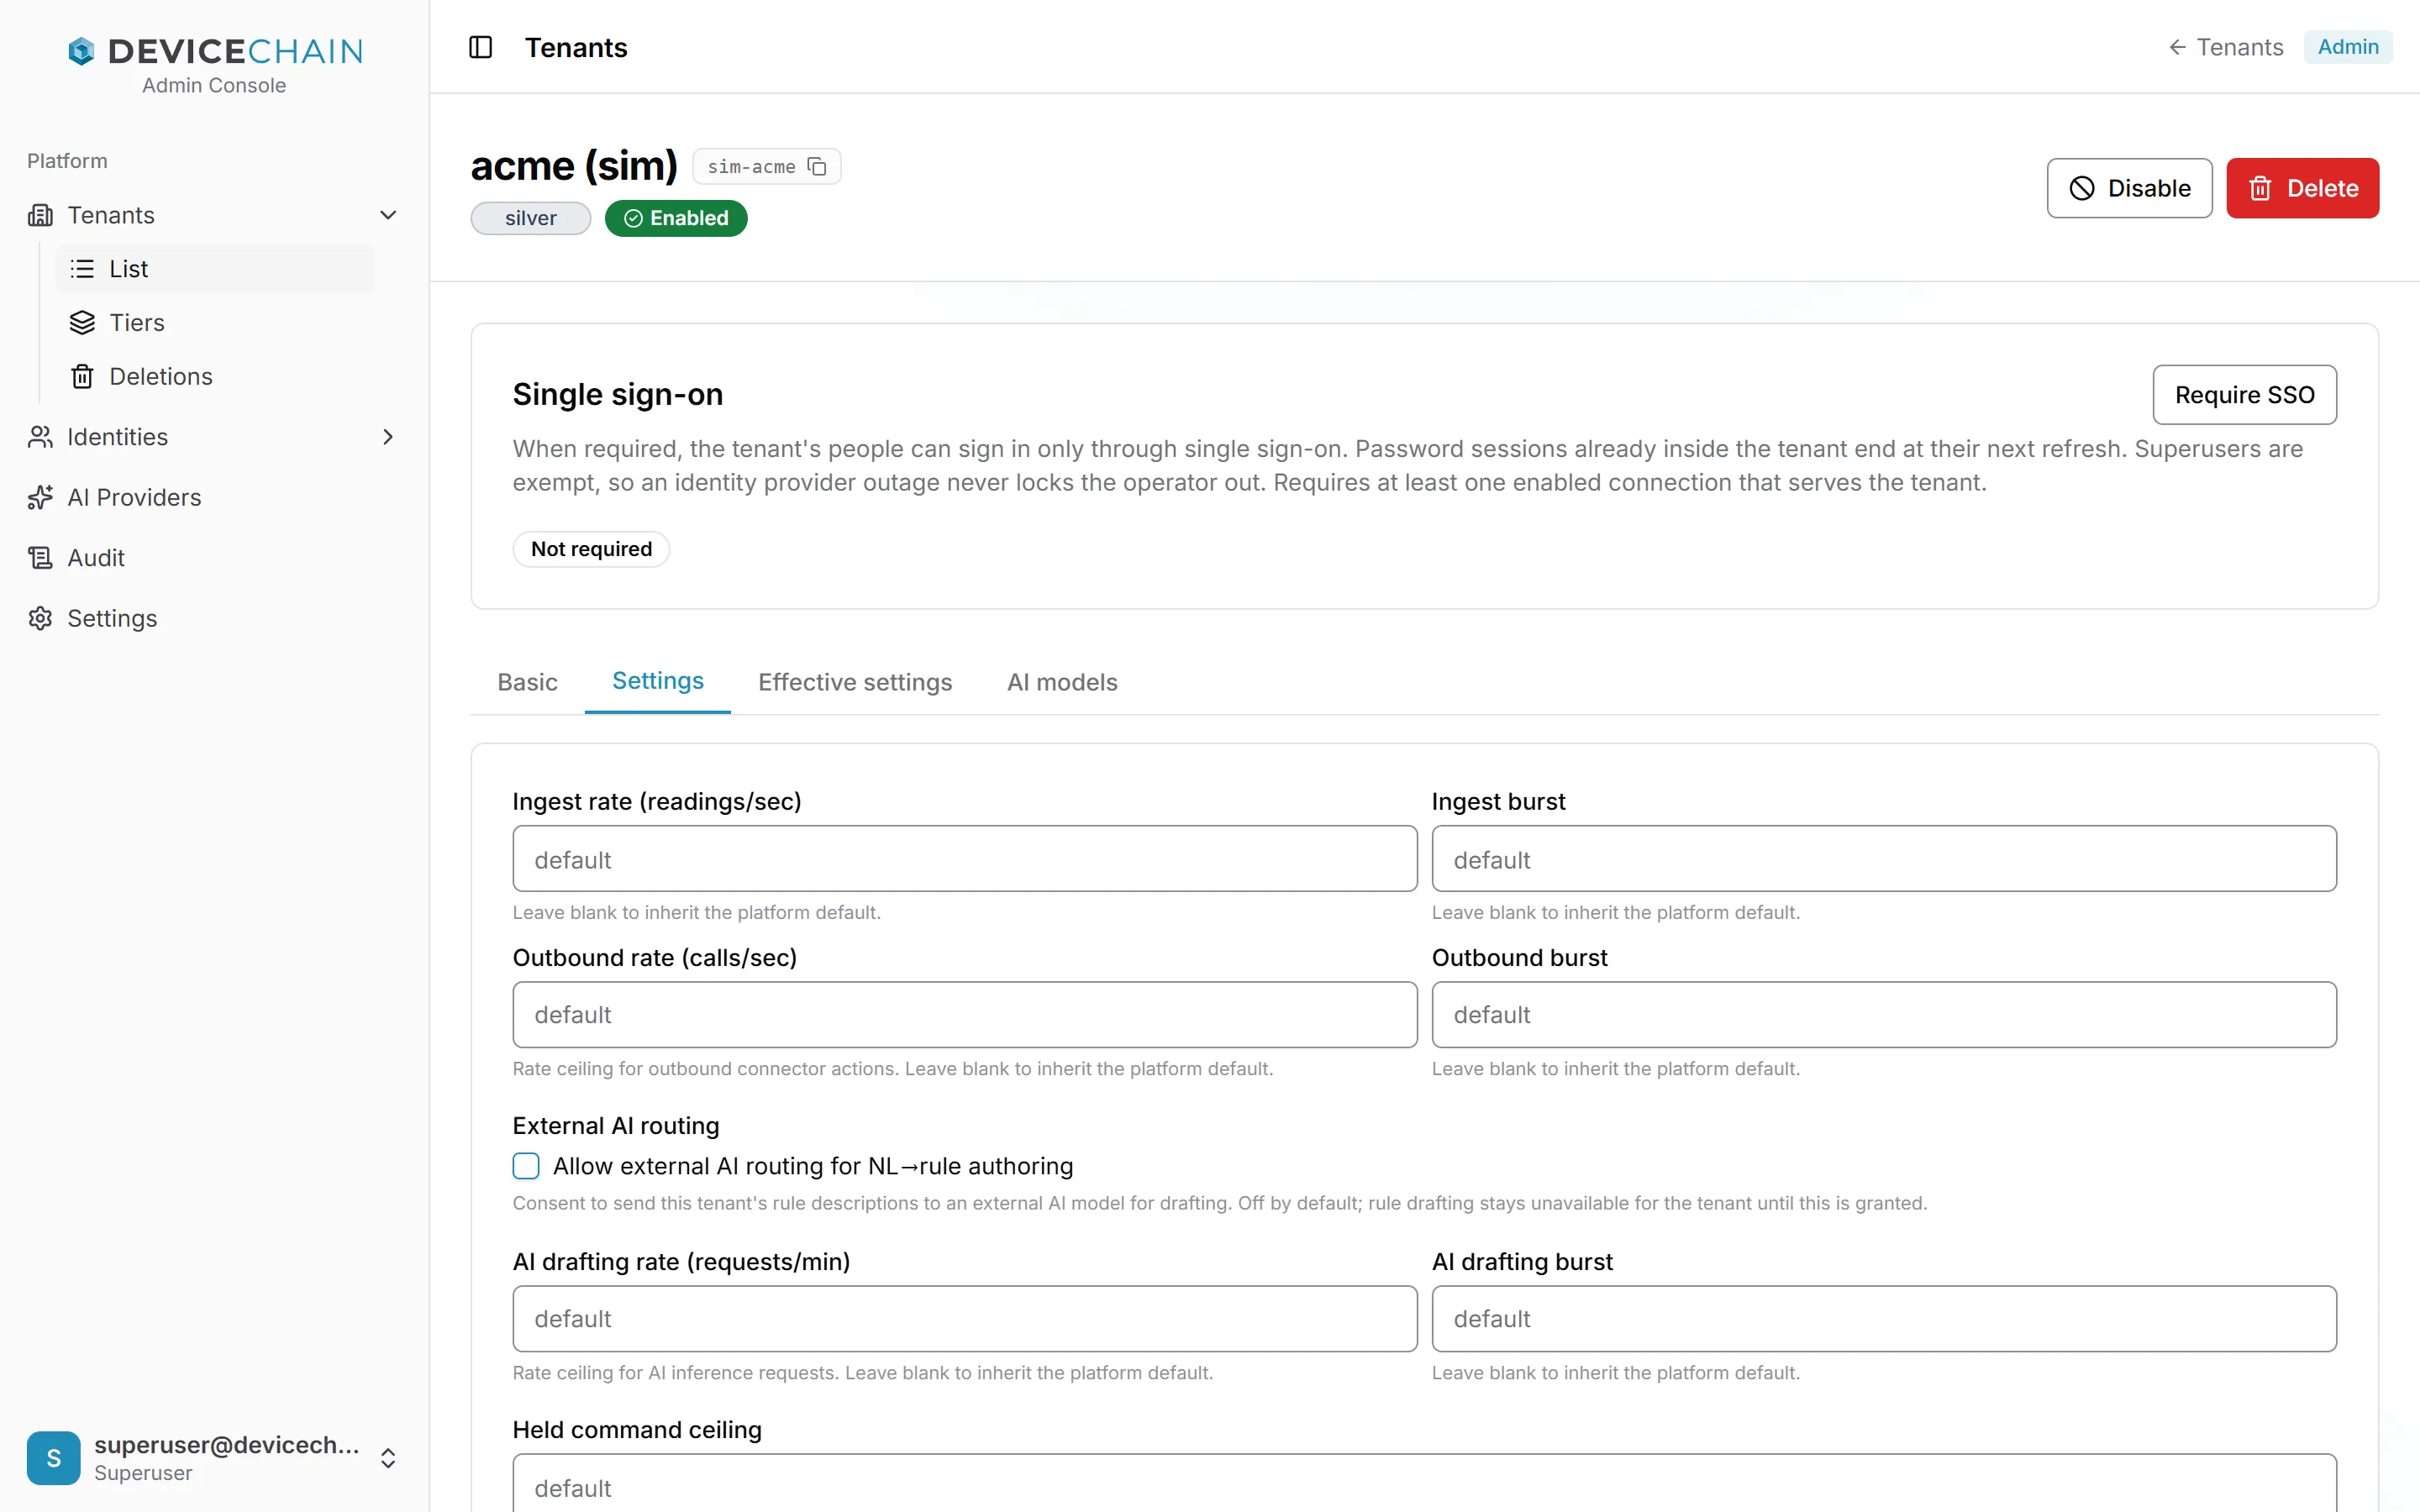
The Settings tab holds the limits this one tenant is held to, when they should differ from its tier. A field left blank inherits: first the tier's value, then the platform default. The fields are the ingest rate and burst, the outbound rate and burst for outbound connectors, External AI routing (the tenant's consent to send rule descriptions to an external AI model, off by default), the AI drafting rate and burst, the Held command ceiling, the Shed priority, and three geofence limits: Geofence count, Points per geofence and Geofence point budget. Each field carries a short explanation in the console. Save changes saves the Basic and Settings tabs together.
The Effective settings tab is read-only. It shows the result for the ingest, outbound and AI drafting rates and bursts: the tier's value, this tenant's override, and the value in force, with a badge naming where it came from. The held command ceiling, shed priority and geofence limits resolve the same way, but this tab does not list them. A setting falls back from its own override, to the tier, to the platform default. The platform default is a real limit, never "unlimited". When the value comes from a service's own default, the console shows Set by the service. The tier's name in the explanation links to the tier.
The AI models tab chooses which AI model the tenant uses for each AI function. It needs the optional AI service; on an instance without it, the tab says the area is not deployed. For how limits and entitlement work, see Tenant tiers and Governance and quotas.
Deleting a tenant
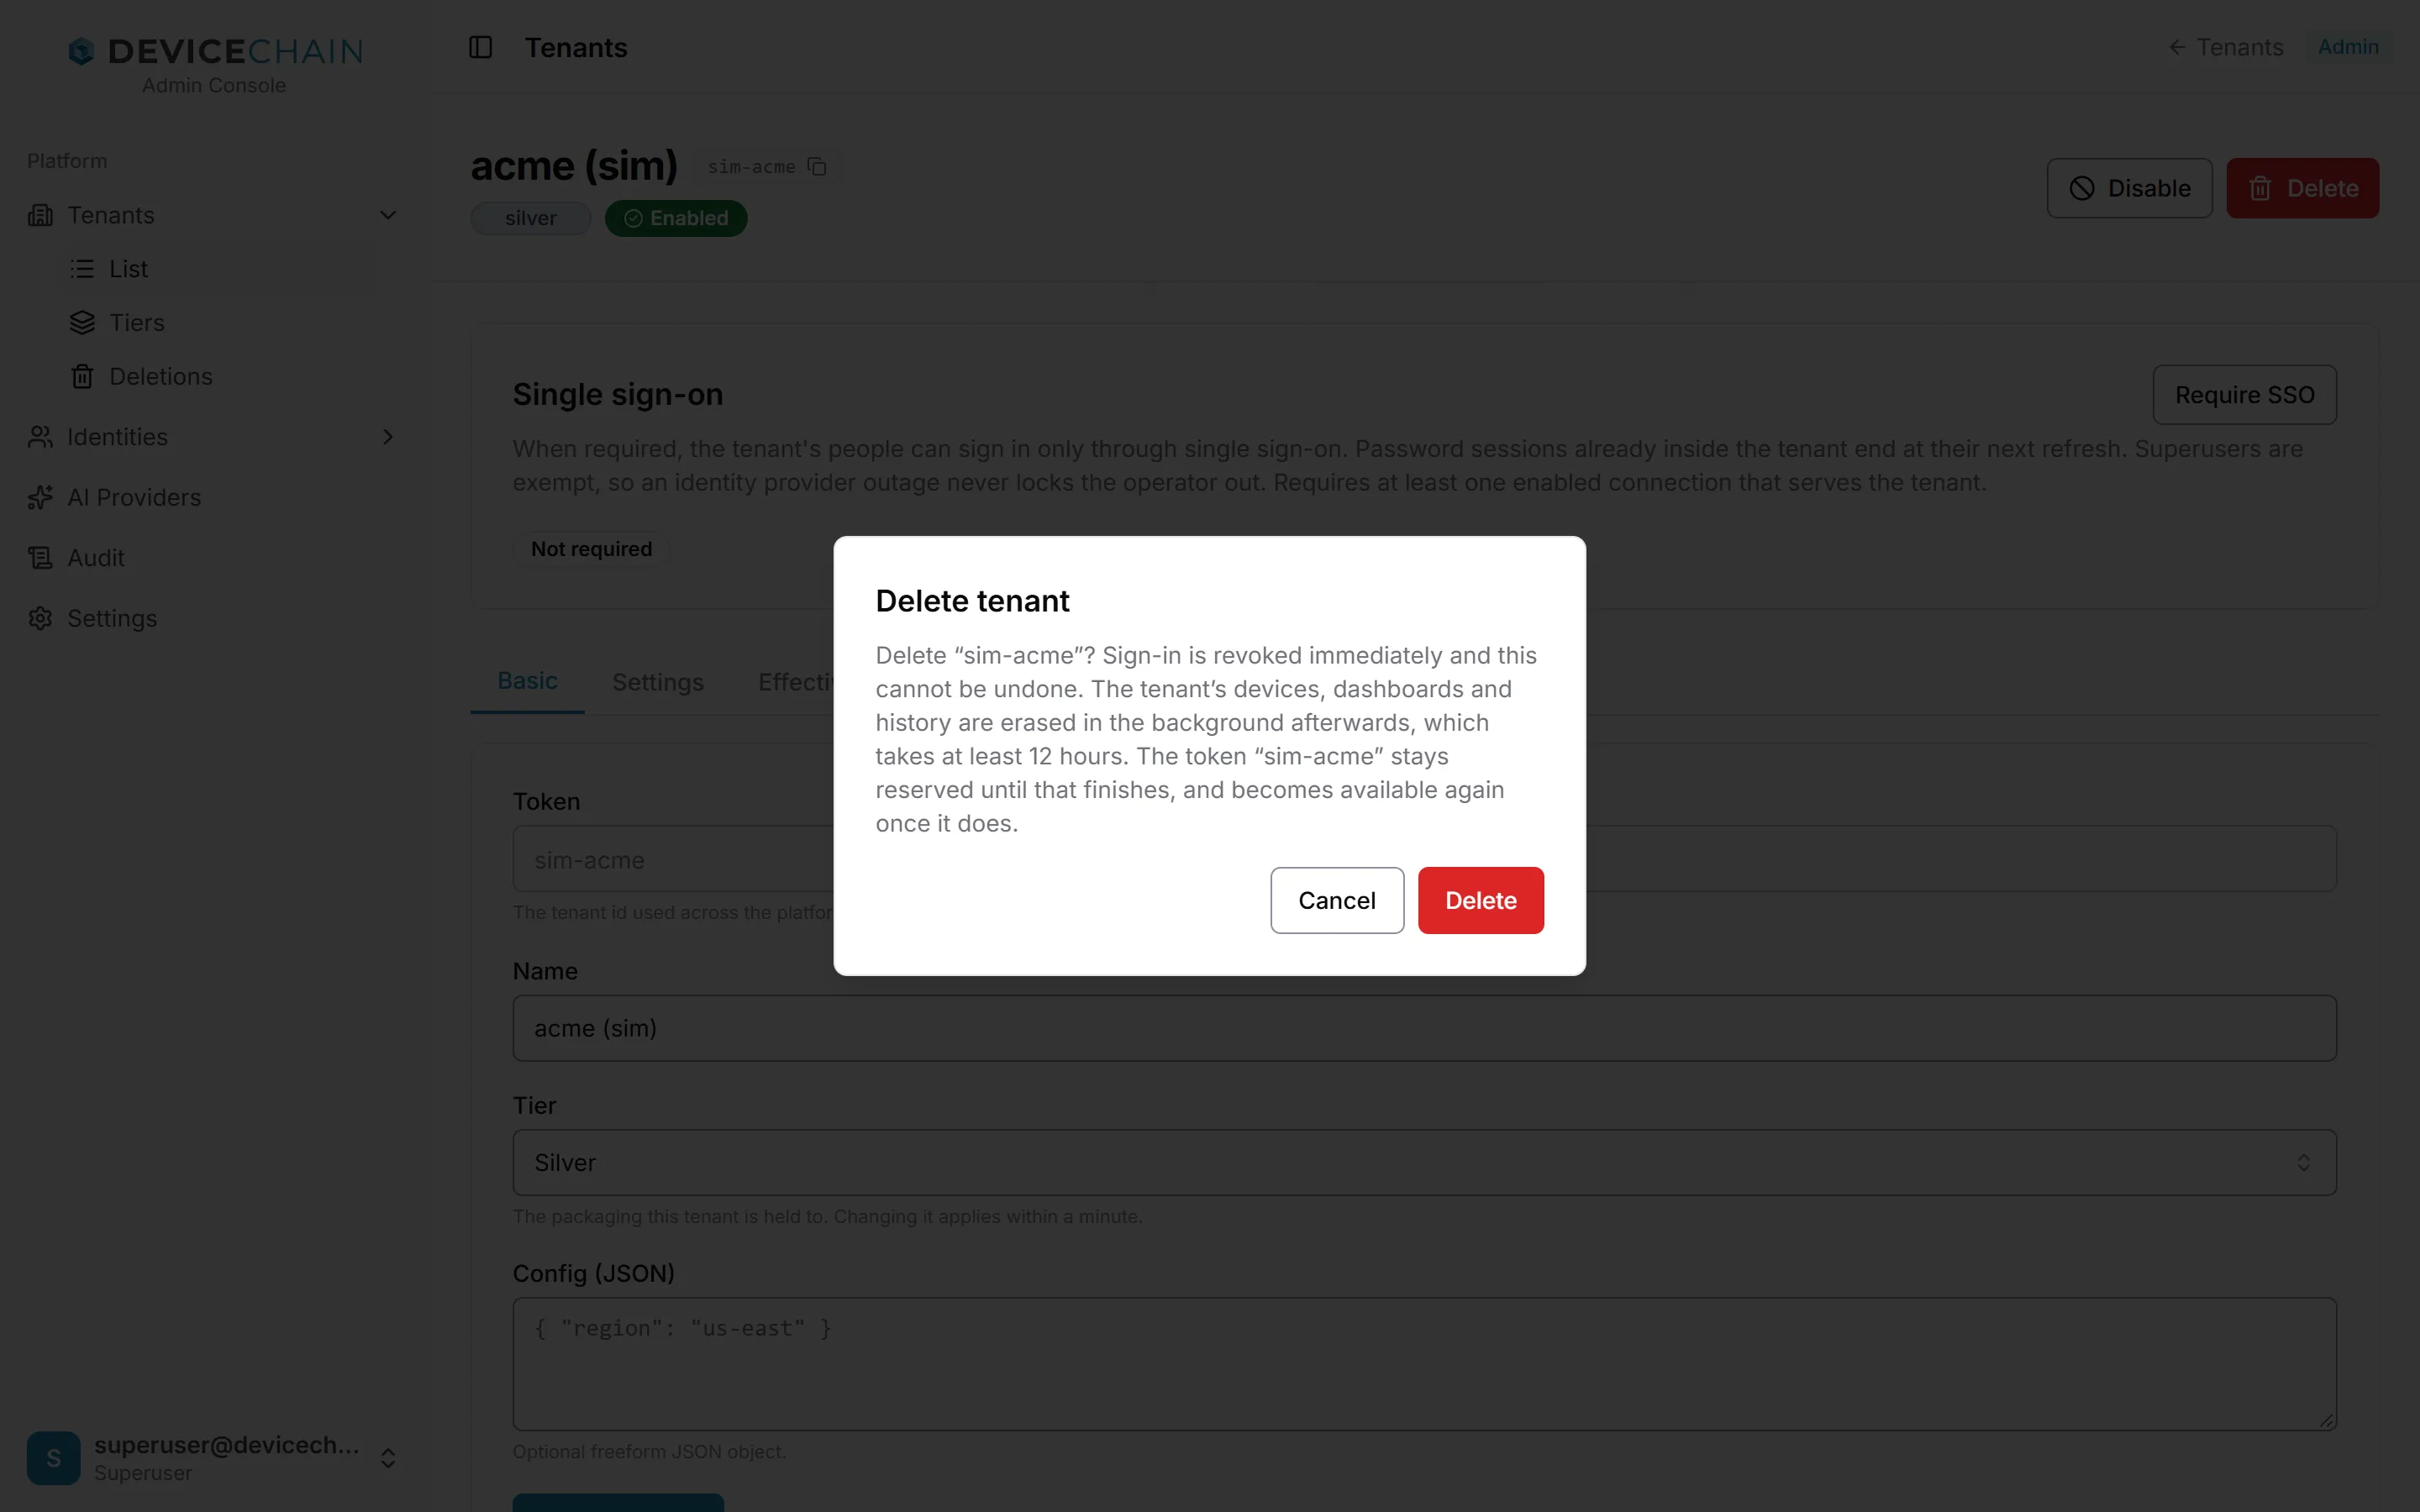
Delete opens a confirmation. Read it: deletion cannot be undone. Sign-in to the tenant is revoked at once, and its devices, dashboards and history are erased in the background afterwards, which takes at least 12 hours. The tenant's token stays reserved until that finishes.
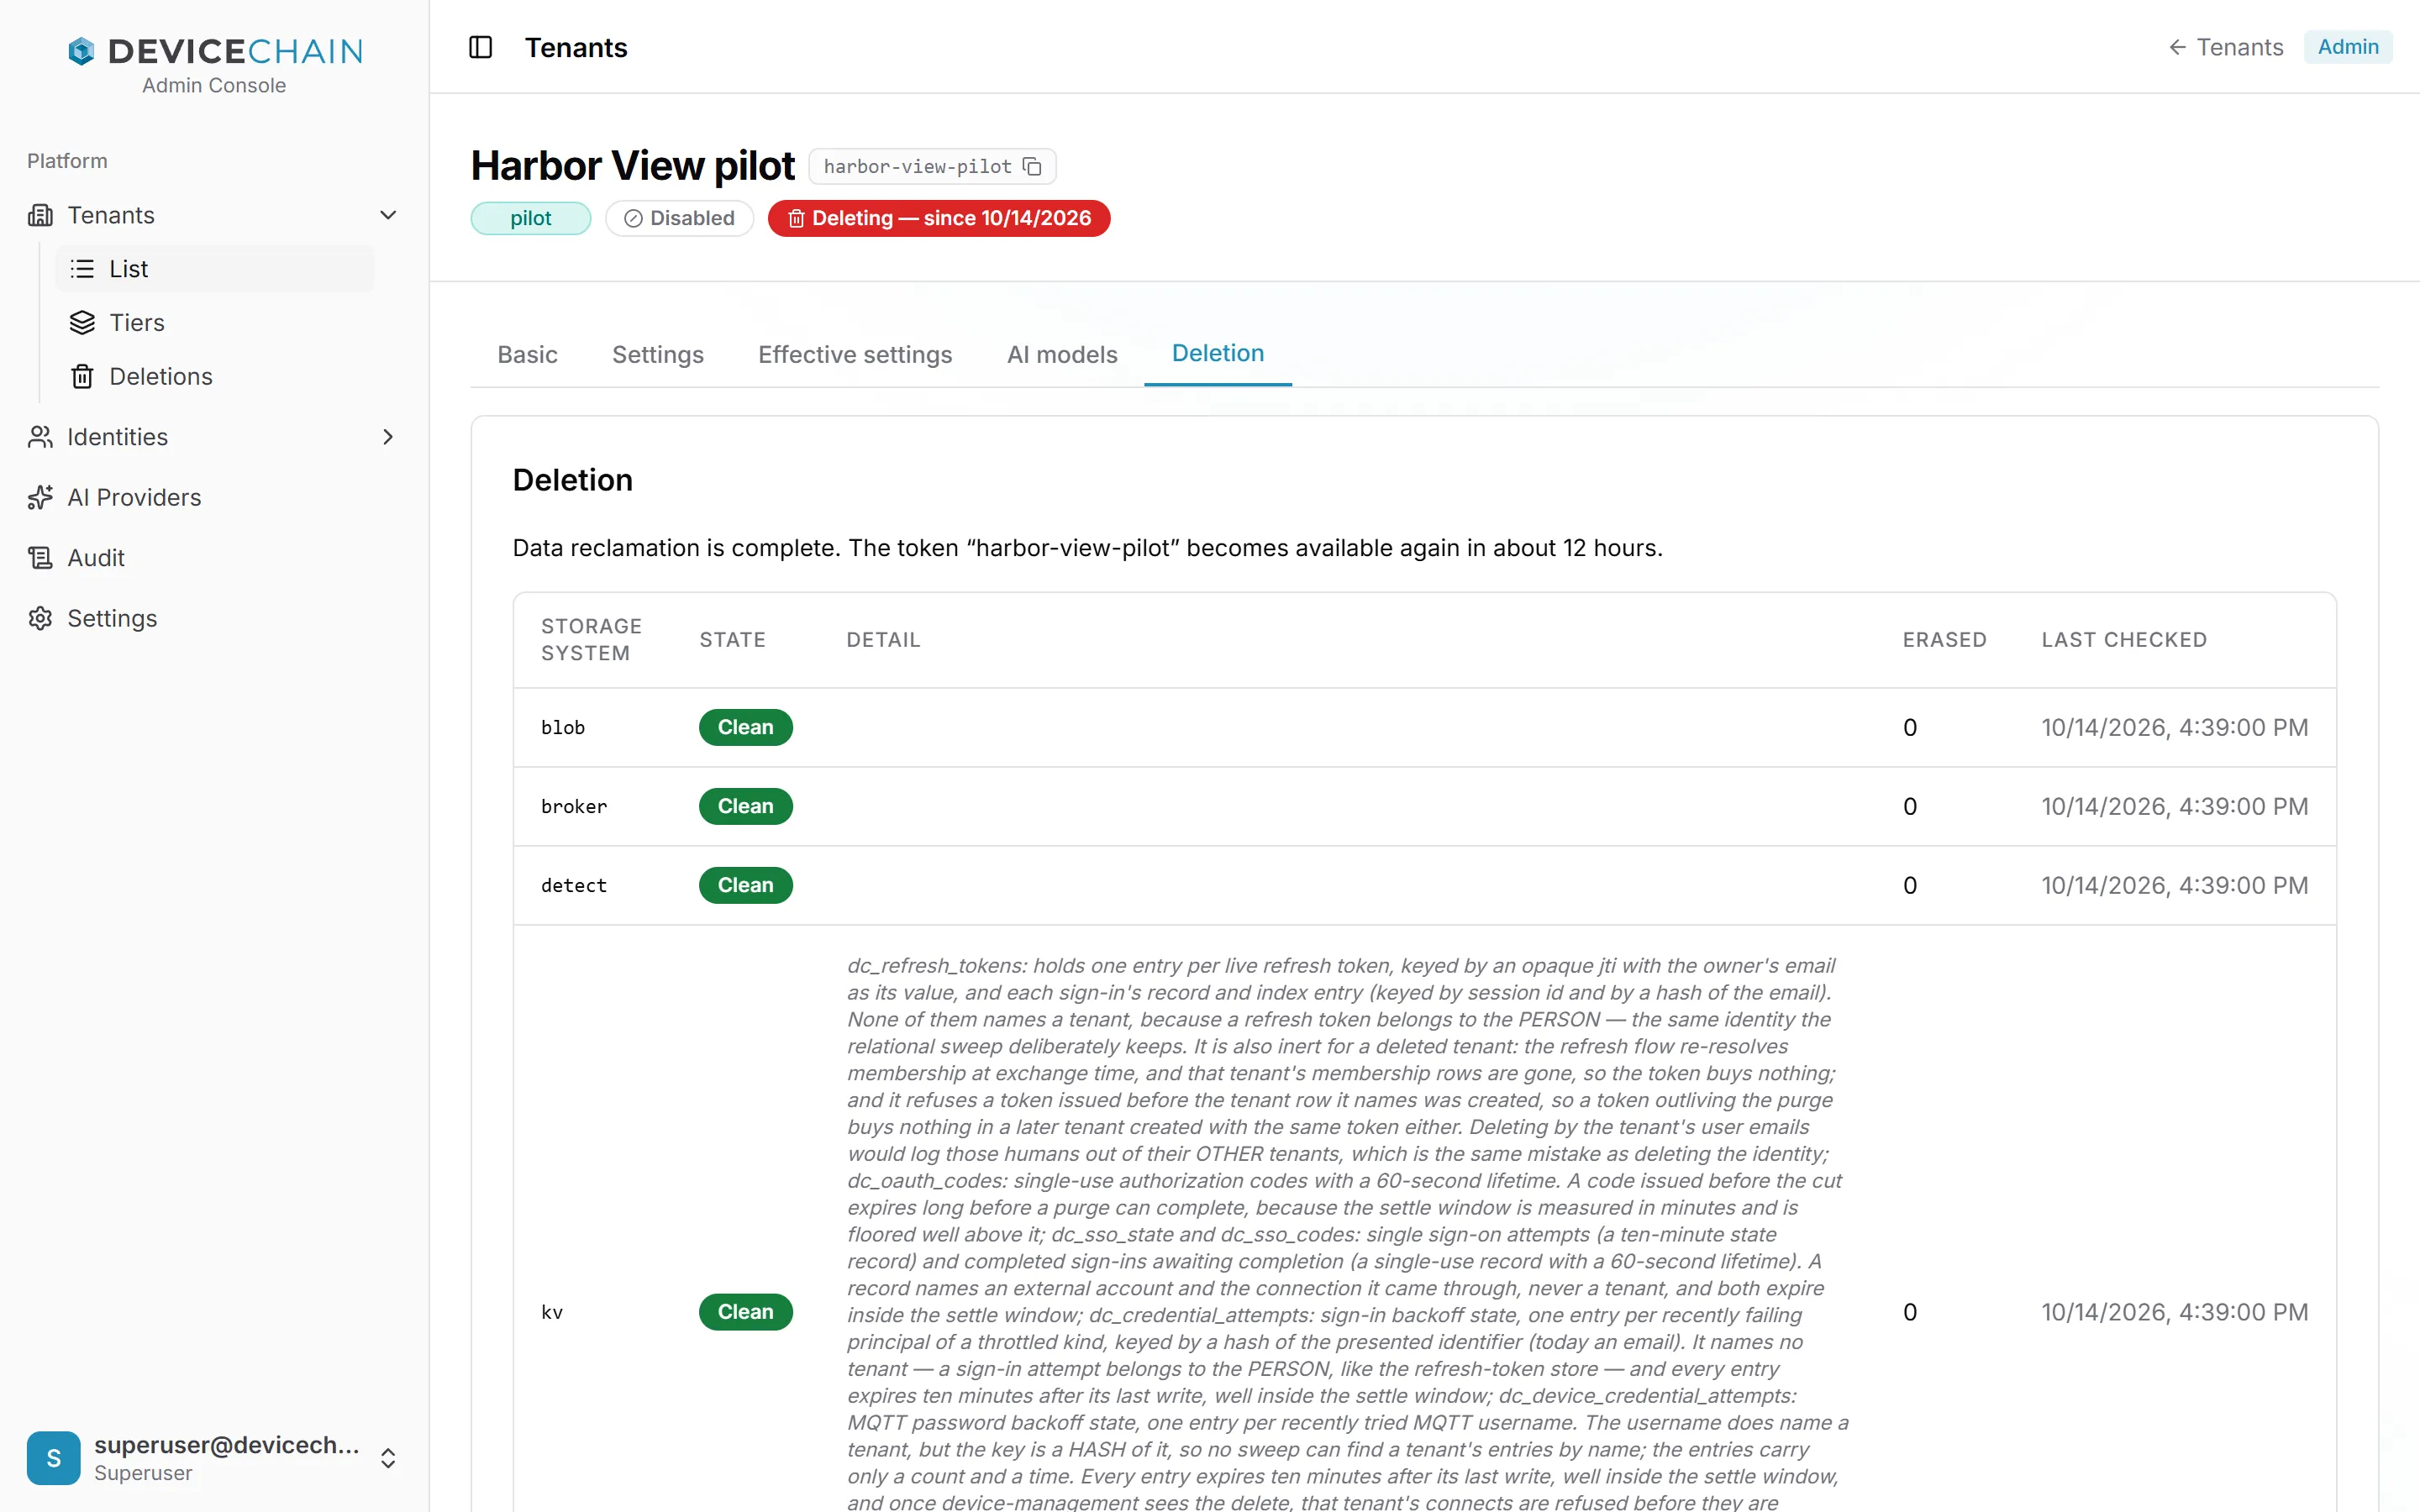
While a deletion runs, the tenant's page loses its Disable and Delete buttons and the single sign-on panel, and gains a Deletion tab. The tab starts with a one-line status that says what the deletion is waiting for. In order:
- Waiting on one or more storage systems that still hold the tenant's data.
- All storage systems report clean, and the deletion waits a short while longer to confirm nothing further arrives.
- Data reclamation is complete, and the token is held before it becomes available again: about 12 hours by default.
- All checks have passed, and the deletion completes on the next sweep.
Below the status, a table has one row per storage system the tenant had data in, with its state:
- Clean: nothing of the tenant's is left there.
- Retaining: data is still held, and will stay until someone changes something. Where the console knows the fix, it says what to do under the row.
- Retrying: an attempt failed, and the next sweep tries again on its own.
Each row also shows how many records were erased and when it was last checked. The Detail column carries the storage system's own notes. Some are long internal explanations of what a system deliberately leaves alone, such as short-lived sign-in records; a note on a Clean row is a footnote, not a problem to act on. The tab refreshes itself while the deletion is in progress, and if it is empty just after you delete, the first check has not run yet; it starts within a minute.
The deletions list
Tenants → Deletions lists every tenant deletion on the instance, newest first. Use the All, In progress and Completed buttons to filter it. Each row shows the token, when the deletion was requested, its status with the same one-line summary as the tenant's Deletion tab, the number of records erased, and how many storage systems are clean or still holding data.
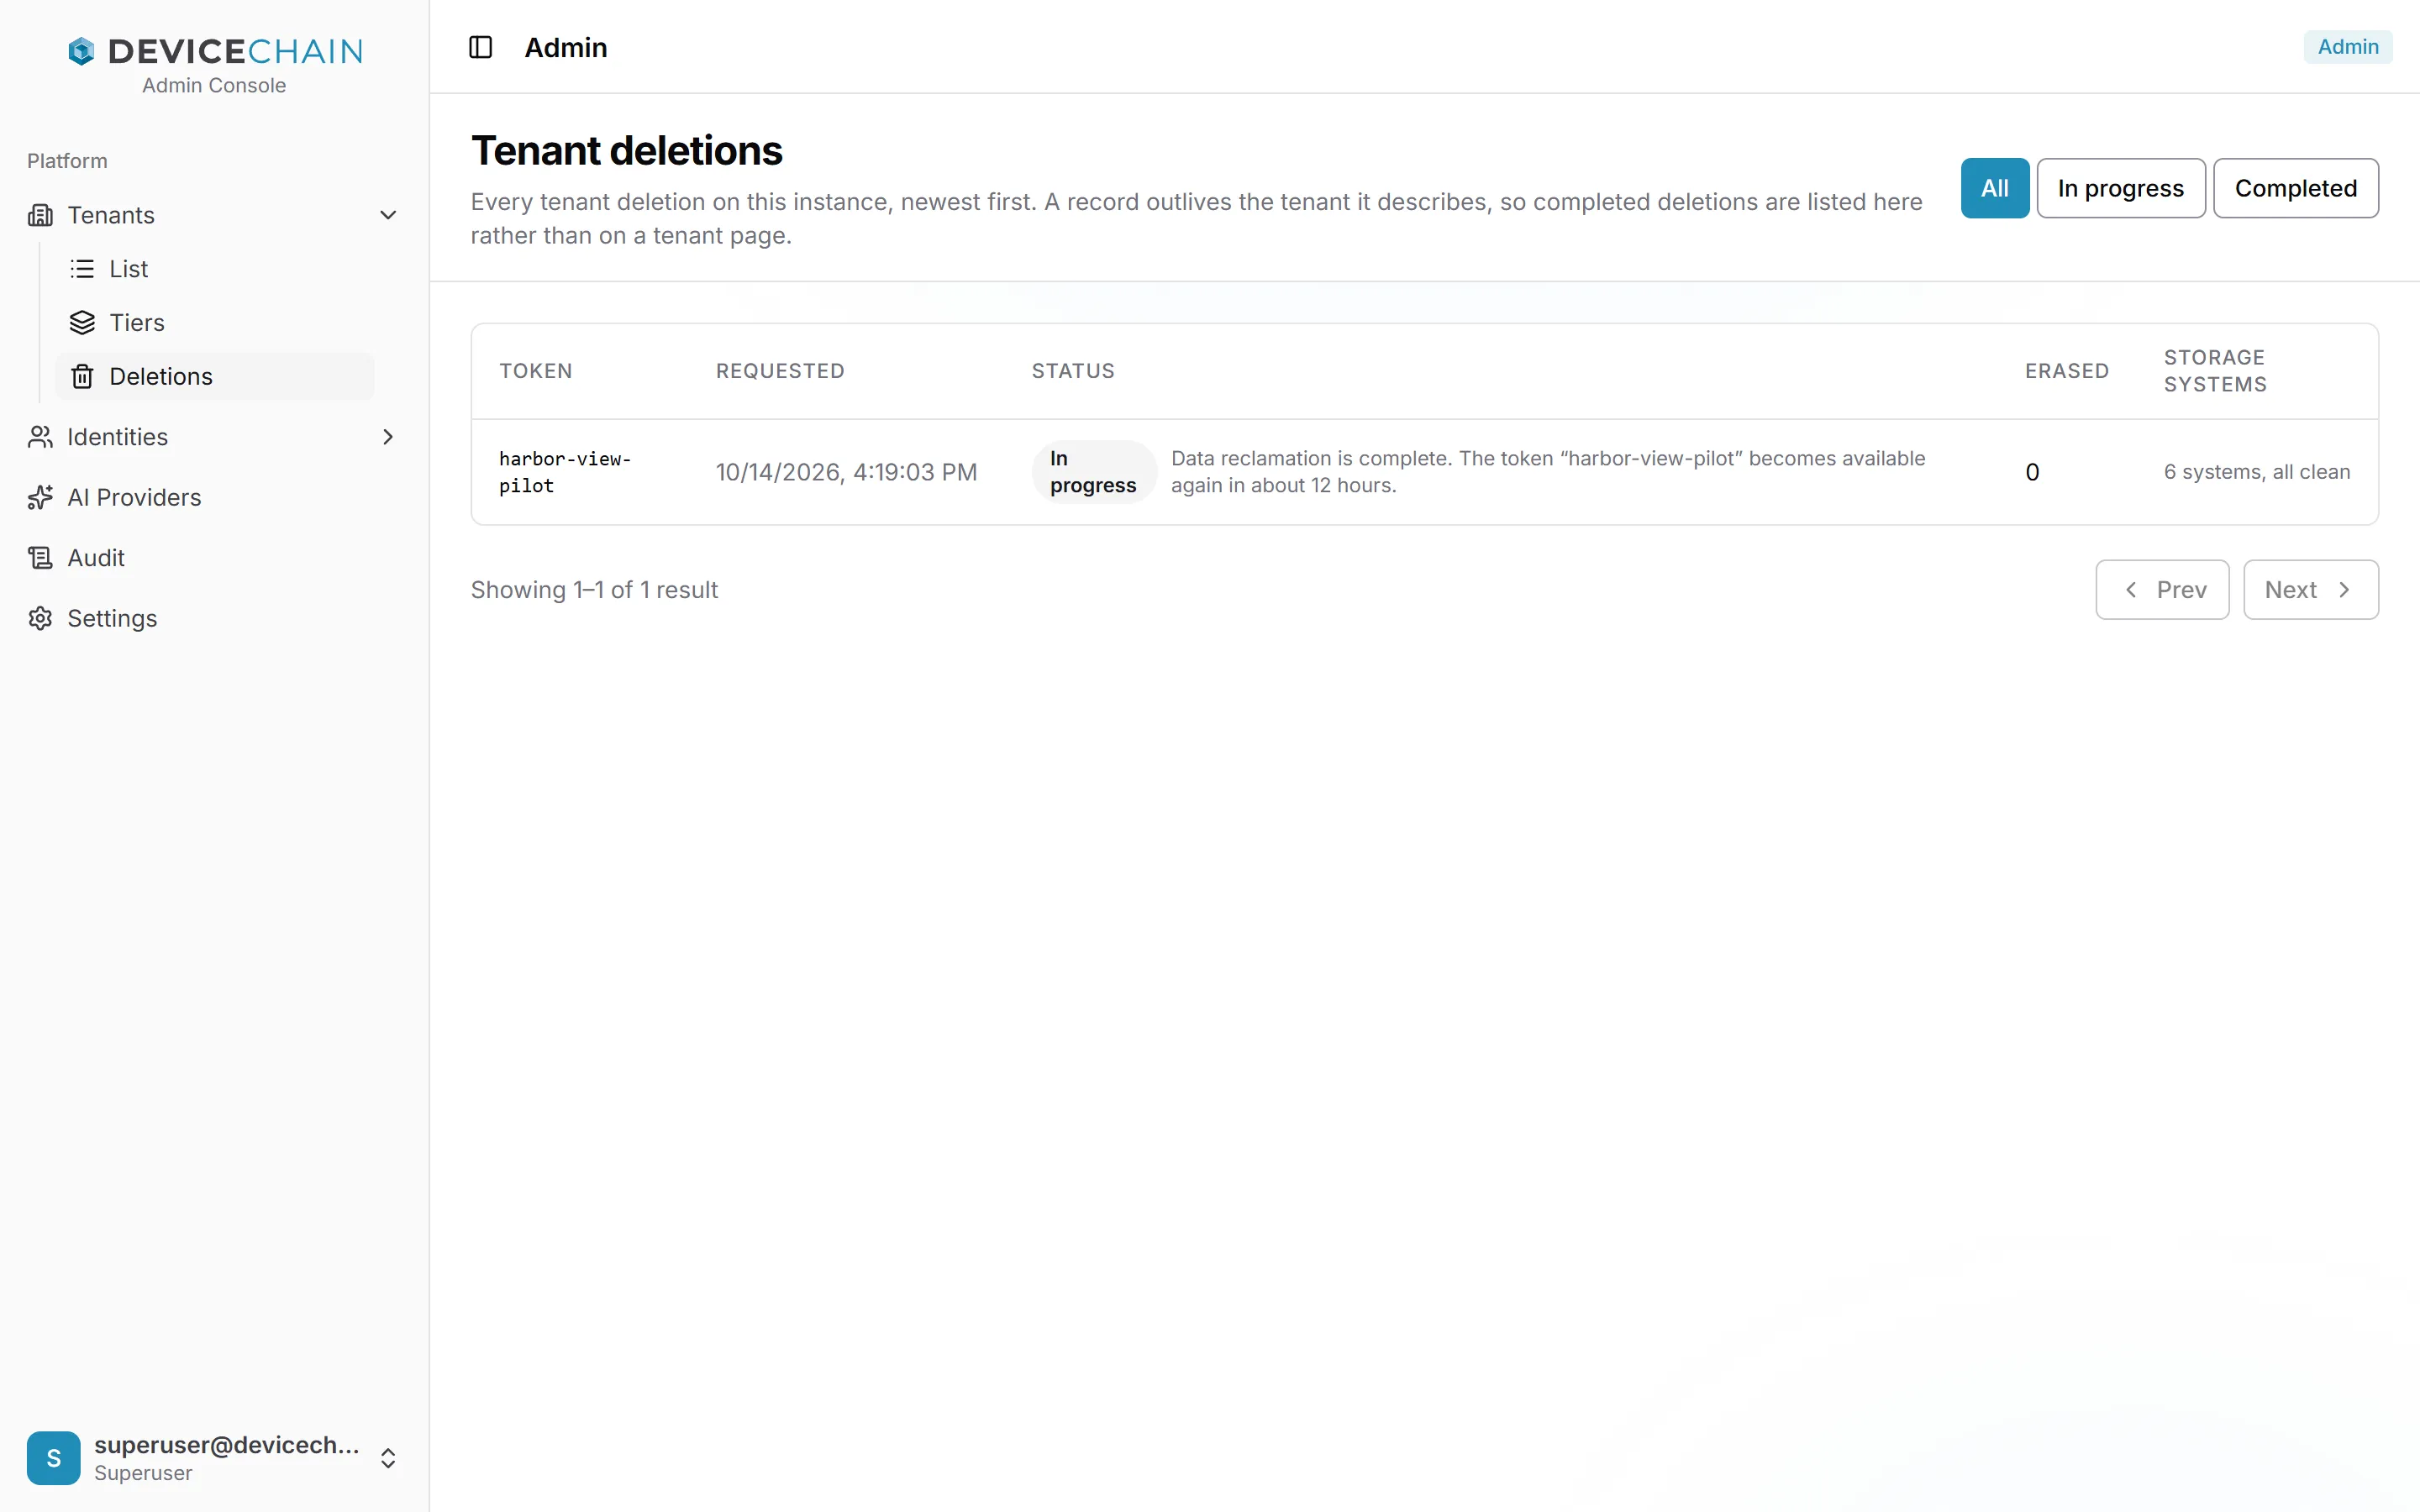
This list is the lasting record. When a deletion completes, the tenant's row and page disappear, so a finished deletion appears only here. Open it when someone asks you to show that a customer's data was erased. For the full timeline, see Tenant deletion.
Tiers
A tier is the packaging a tenant is sold: the default limits every tenant at that tier is held to, and which AI models those tenants may use. Tenants → Tiers lists them, each with its coloured pill, name, description and how many tenants are on it.
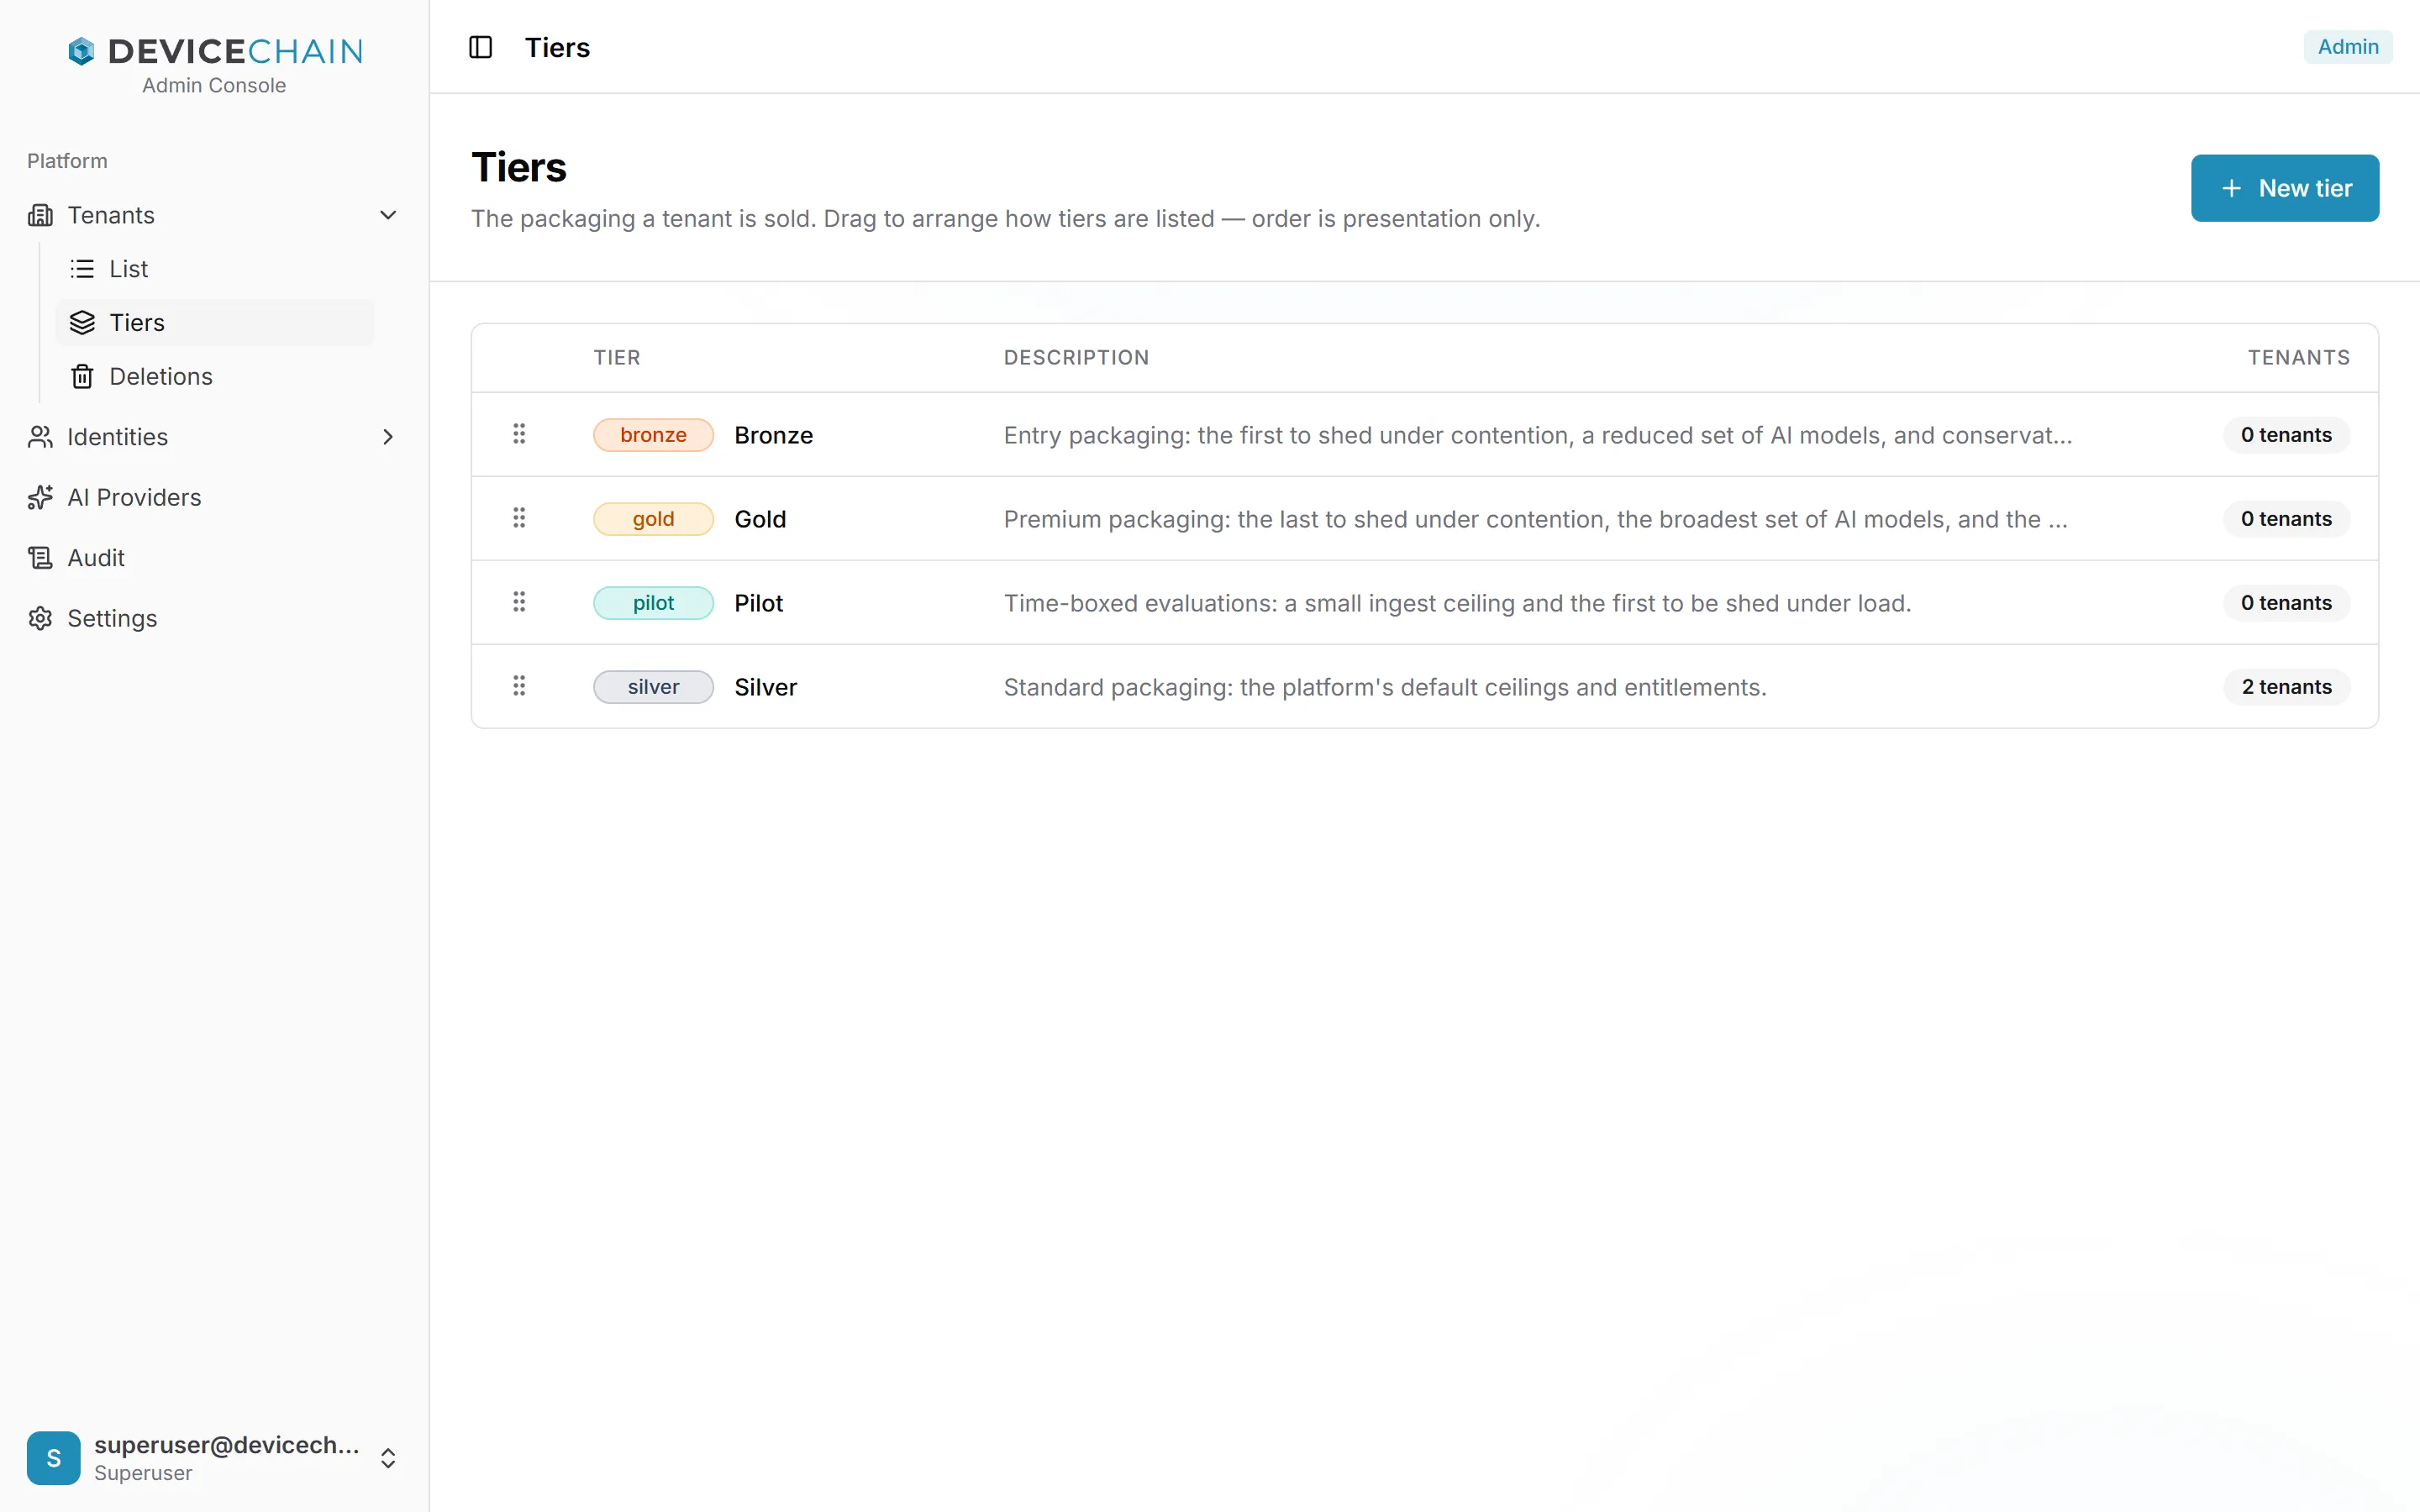
Drag a row by its handle to change the order tiers are listed in. The order is presentation only: it is not a ranking, and nothing is computed from it. New tier creates one. Defining a tier changes nothing on its own; it takes effect once tenants are created at it or moved to it.
A tier's page has three tabs. Basic holds the token, which cannot change, the name, an operator-facing description, and the Color of its pill. The colour is presentation only.
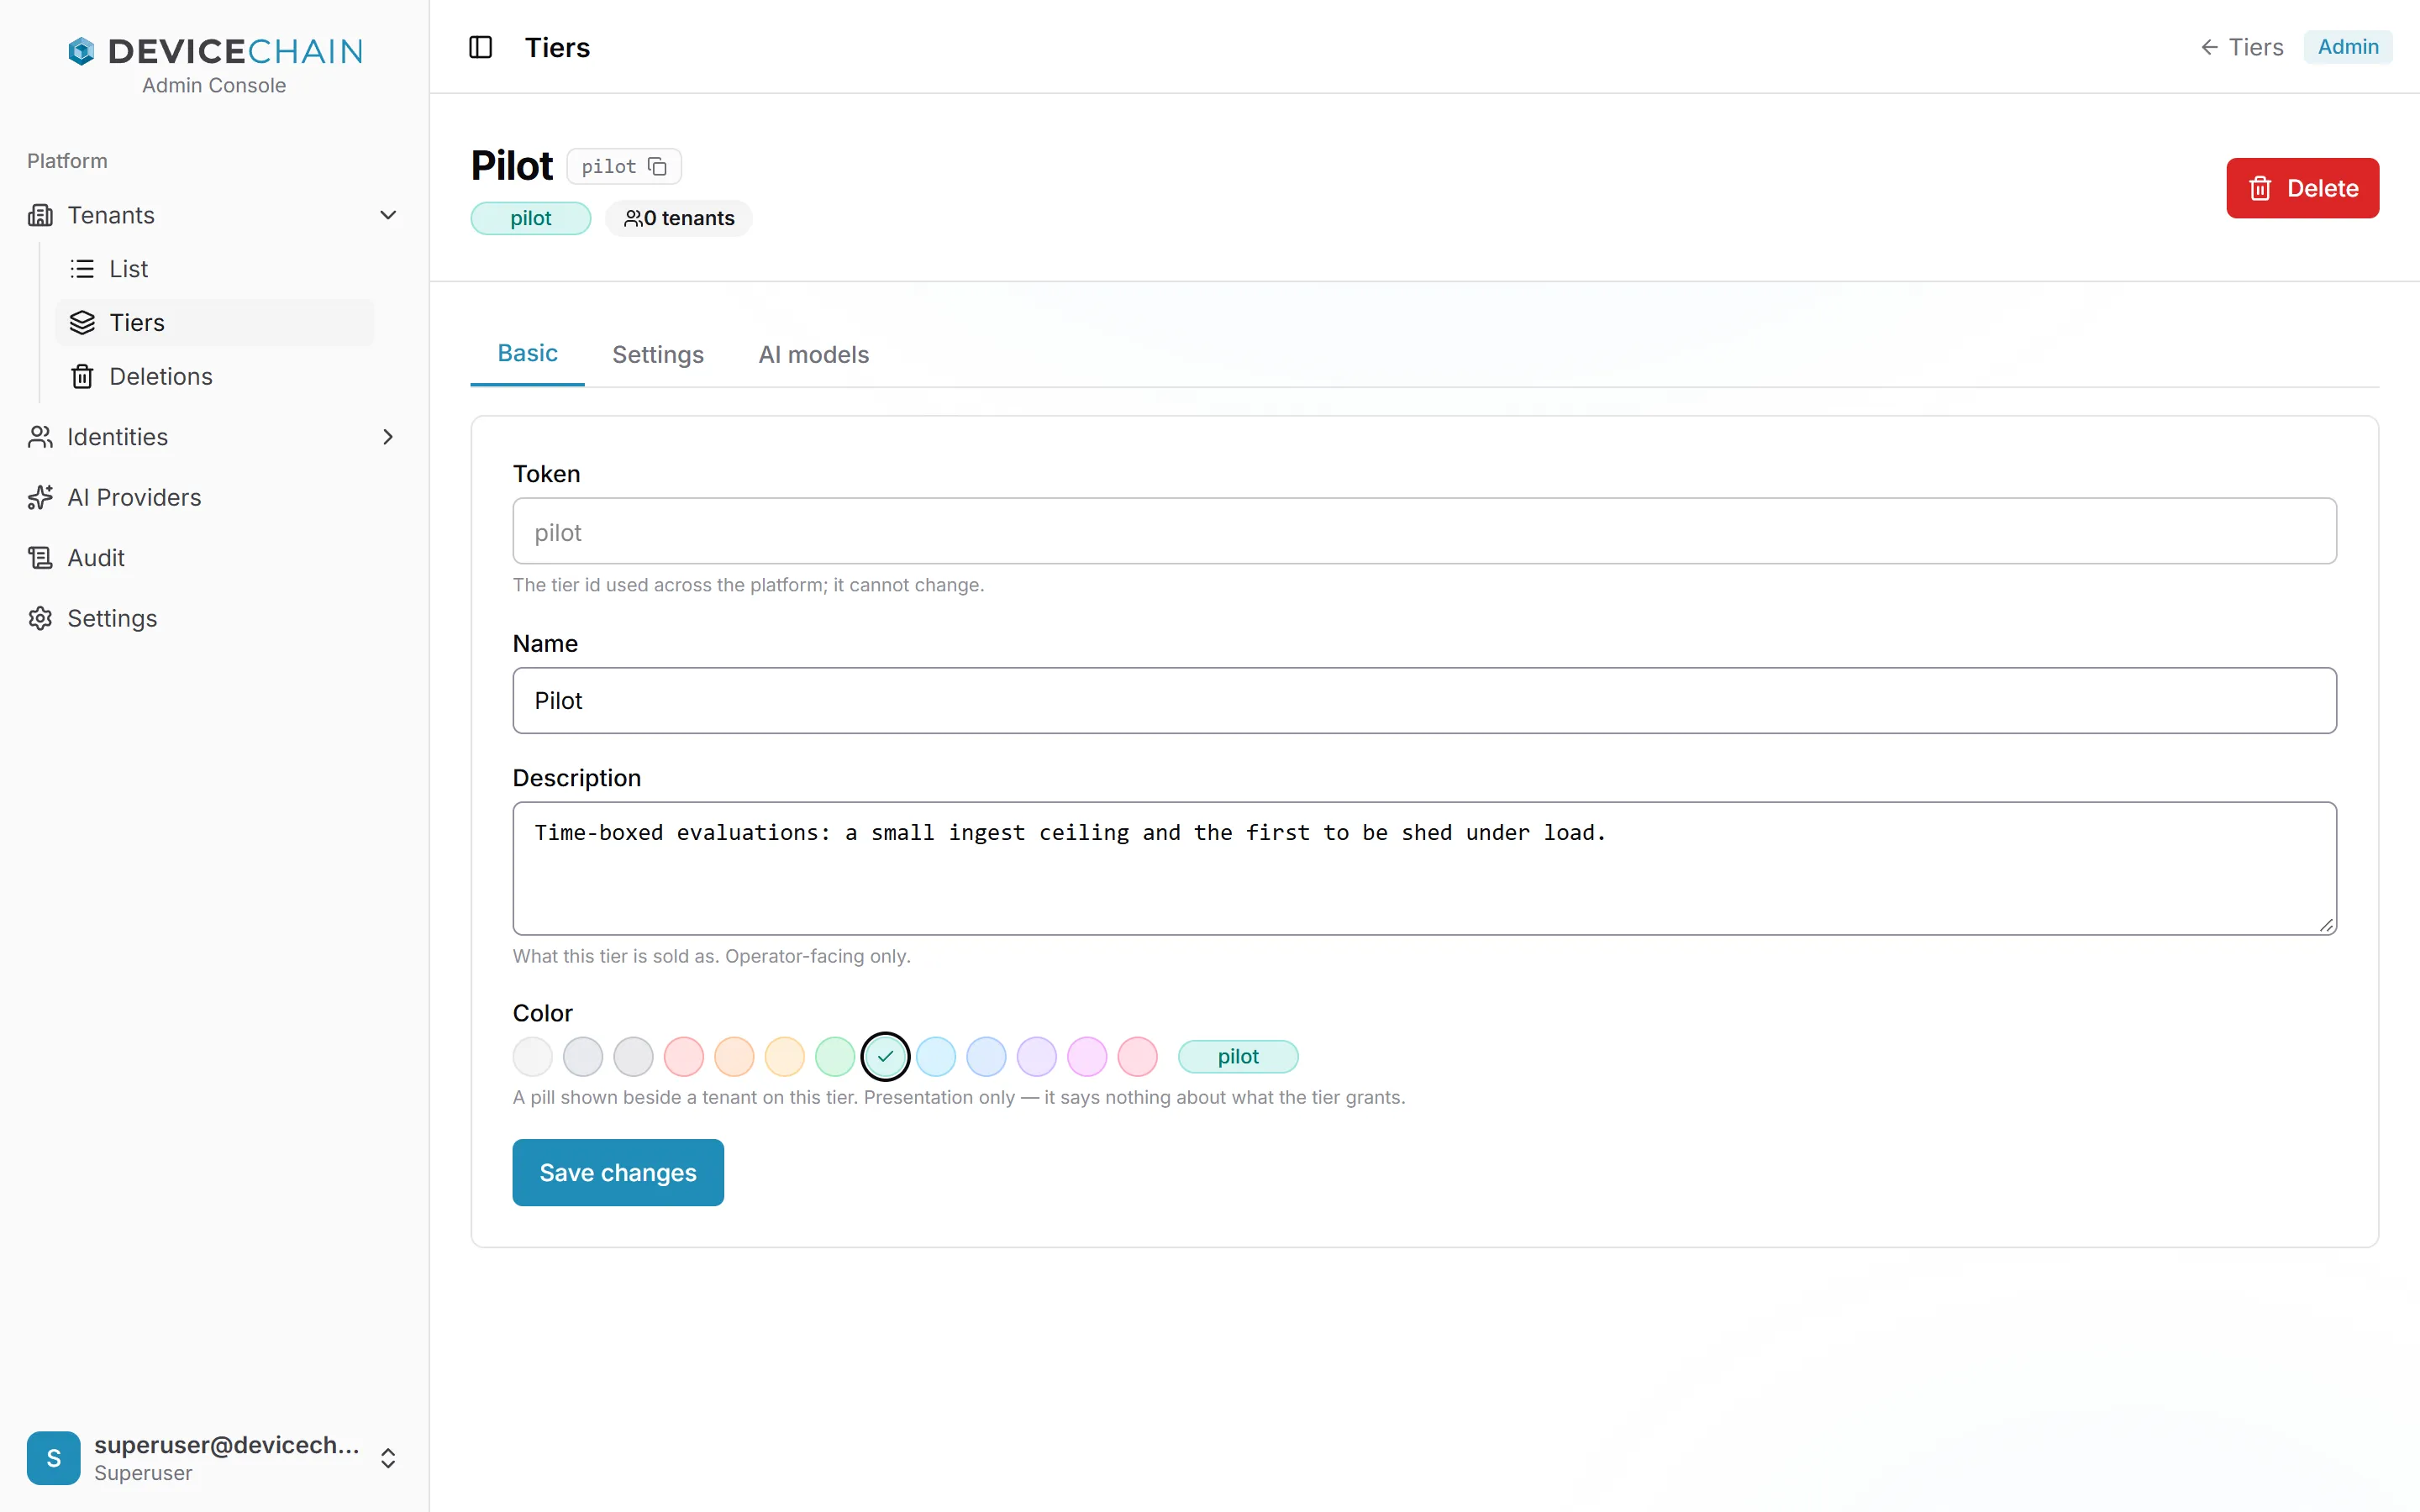
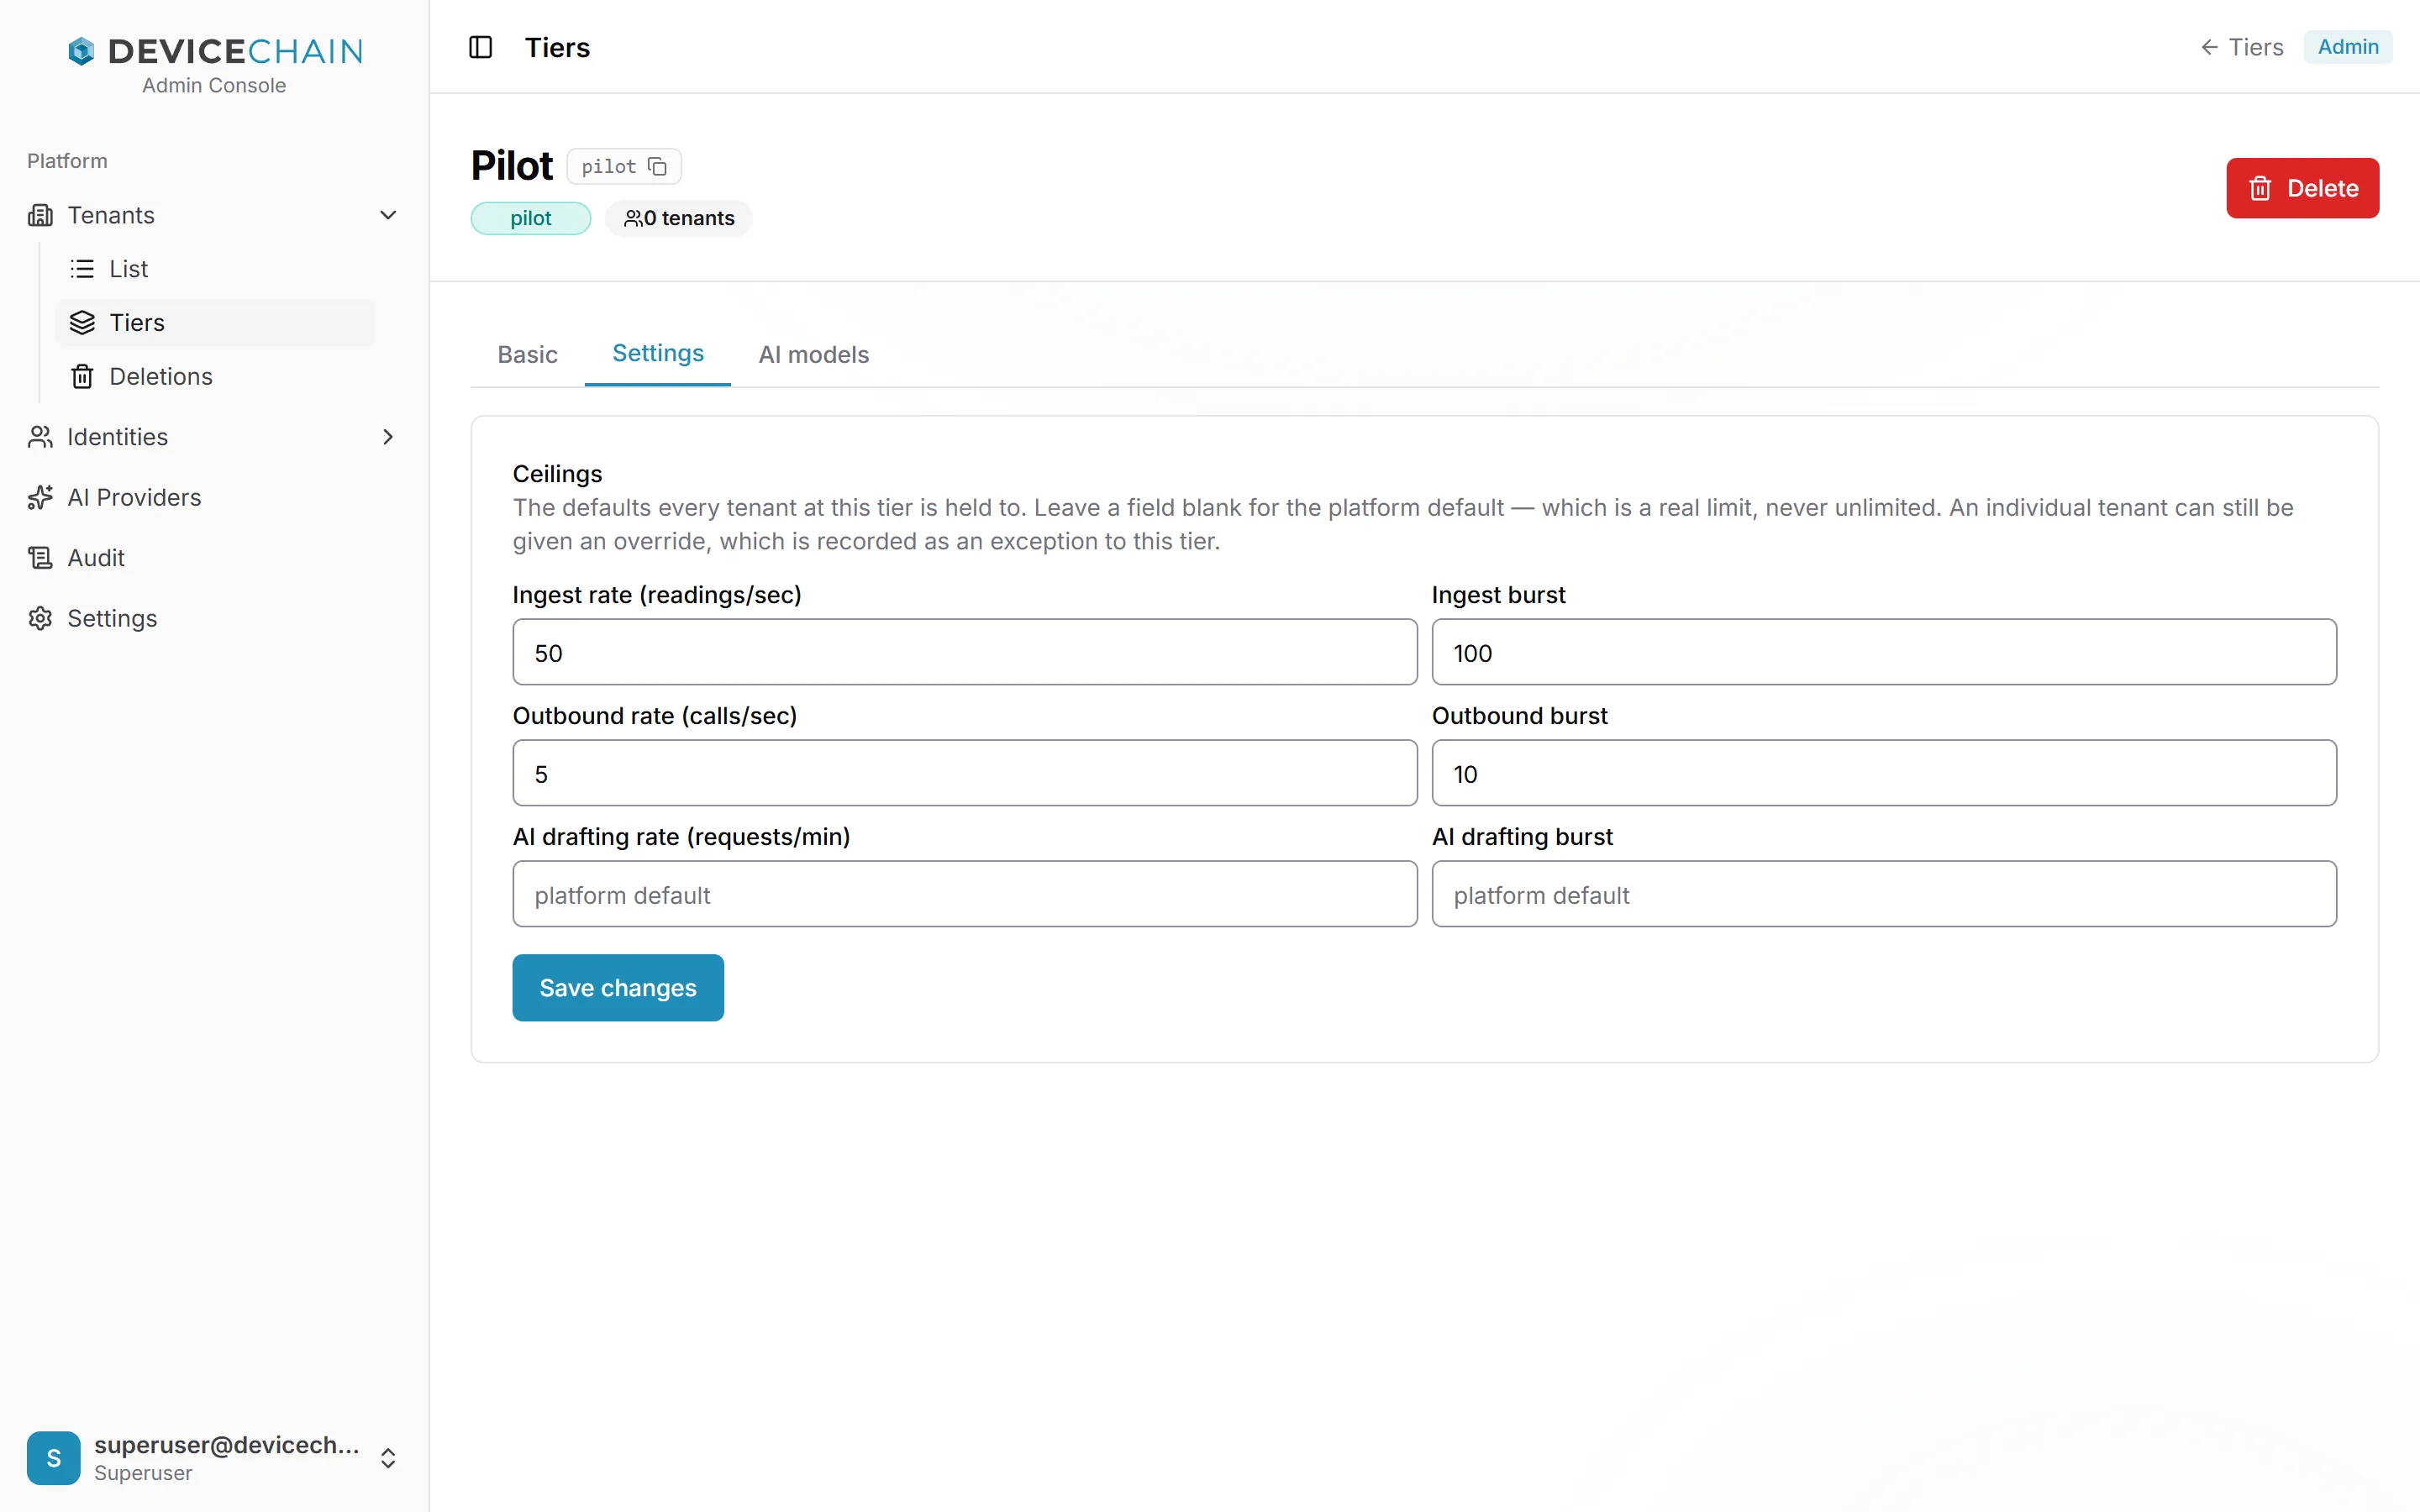
Settings holds the tier's Ceilings: the ingest, outbound and AI drafting rates and bursts. Leave a field blank for the platform default. A tenant can still be given its own override on its Settings tab. When tenants are on the tier, saving re-prices them within a minute, without a restart.
A tier can also carry a held command ceiling, a shed priority and the three geofence limits, and tenants at the tier inherit them the same way. The console has no fields for these on a tier: they are set through the admin API, and saving this tab leaves them as they are. A tenant's own value on its Settings tab still takes precedence over the tier's.
AI models chooses which AI models the tier grants, and needs the optional AI service. A tier cannot be deleted while any tenant is on it. See Tenant tiers.
Identities
Identities → List is the instance's directory of people. A person is one identity, keyed by email address, that can be a member of many tenants. The list shows each identity's email, name, status, any system roles, and how many tenants it belongs to.
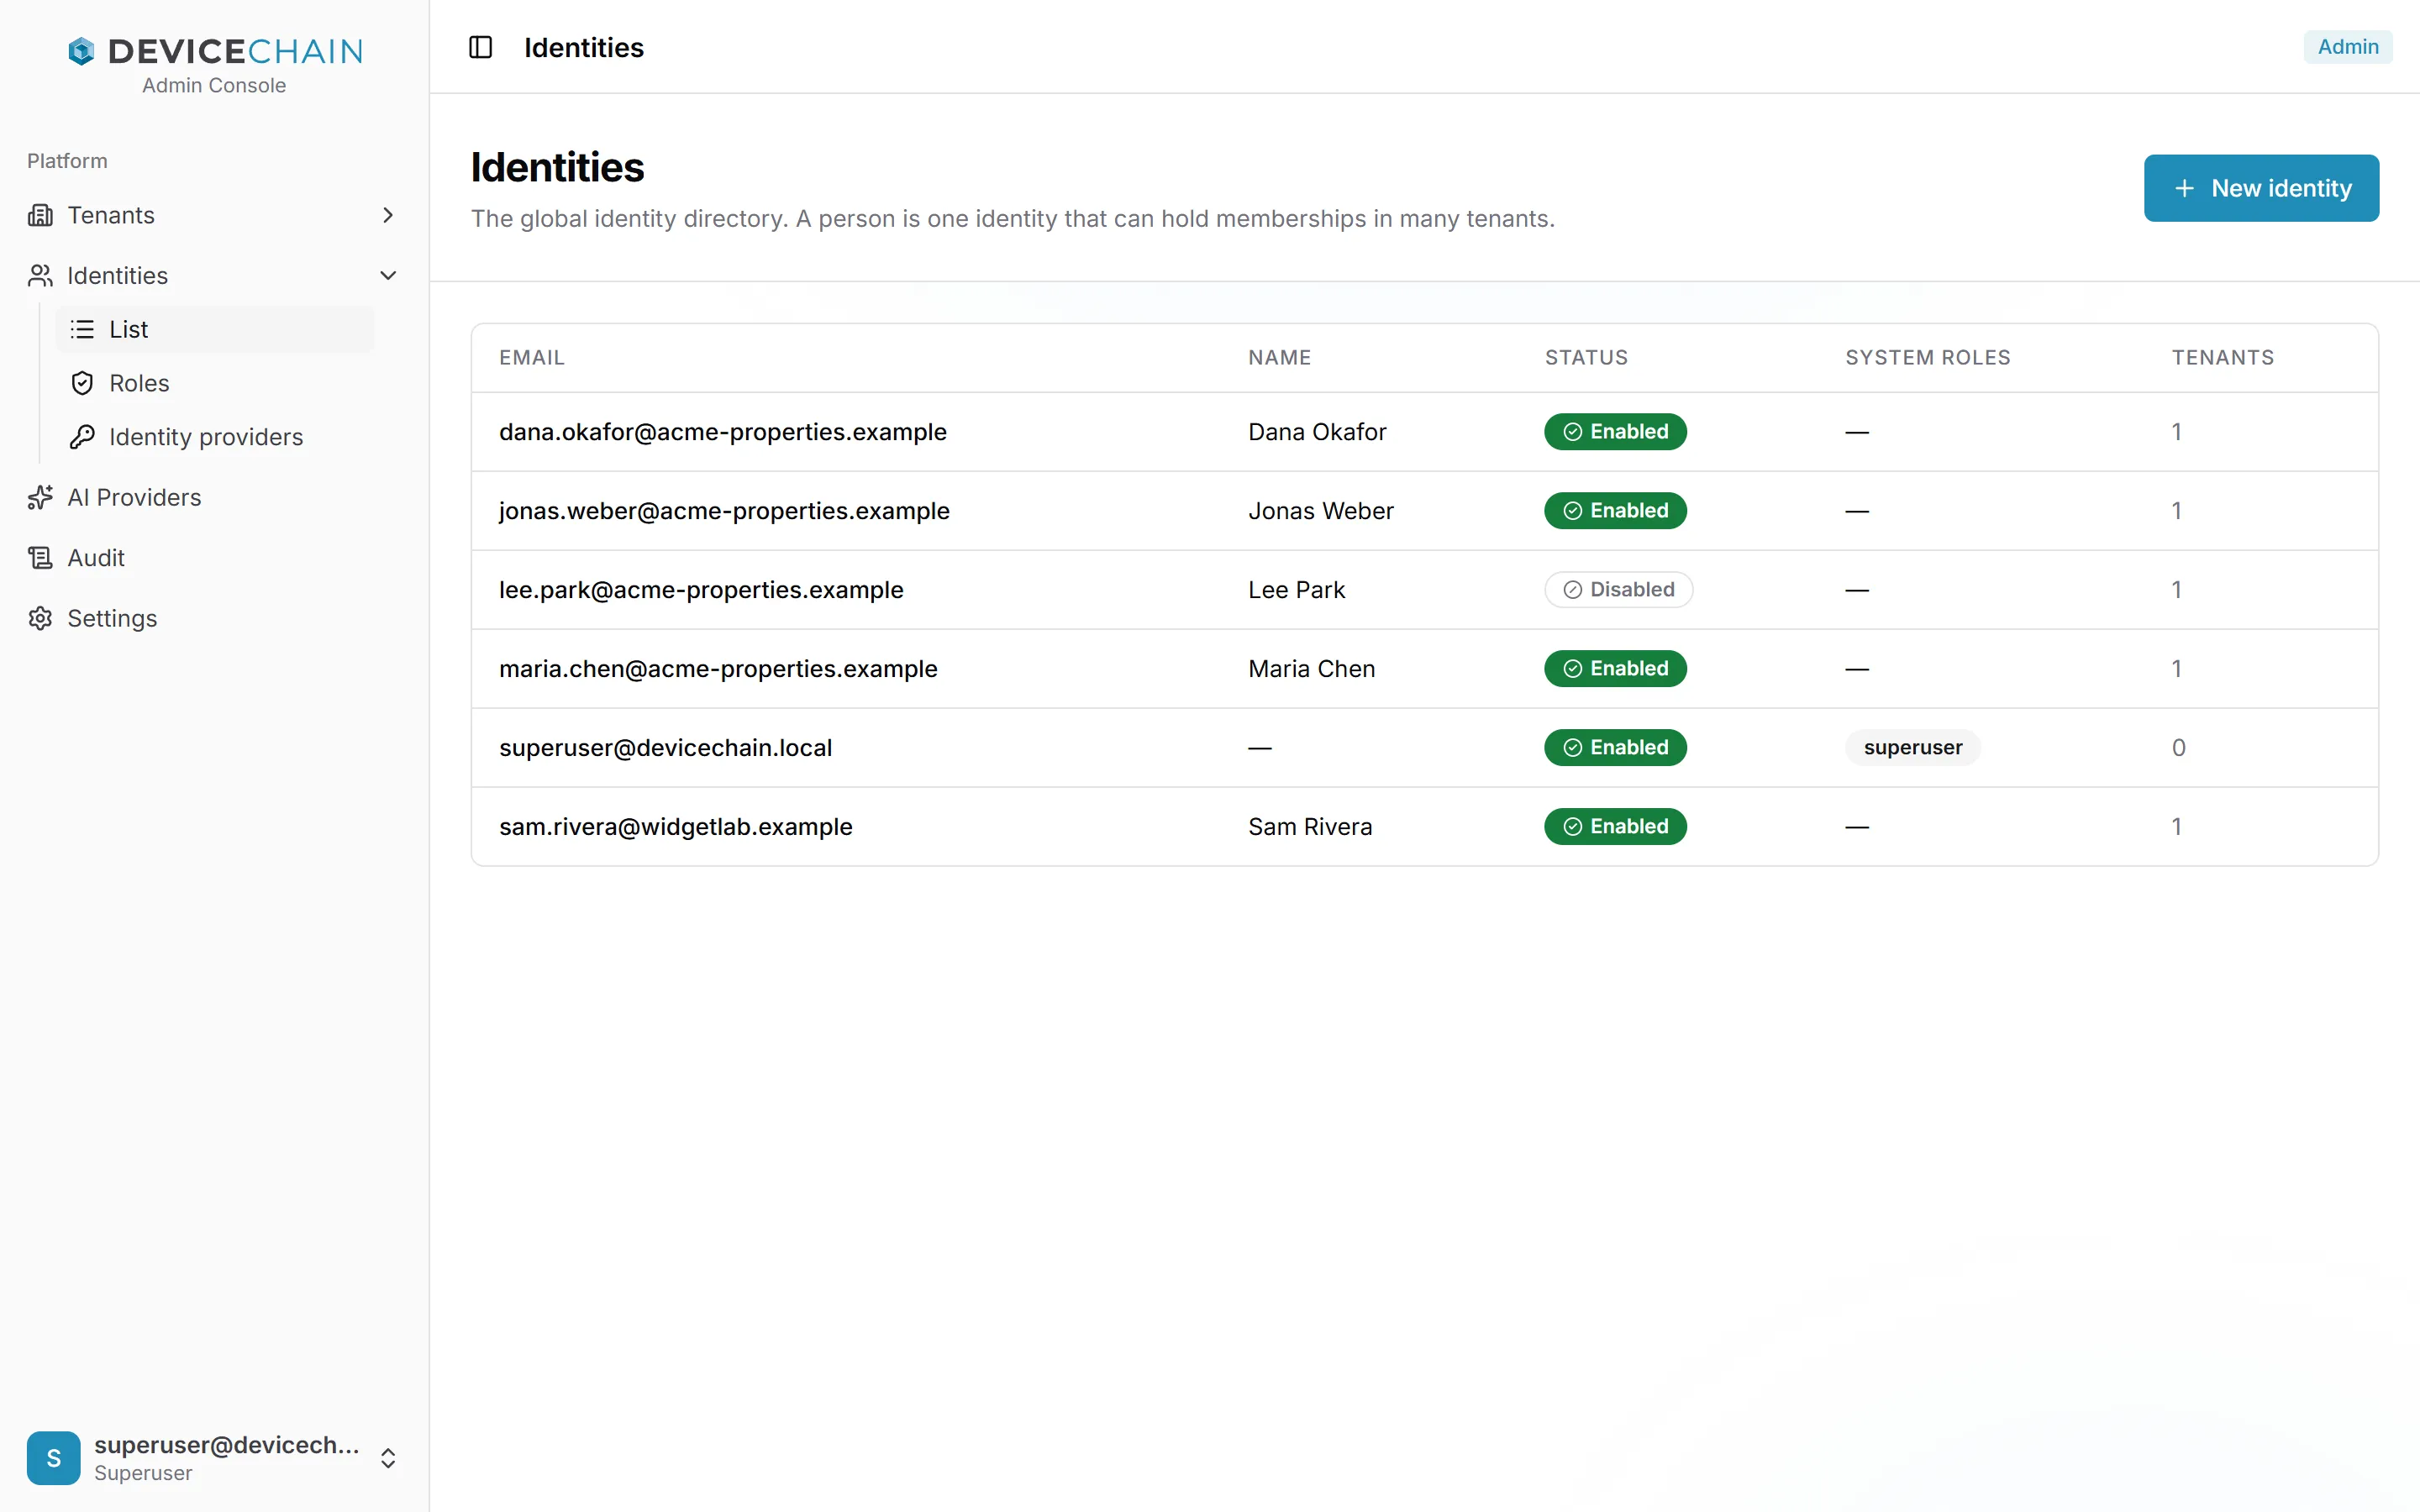
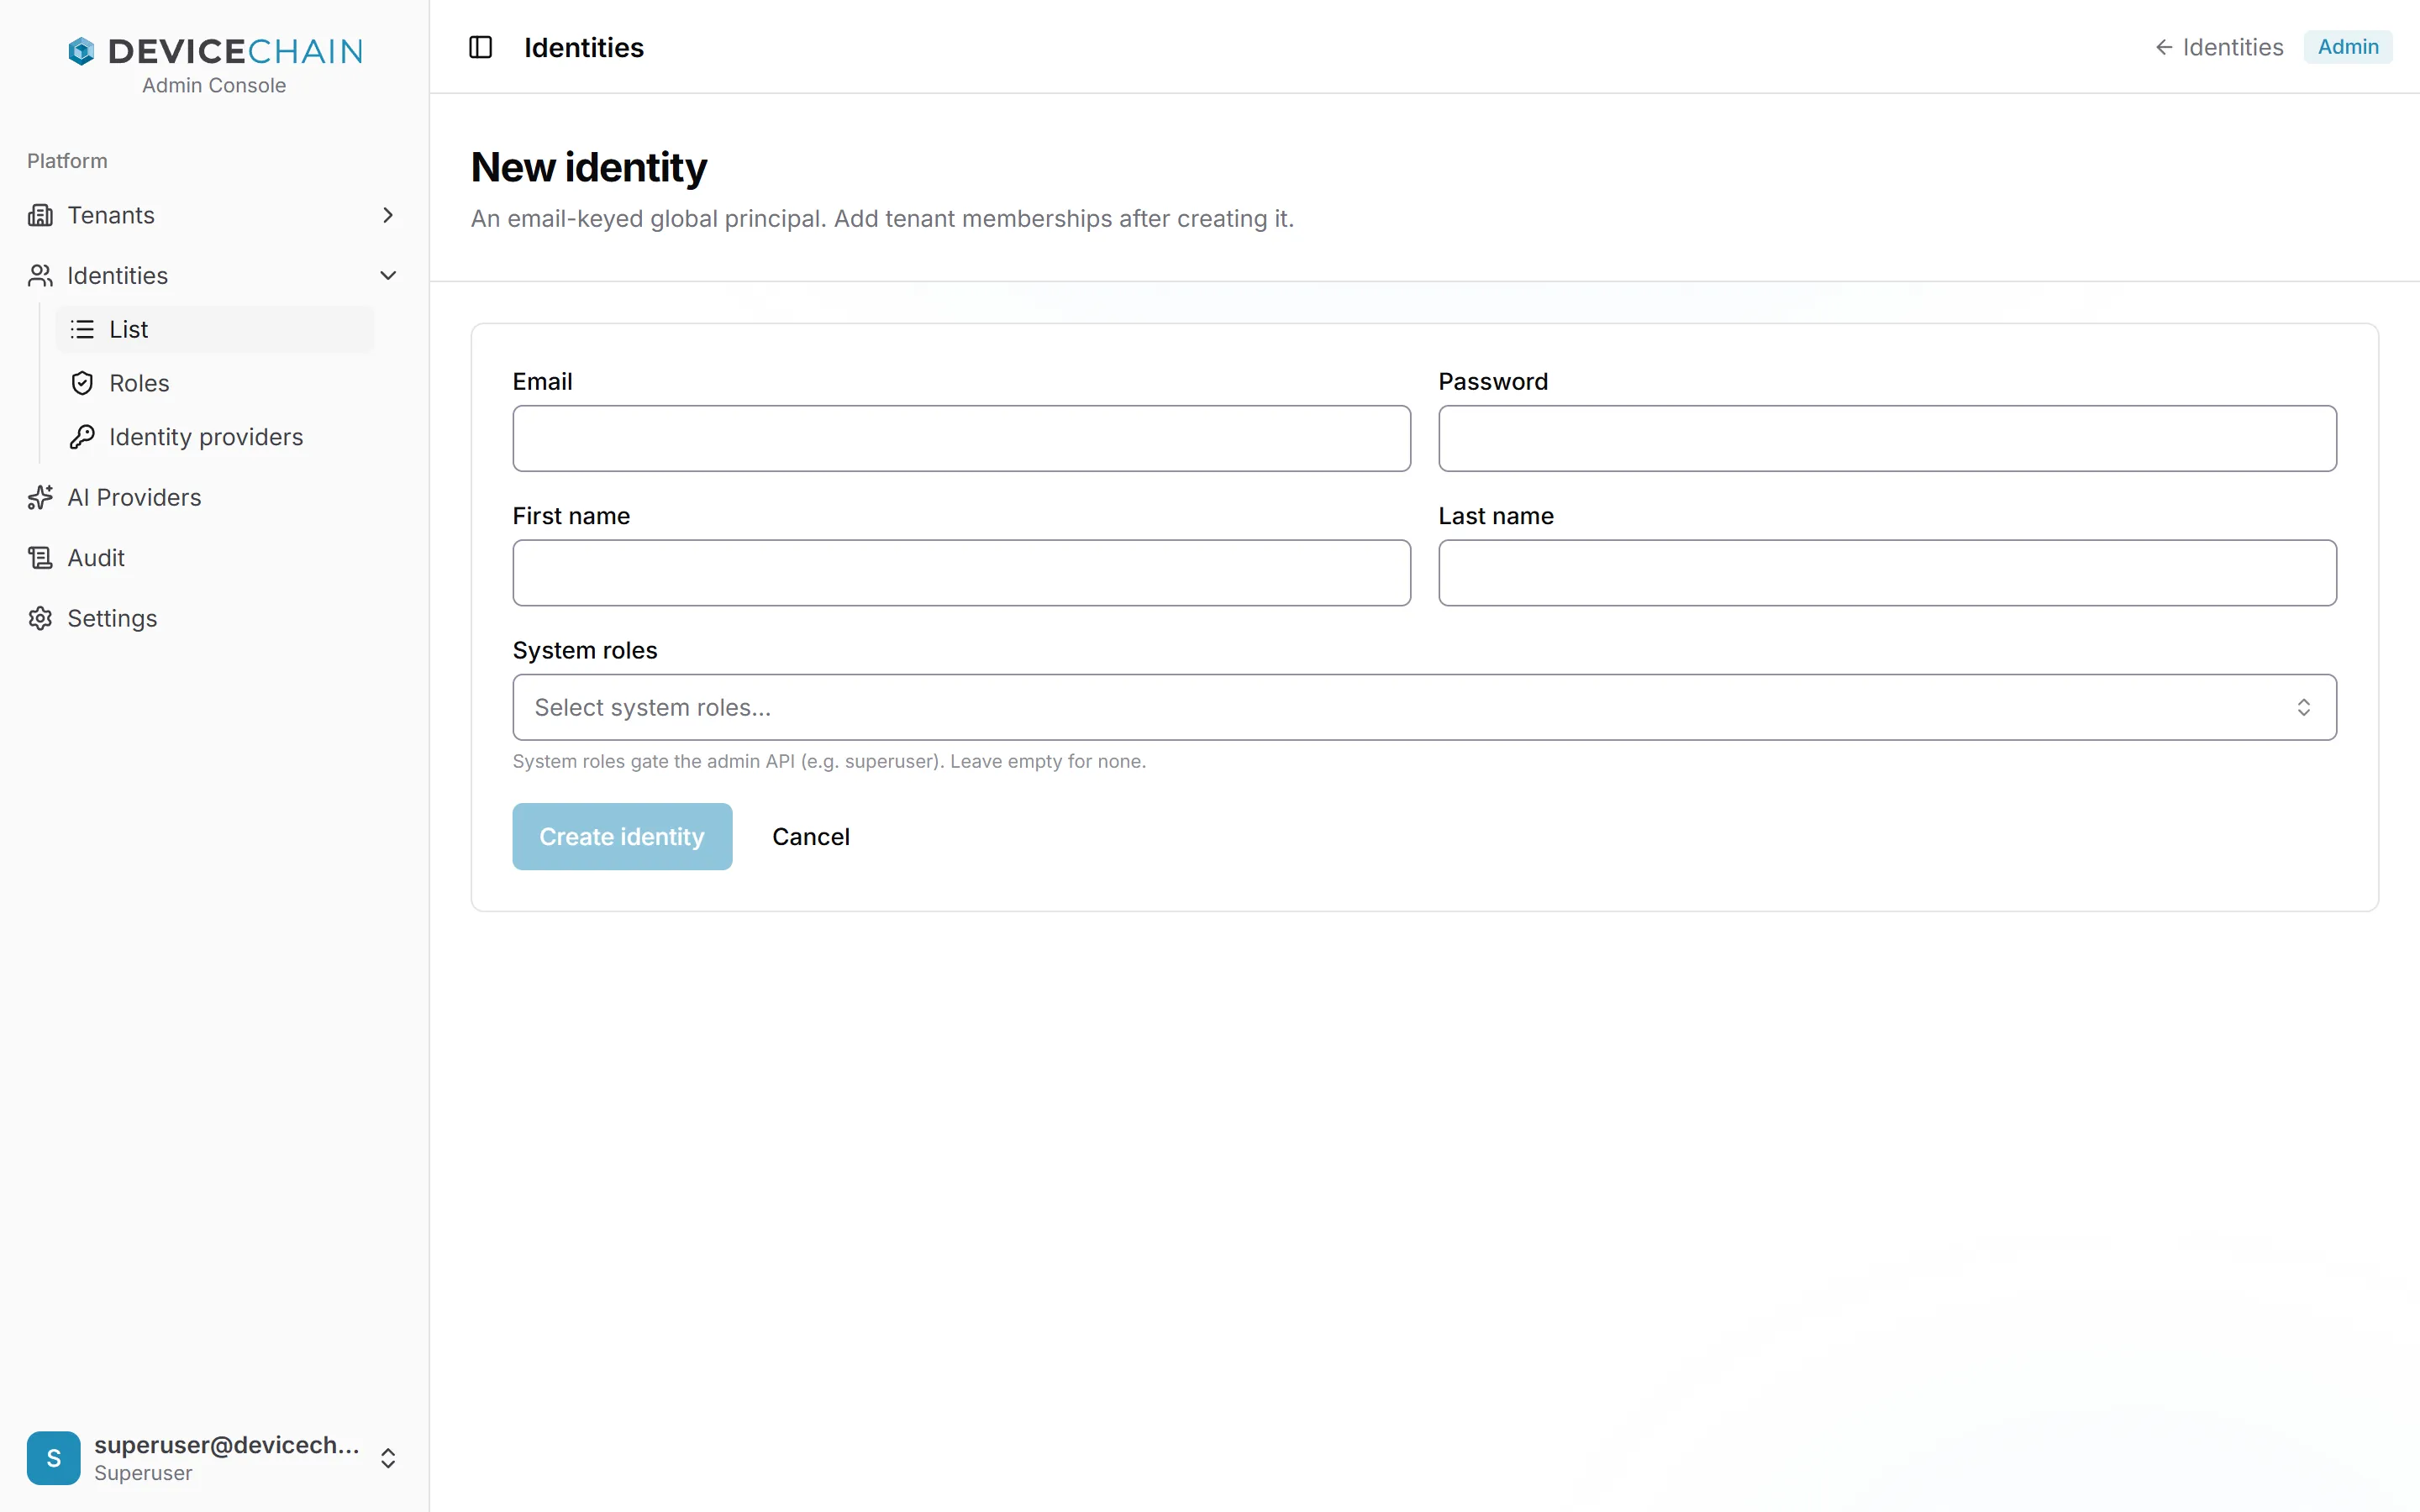
New identity asks for an email, a password, a first and last name, and any System roles. System roles gate the admin console and its API; leave them empty for an ordinary person. Tenant memberships are added after the identity exists.
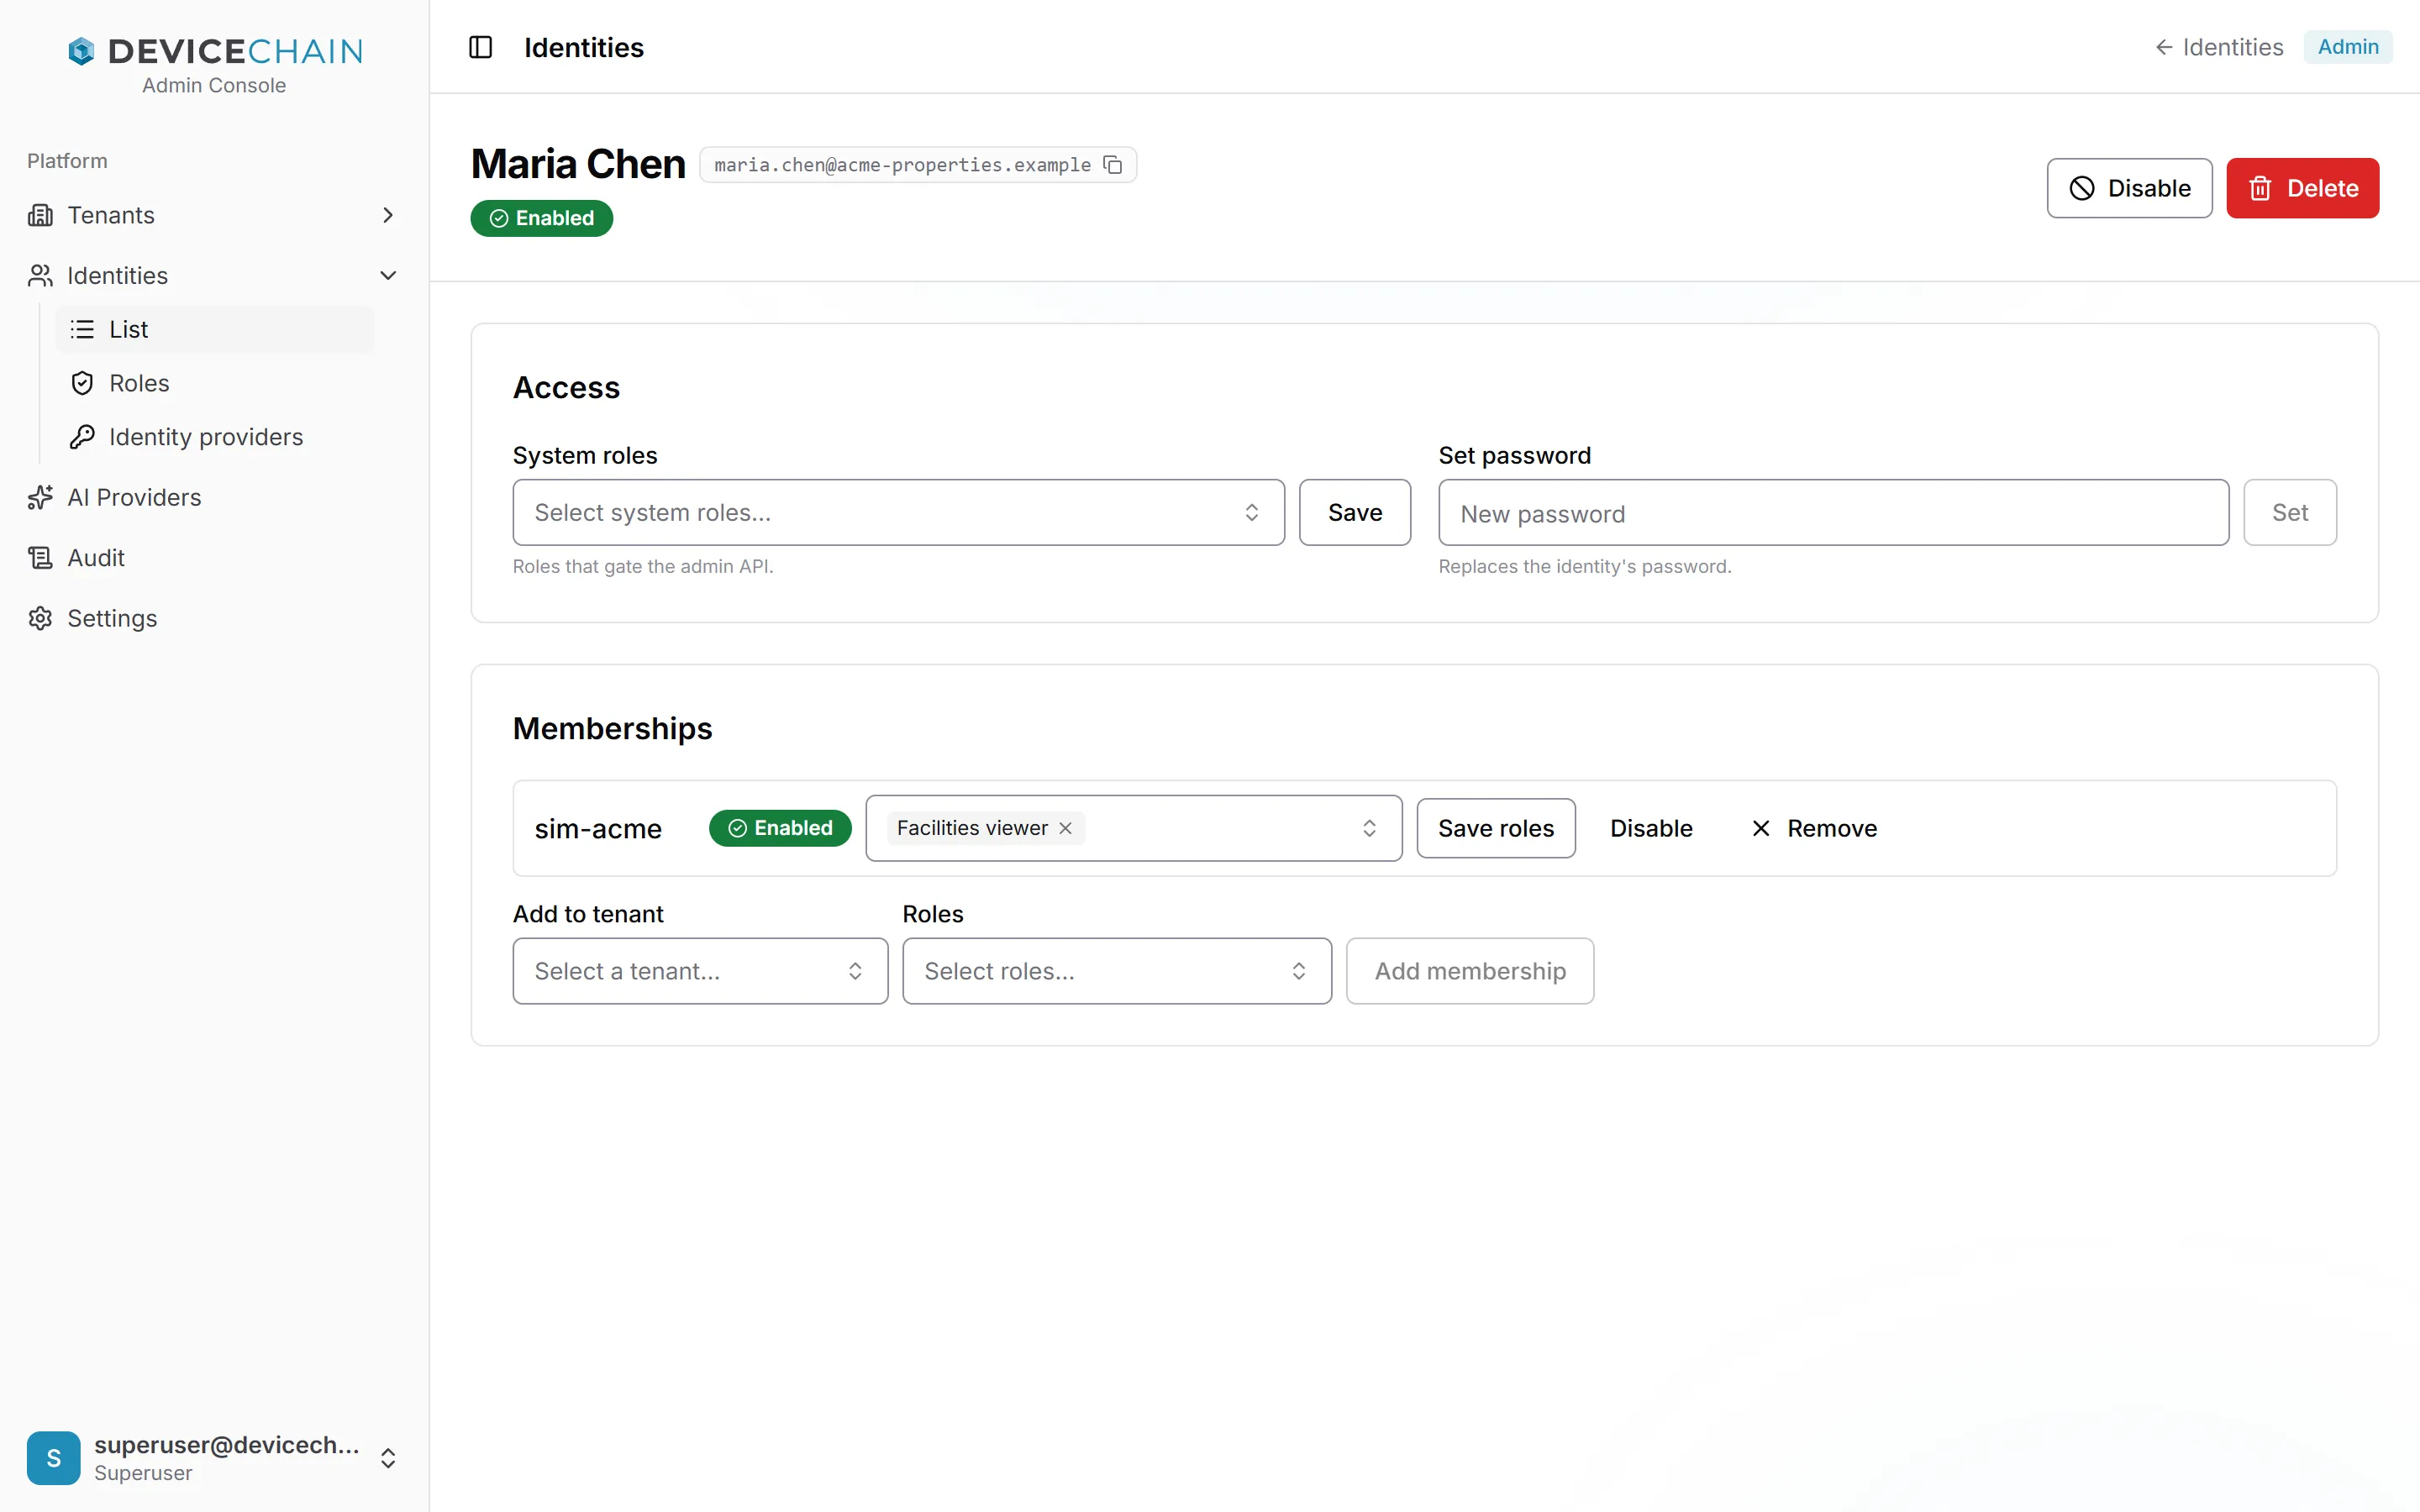
An identity's page has Disable and Delete at the top. A disabled identity cannot sign in, and its sessions end at their next refresh. Deleting removes the identity and all its memberships.
- Access sets the identity's System roles (then Save) and replaces its password with Set password.
- Memberships lists the tenants it belongs to, each with its status and its tenant roles. Change the roles and choose Save roles, or Disable or Remove the membership. A disabled membership keeps the person out of that one tenant. To add one, pick a tenant and roles under Add to tenant and choose Add membership.
Roles
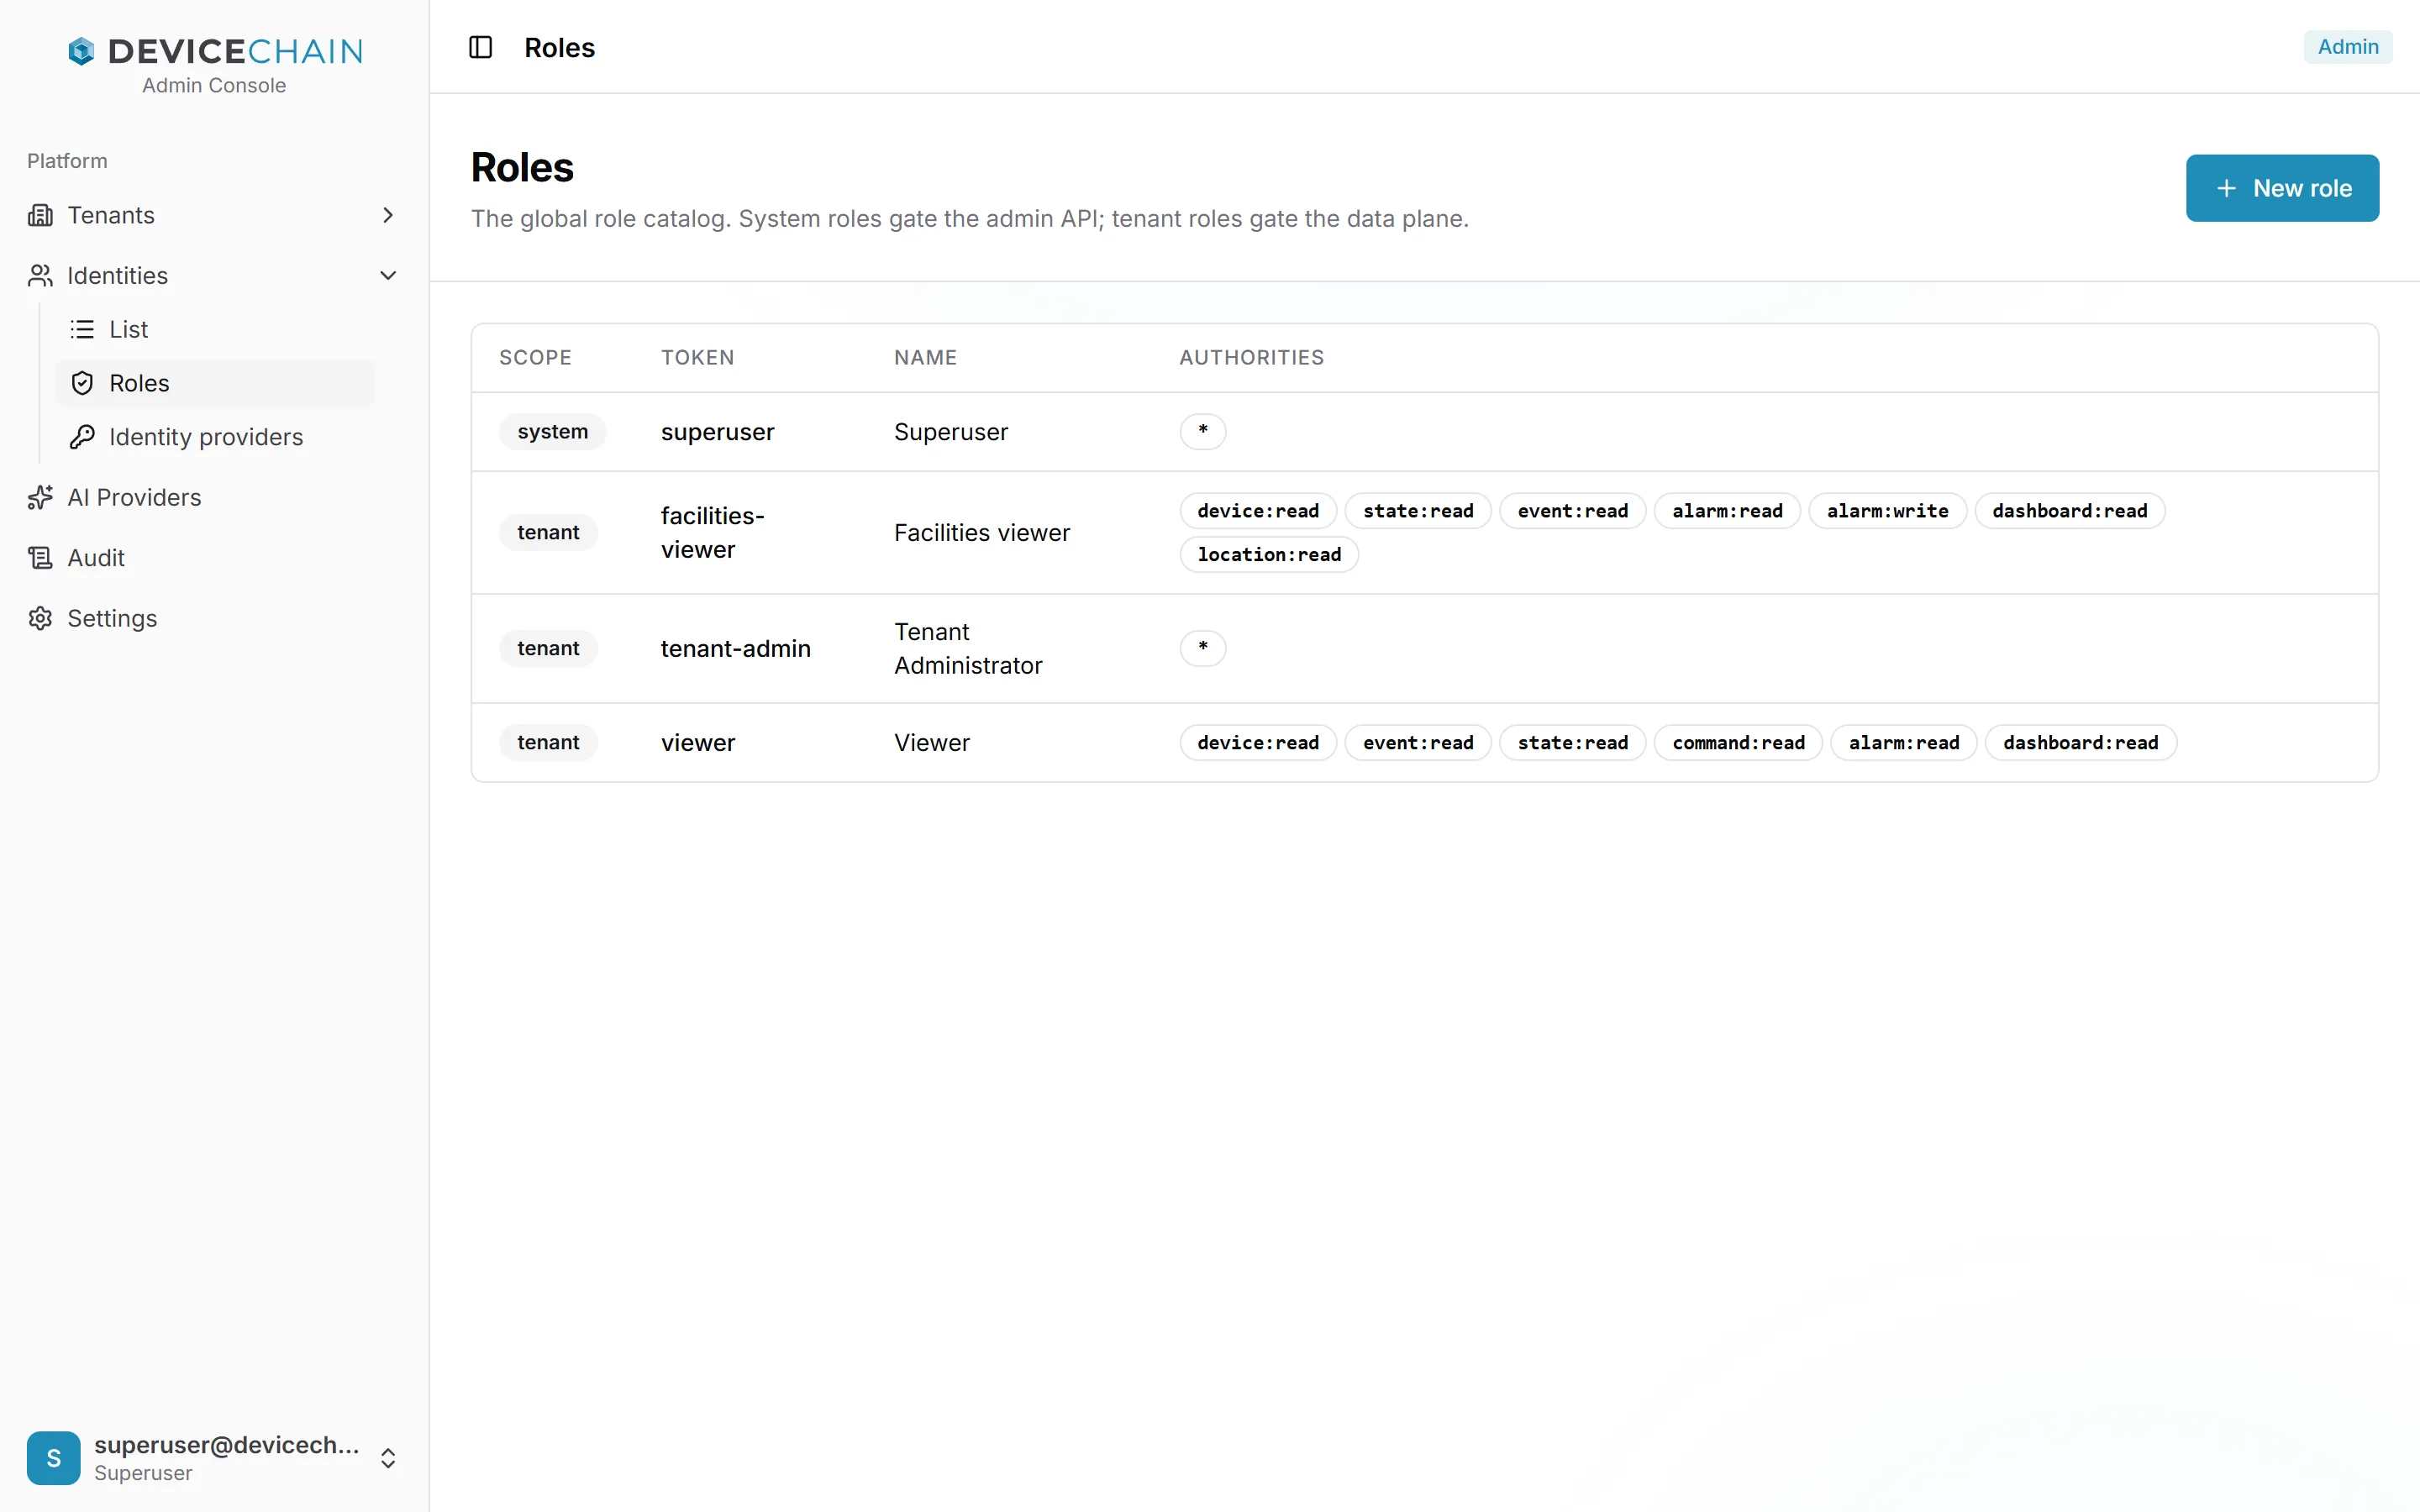
Identities → Roles is the role catalogue for the whole instance. A system role gates the
admin console and its API; a tenant role gates what a member can do inside a tenant. Each role
lists its authorities, the permissions it grants. * grants everything within the role's scope.
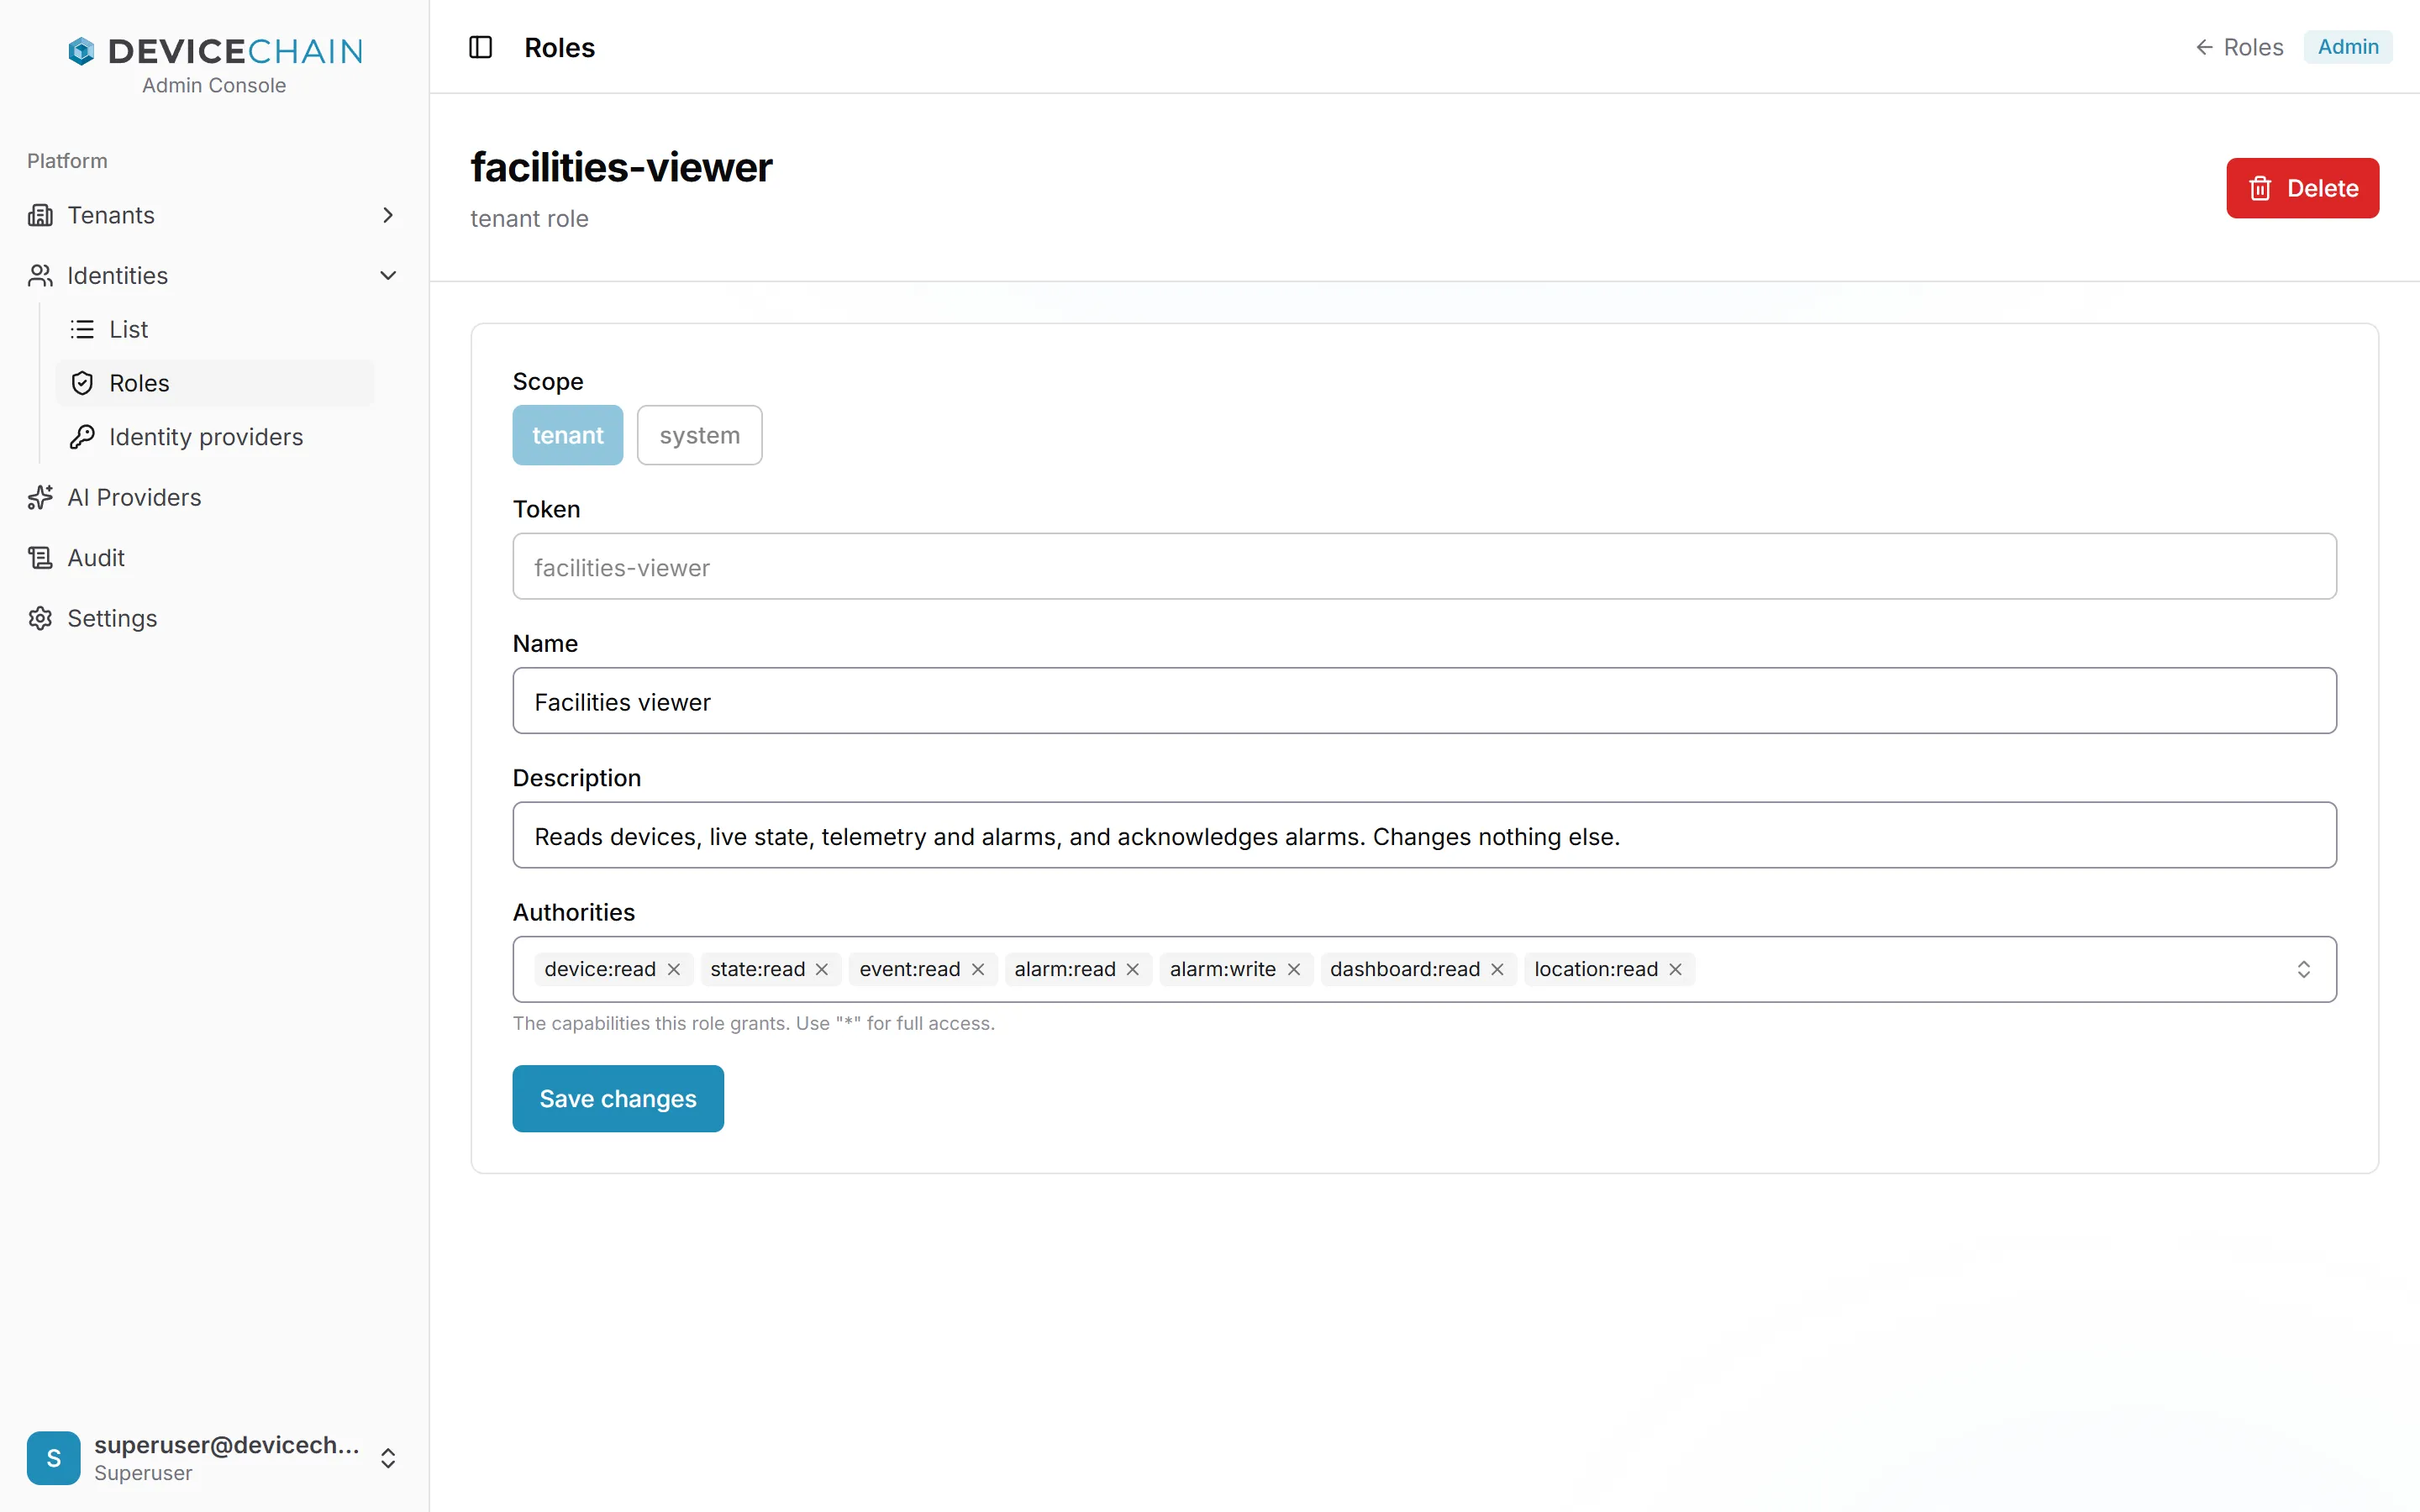
Open a role to change its name, description and Authorities, then choose Save changes. The scope and token are fixed once the role exists. New role creates one; Delete removes a role from everyone who holds it.
Identity providers
Identities → Identity providers connects outside OpenID Connect providers, such as Google Workspace or Microsoft Entra ID, that people sign in through. The list shows each connection's name, kind, issuer, the email domains it speaks for, whether its endpoints are approved, and its status. A connection starts disabled, and cannot be enabled until someone has approved the provider's endpoints.
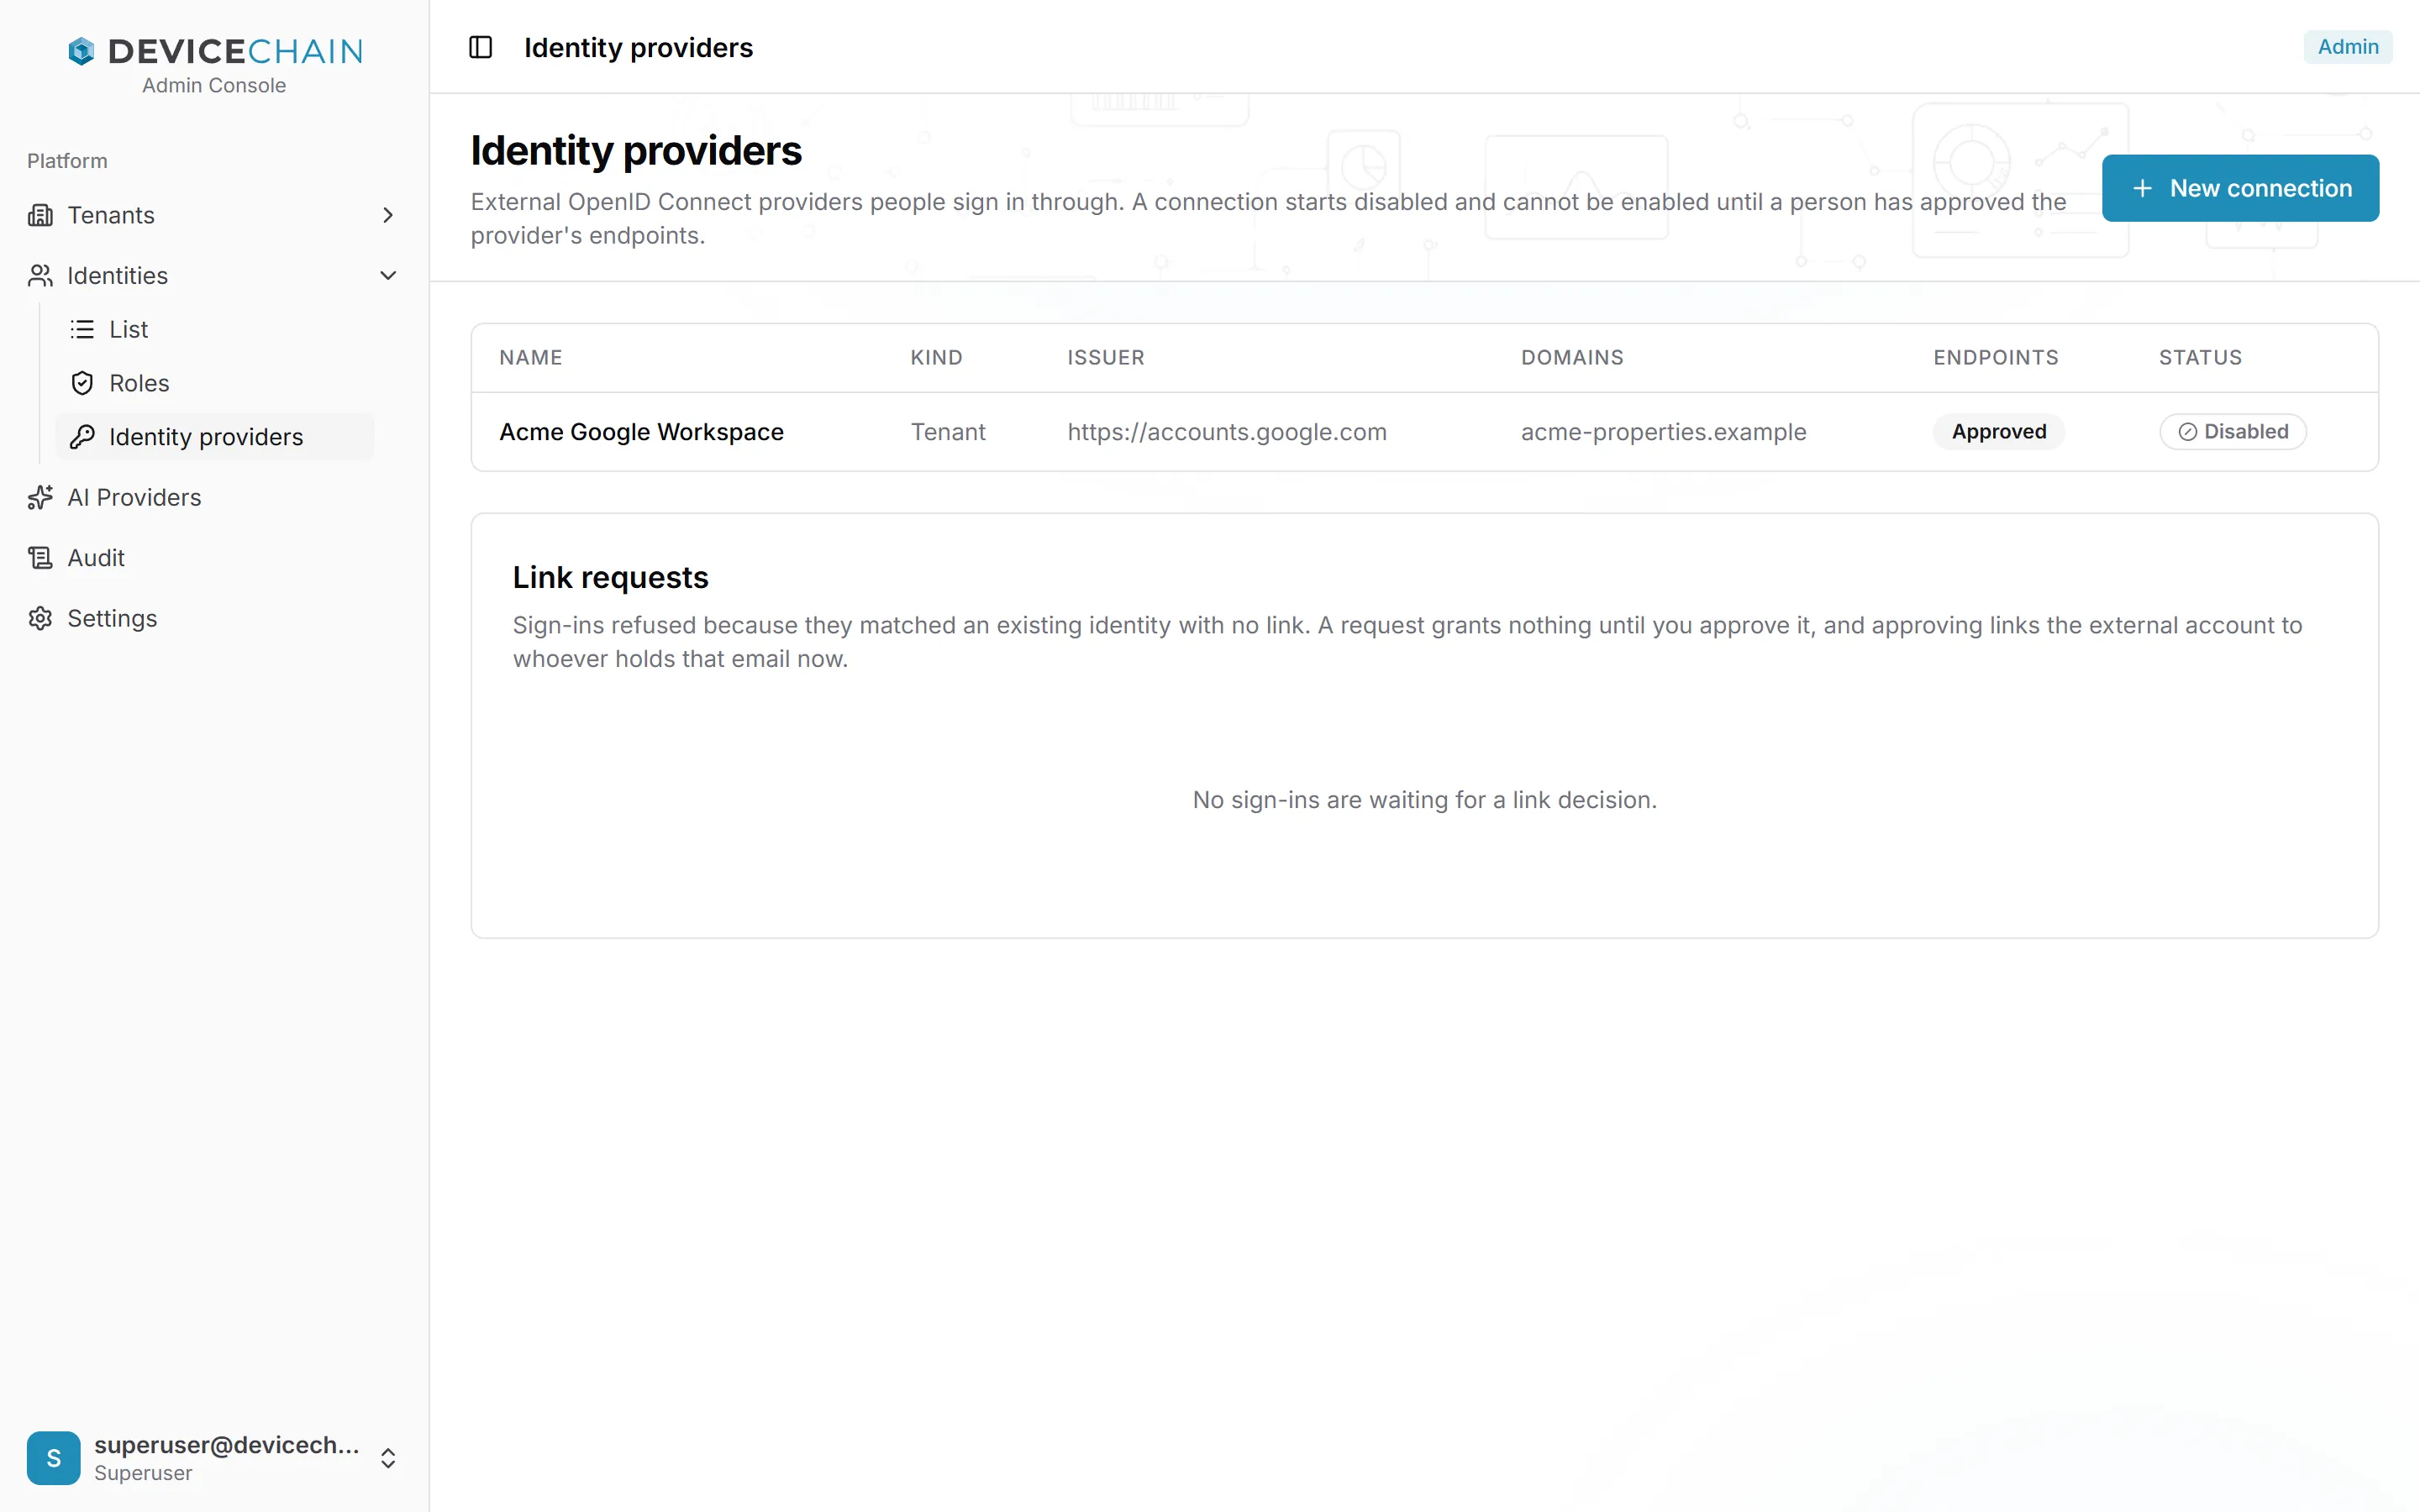
Below the list, Link requests collects sign-ins that were refused because they matched an existing identity that has no link to that provider. A request grants nothing until you Approve it; Reject deletes it.
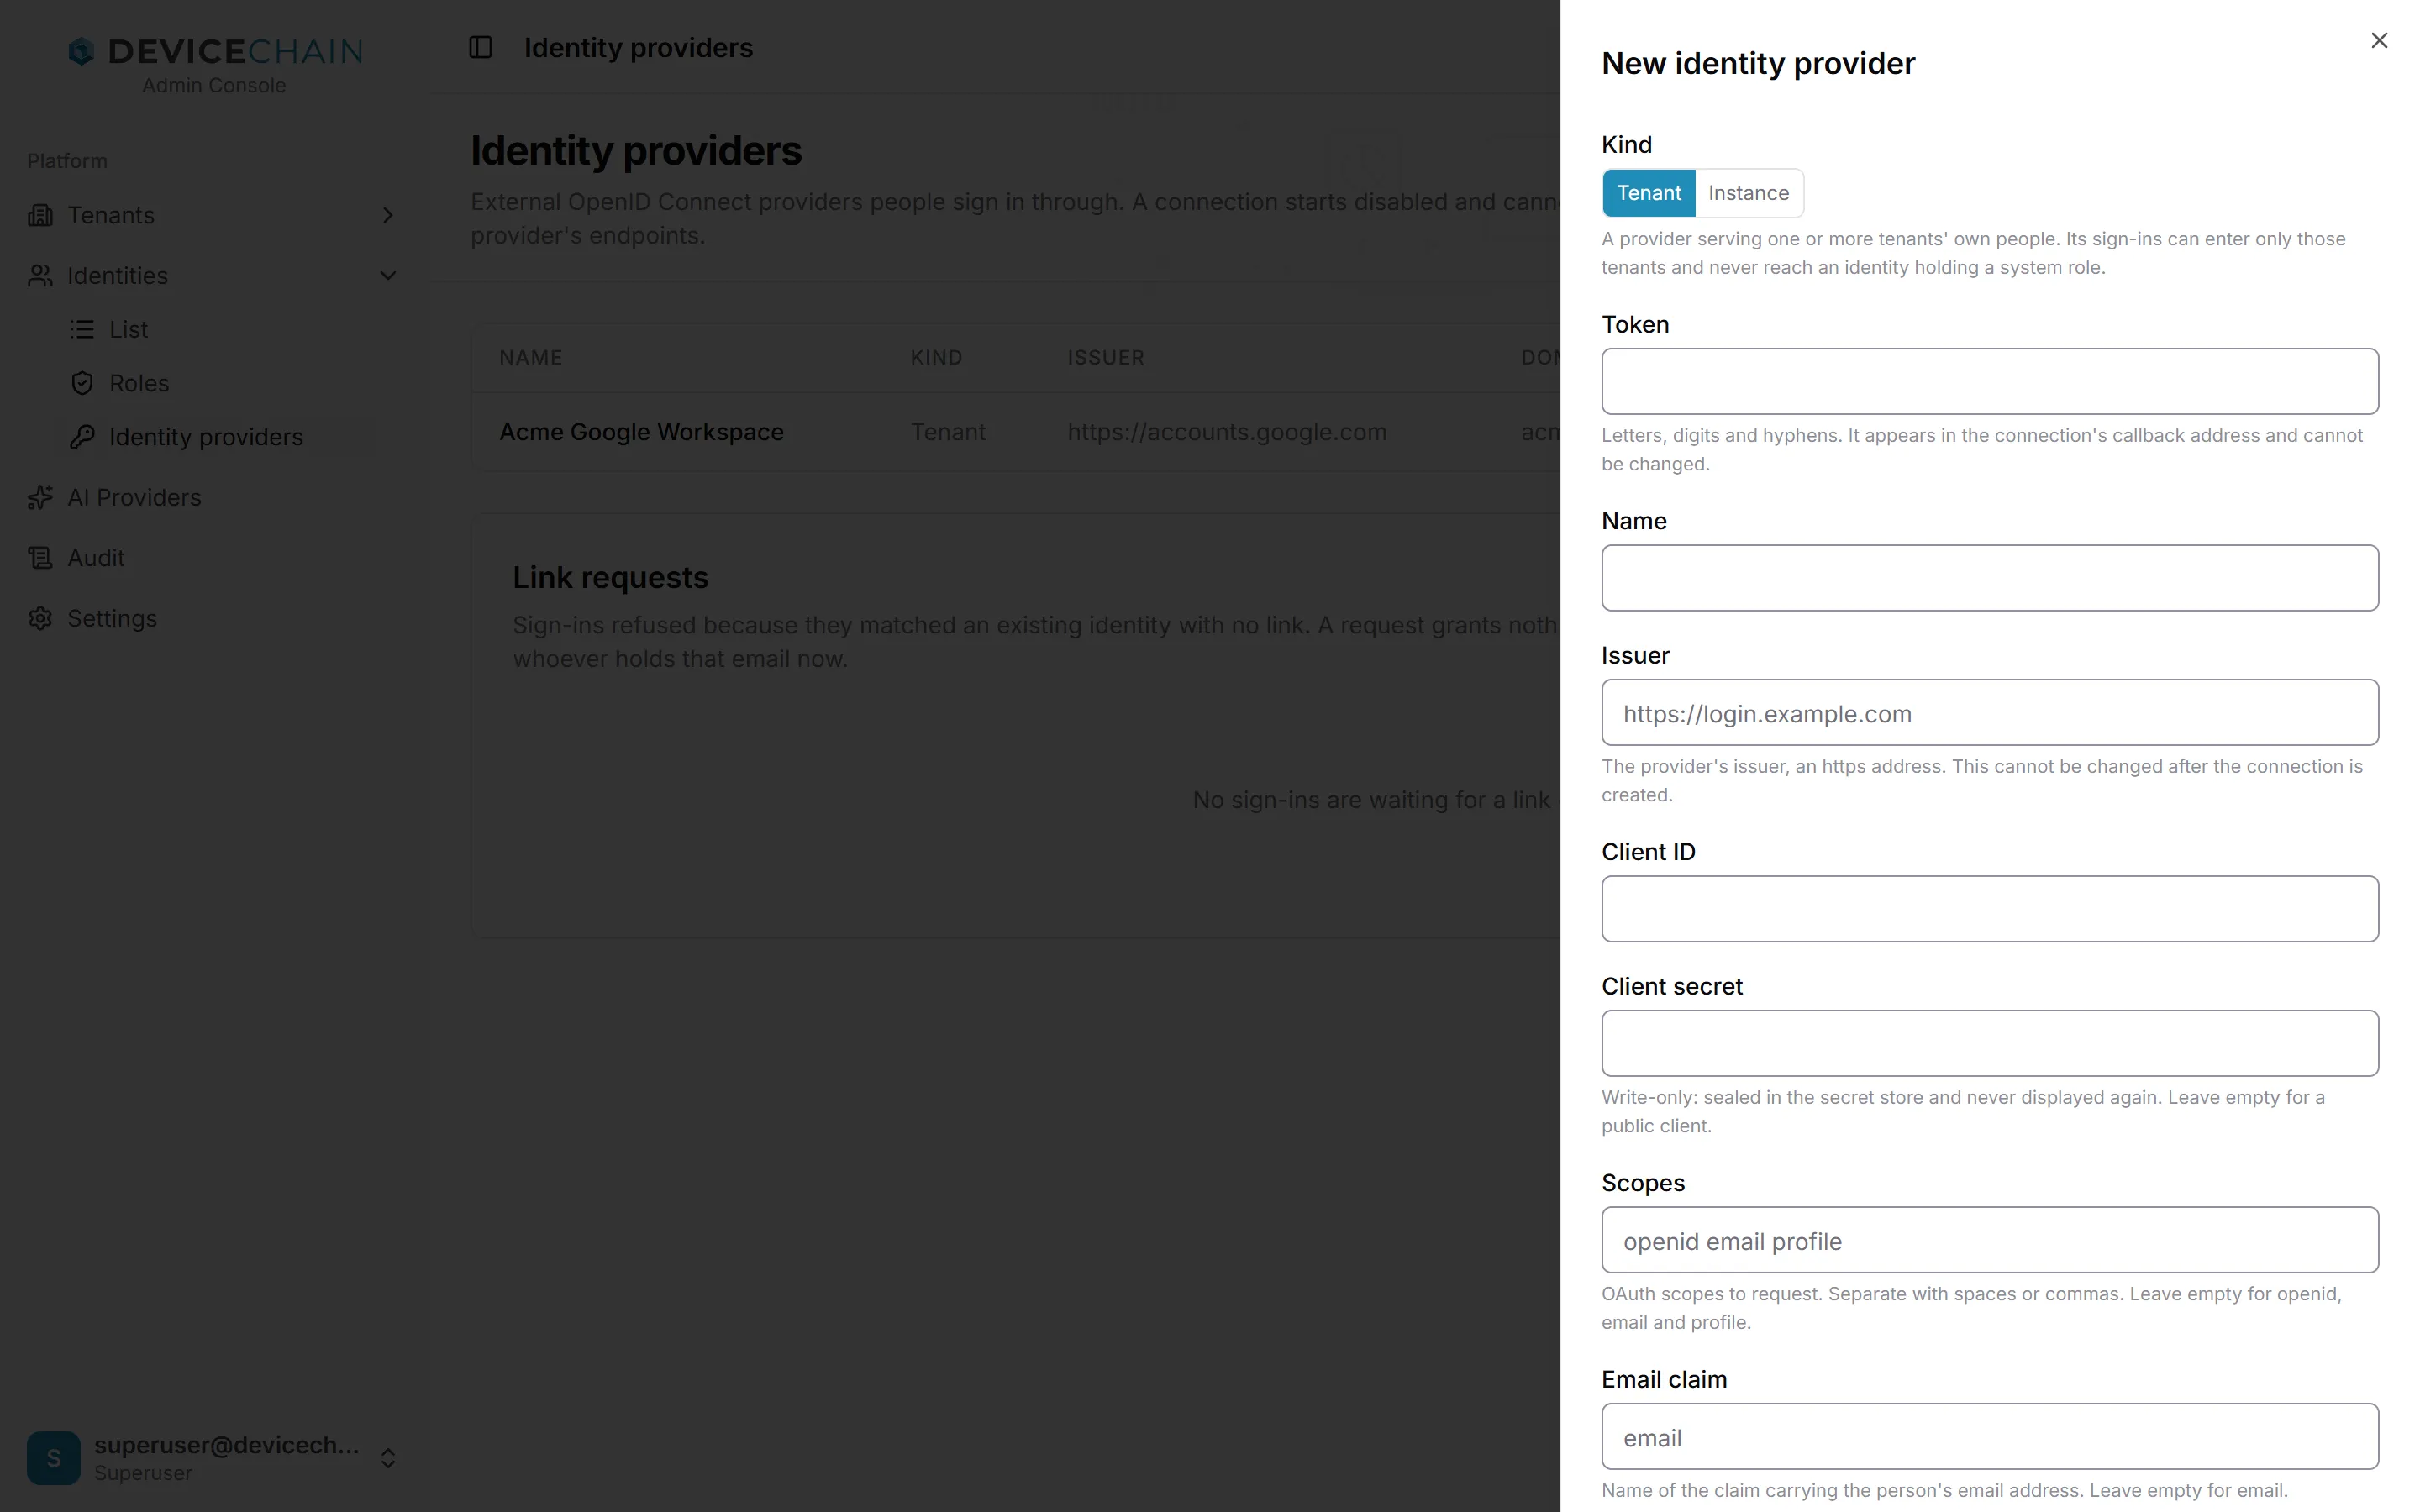
New connection opens a form. The Kind decides who the connection is for:
- Tenant: a provider for one or more tenants' own people. Its sign-ins can enter only the tenants it serves, and never reach an identity that holds a system role.
- Instance: your operators' own provider. It is linked to identities only by explicit action,
and must either require an authentication method, such as
mfa, or be confirmed as a provider that enforces multi-factor sign-in. It serves no tenants, and enters a tenant only as a superuser.
The form also asks for a token, a name, the provider's Issuer, the Client ID and Client secret it gave you, and optionally the scopes, the email claim and the authentication methods and claims every sign-in must carry. The token and issuer cannot be changed later. The client secret is write-only: it is never shown again. If the provider runs inside your network and its TLS certificate was signed by your own certificate authority, paste that CA certificate (PEM) under Private CA certificates, or choose the file.
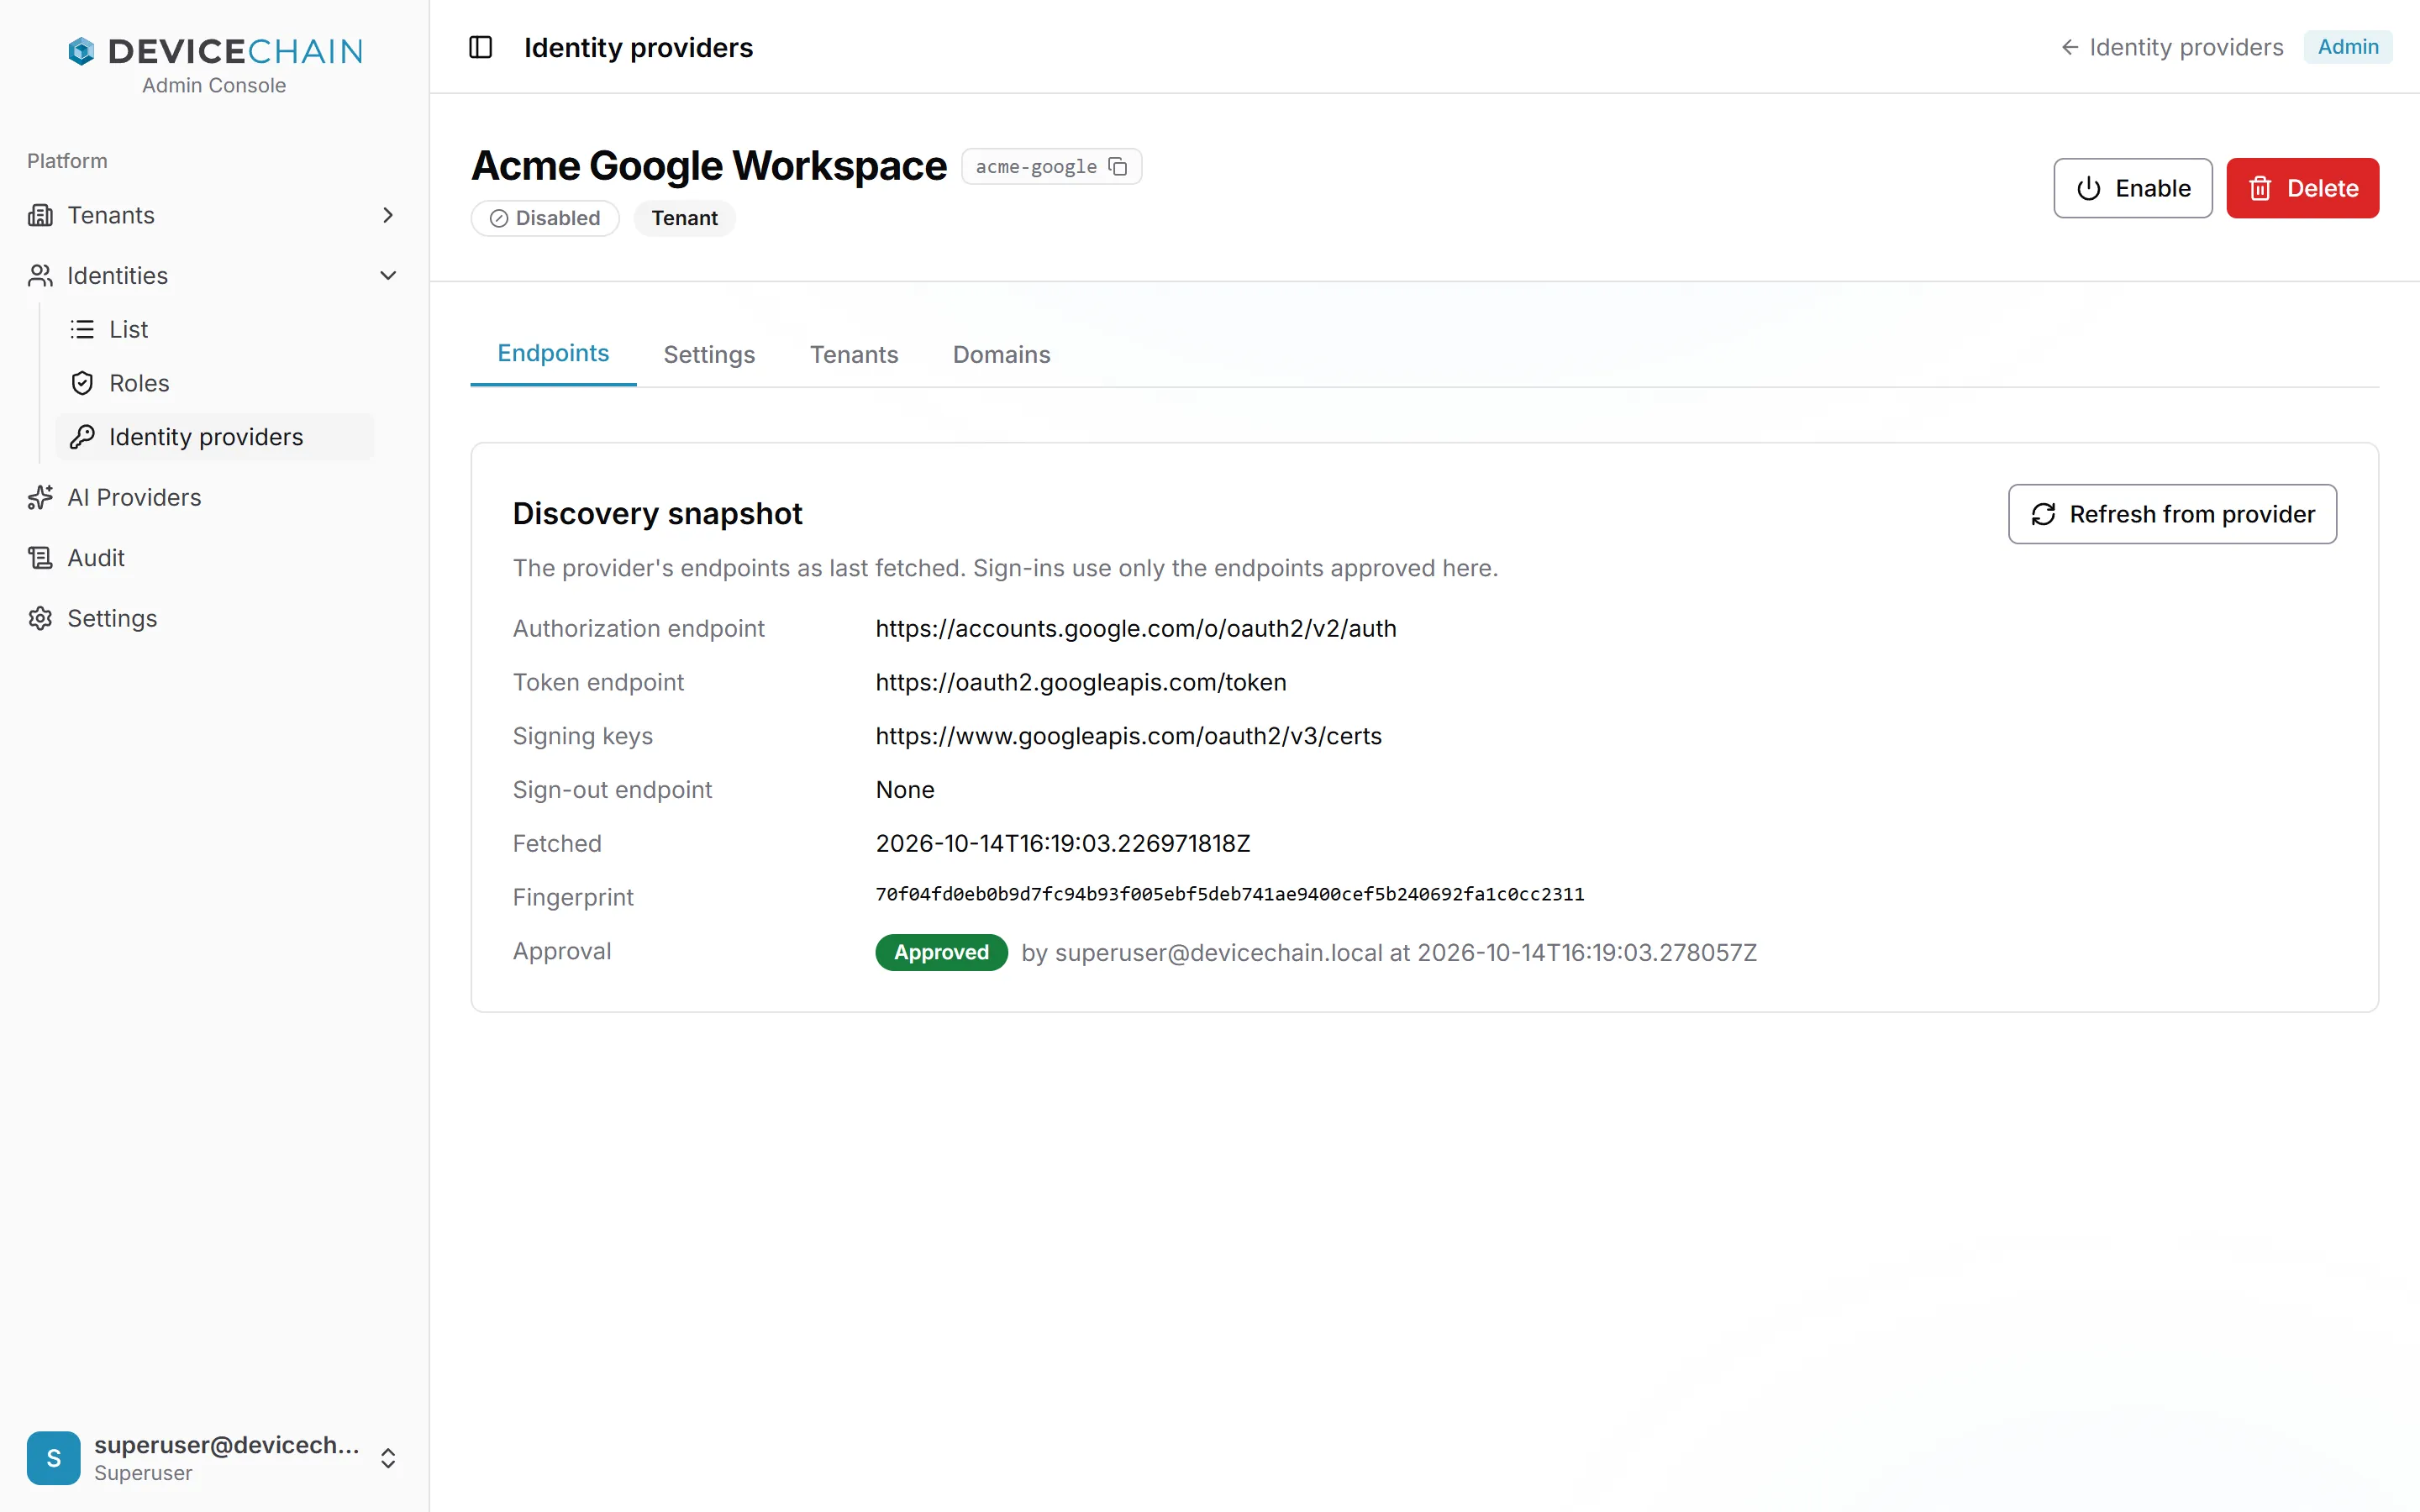
A connection's page has four tabs, with Enable (or Disable) and Delete at the top.
Endpoints shows the discovery snapshot: the provider's authorization, token, signing-key and sign-out endpoints as last fetched, with a fingerprint and the approval. Sign-ins use only the endpoints approved here. Until they are approved, the tab offers Approve endpoints, and Enable stays unavailable. Refresh from provider fetches them again; if they changed, the approval is withdrawn, sign-ins through the connection are refused, and you review and approve the new endpoints to resume.
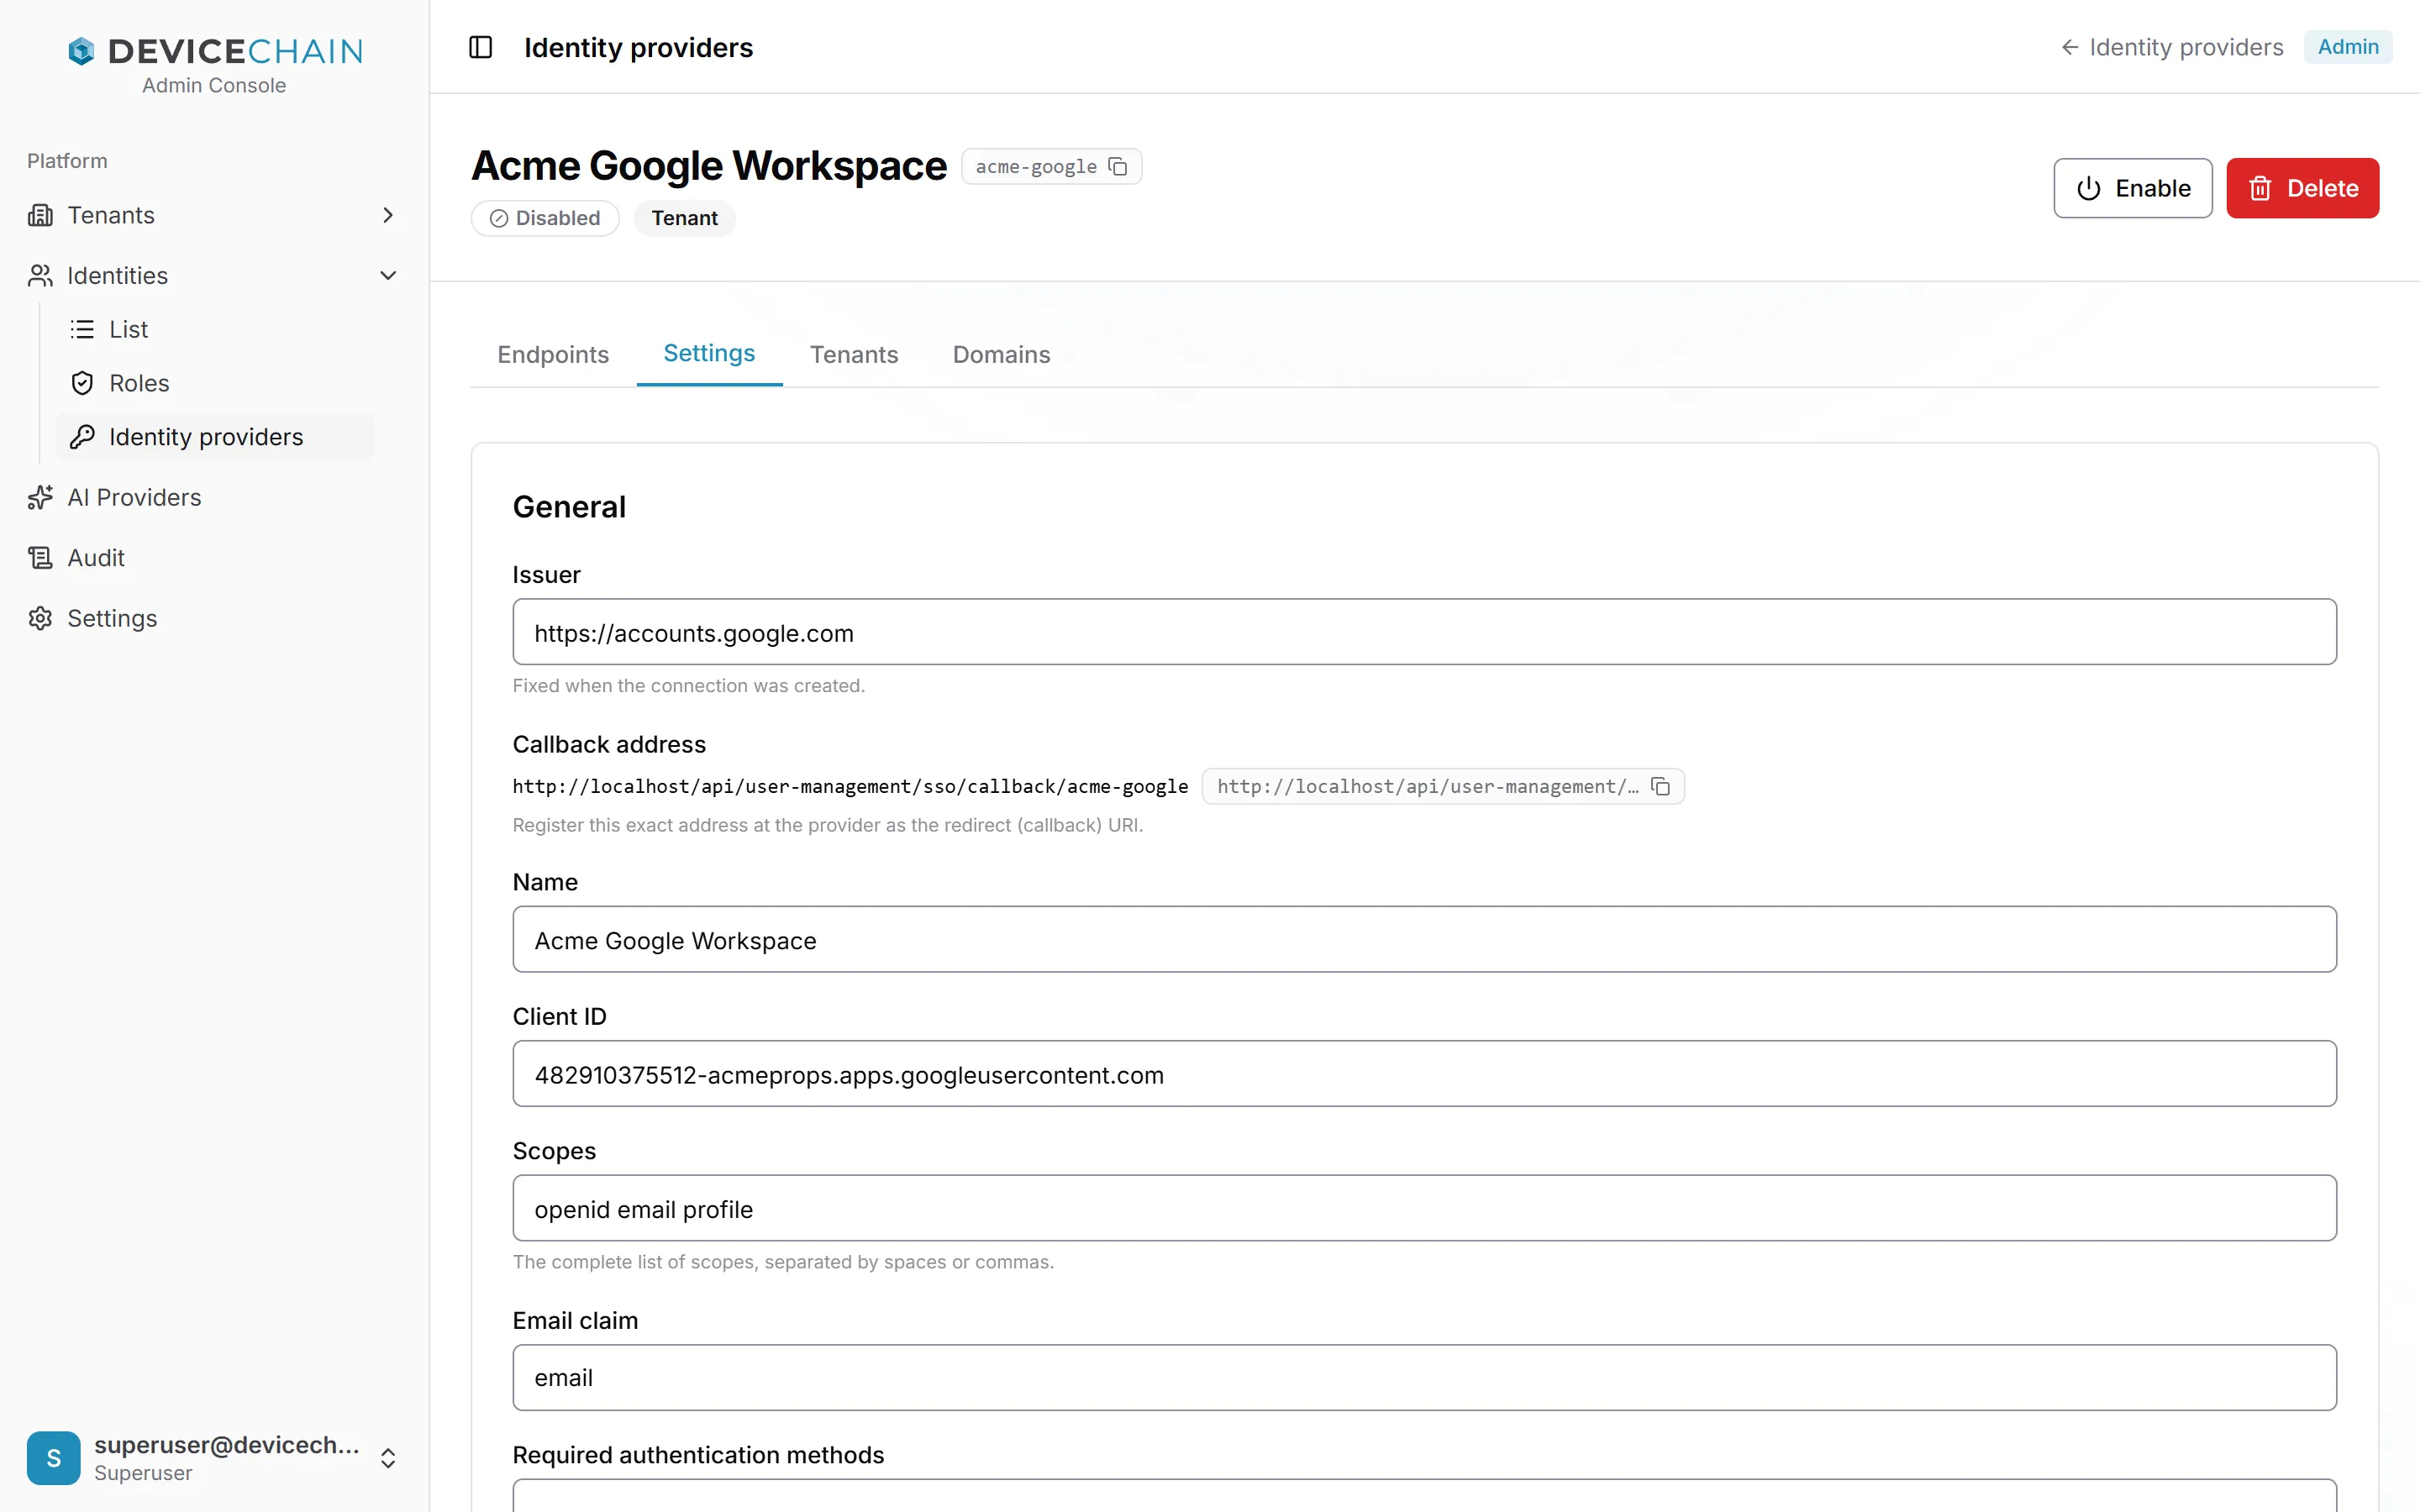
Settings edits the connection. Its General section shows the fixed issuer and the Callback address, which you register at the provider as the redirect URI, then the name, client ID, scopes, email claim and required authentication methods. Further sections handle the client secret, the required claims, the private CA, and whether signing out also signs people out at the provider.
The Private CA section is for a provider inside your network whose TLS certificate was signed by your own certificate authority. The certificates you add are trusted for this provider only, in addition to the system's trusted roots, and only certificates are accepted, never a private key. Verify and save bundle first reaches the provider with the new bundle, and saves nothing if its certificate does not chain to it. If the provider then names different endpoints, the approval is withdrawn and you review them again. Remove bundle goes back to the system's roots alone.
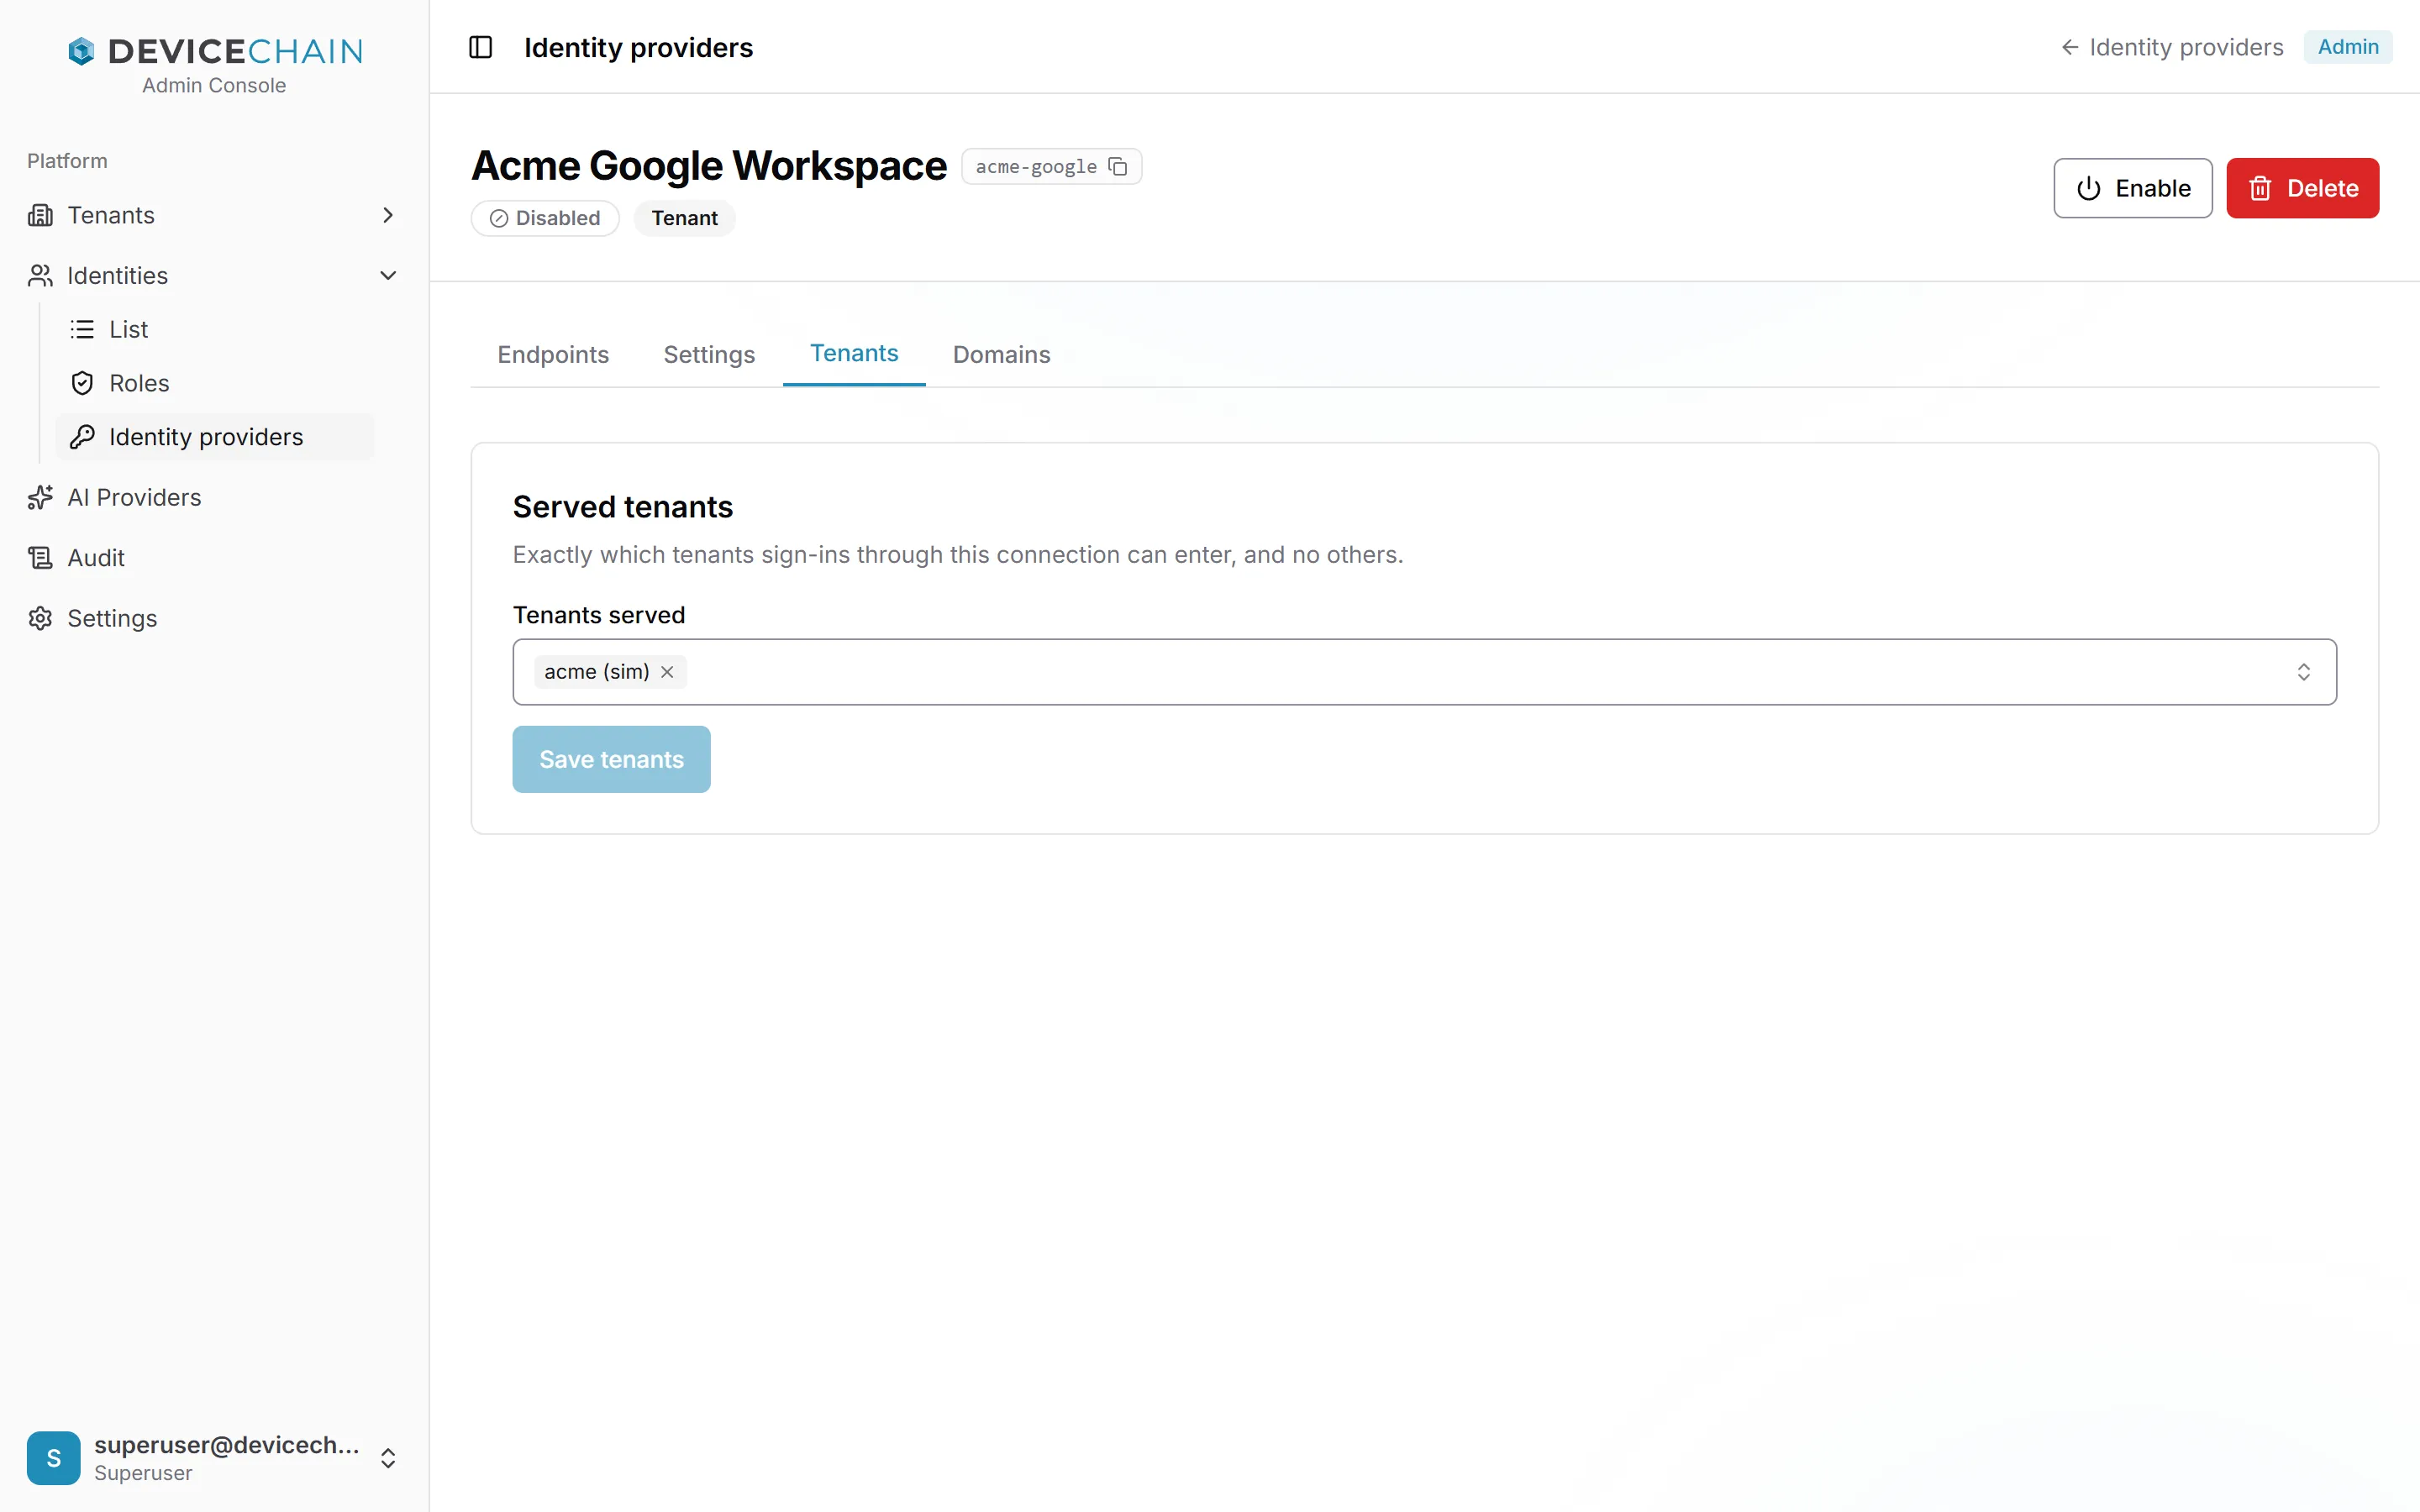
Tenants names exactly which tenants sign-ins through this connection can enter, and no others. Choose Save tenants after changing the list.
Domains lists the email domains this connection speaks for, who asserted each one and when. Add one under Add a domain, or Remove it. Freemail providers and public suffixes are refused, and a domain belongs to one connection only.
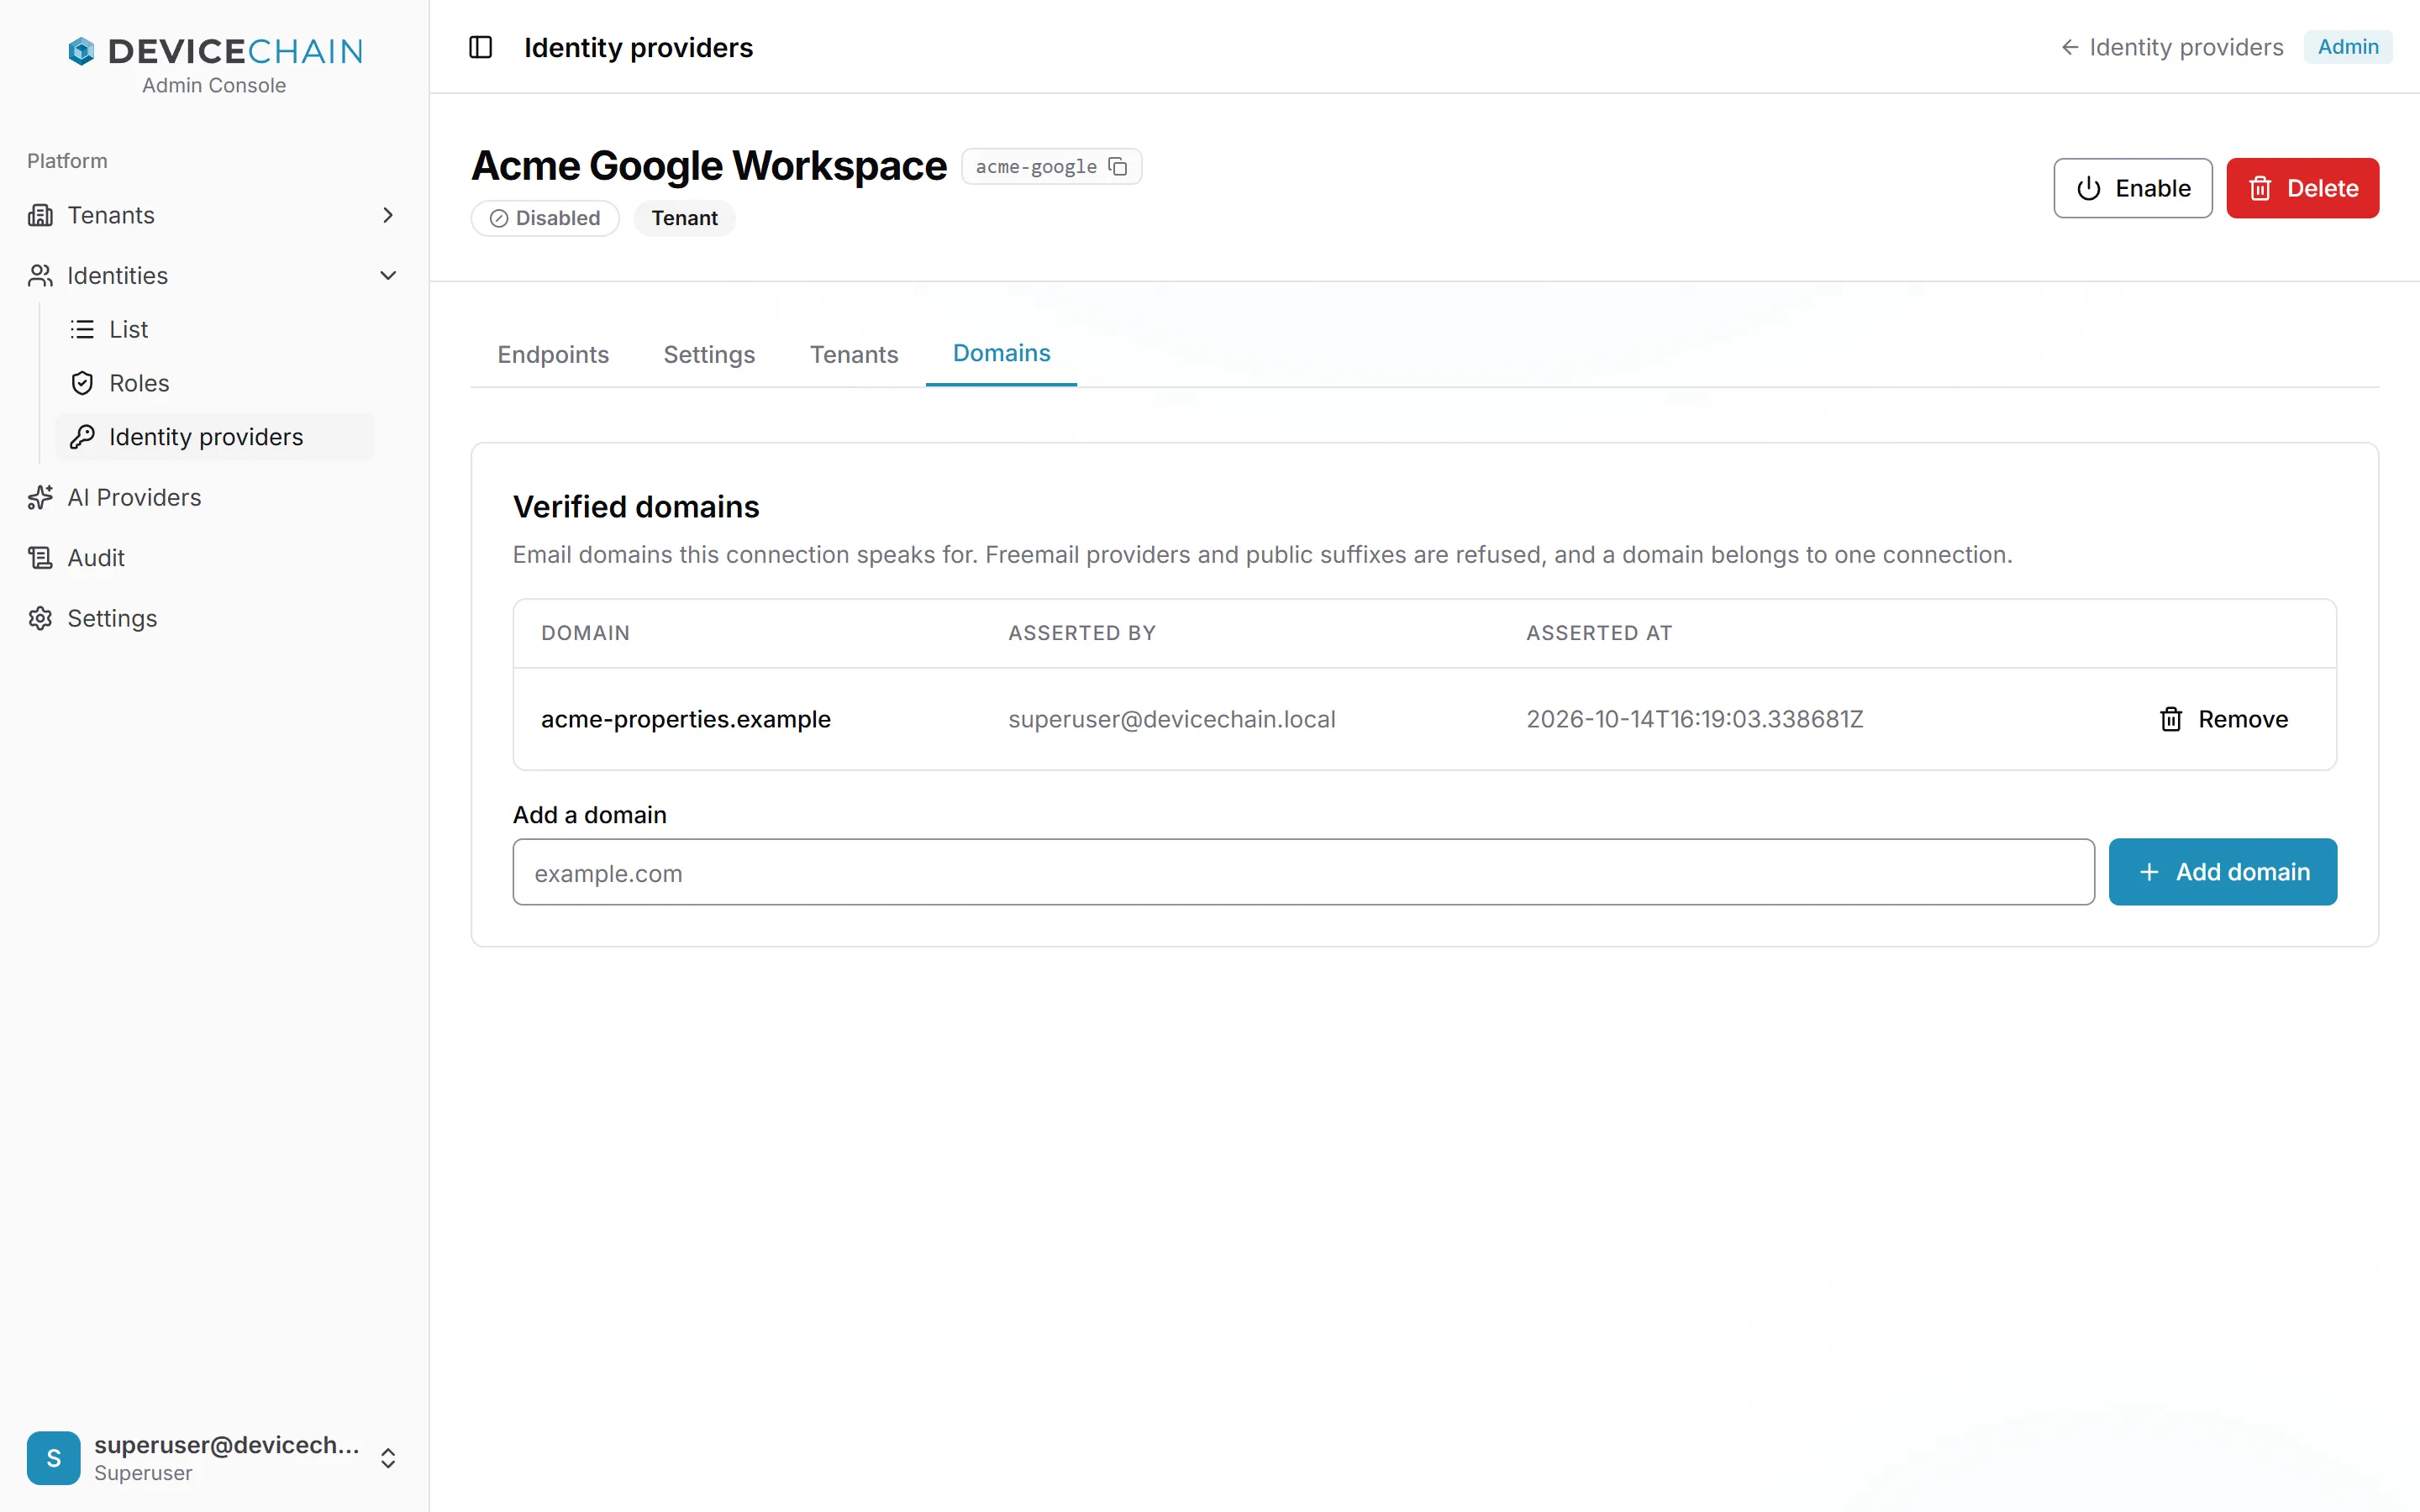
The connection in these screenshots is approved but still disabled, so nobody can sign in through it yet. For the whole setup, step by step, see Configure single sign-on, and for how it behaves, Single sign-on.
AI providers
AI Providers registers the AI models the instance can use for drafting detection rules in plain language. Each provider has a kind, a model, an API key and, where needed, an endpoint. The key is write-only: it is never shown again. A provider's page has Basic, Connection and Test tabs, and Test provider runs a prompt through it to check the connection. Registering a provider offers it to nobody: you grant it to a tier, under Packaging, to put it on those tenants' menu.
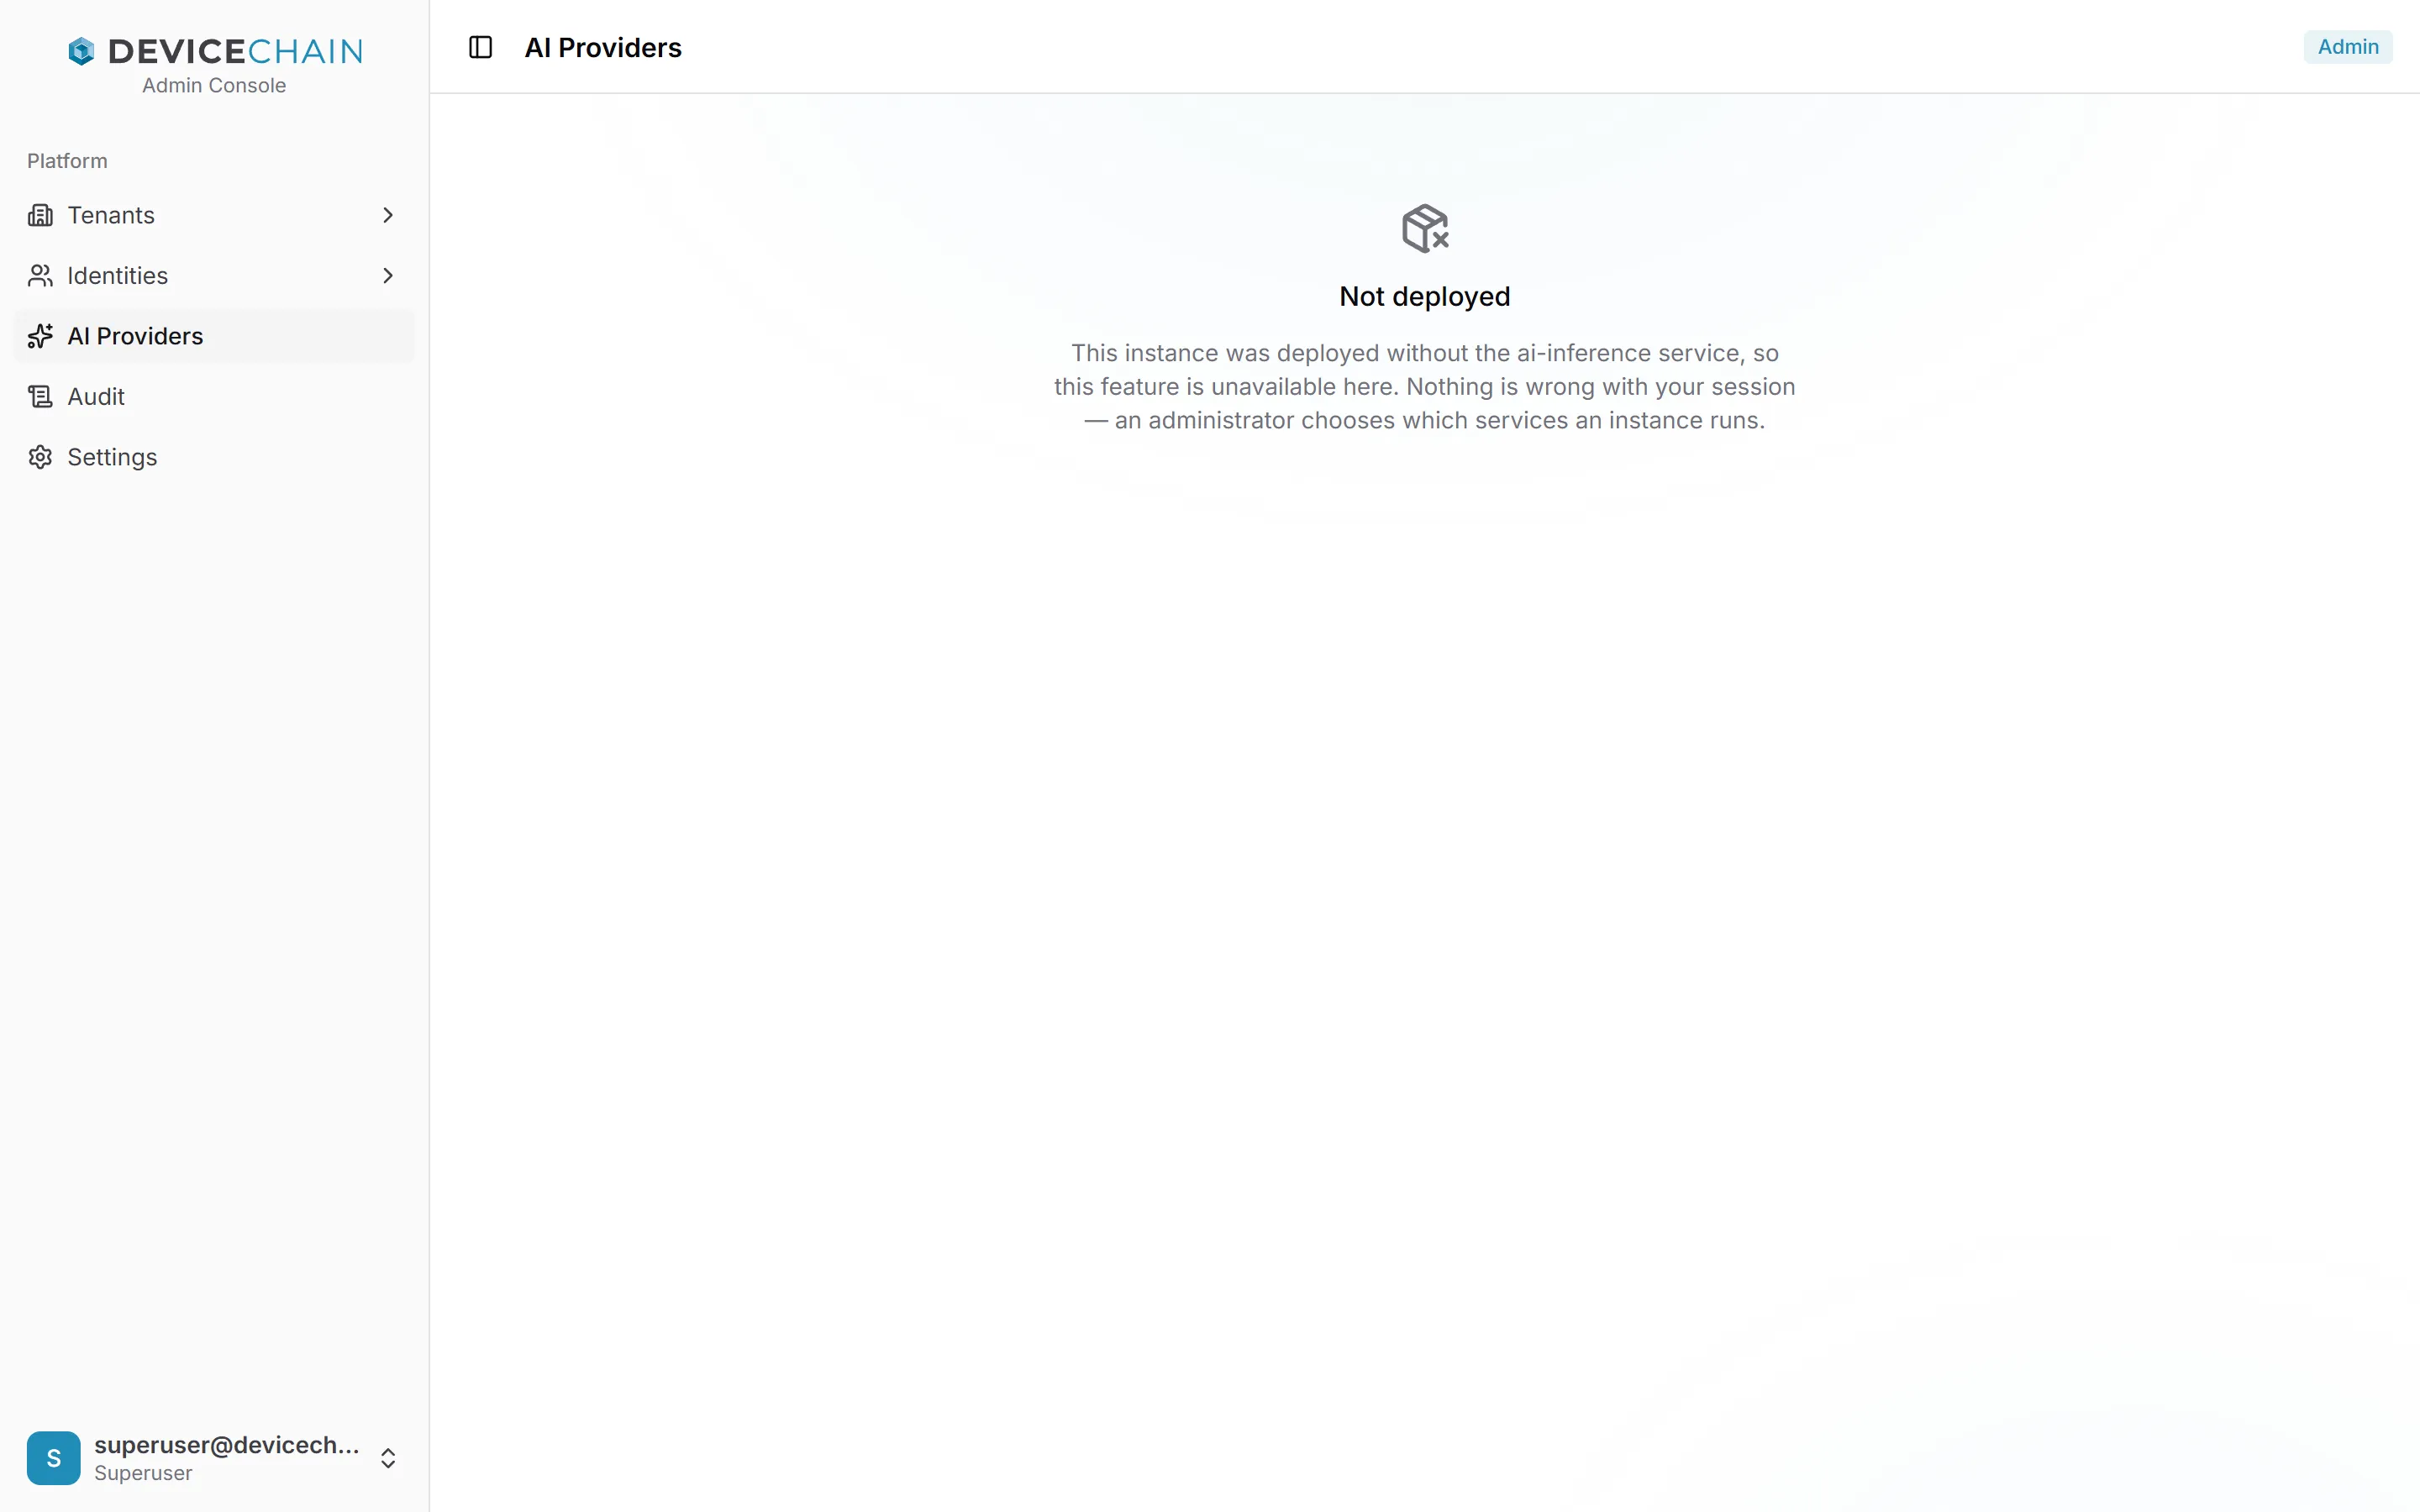
The AI providers screens need the optional AI service. The instance in these screenshots does not run it, so the page reports the area as not deployed:
See AI providers.
Instance audit
Audit is the instance-wide journal. It records sign-ins, failed sign-ins and session refreshes (the Auth category), and changes to identities, roles, tenants and identity providers (the Mutation category), across every tenant. Each row shows the time, category, actor, operation, tenant and target.
Filter with All tenants (a tenant whose deletion has completed is listed too, with the date, so its journal stays reachable), All categories and Filter by actor…. Export CSV downloads everything that matches, the same way as the tenant Audit export.
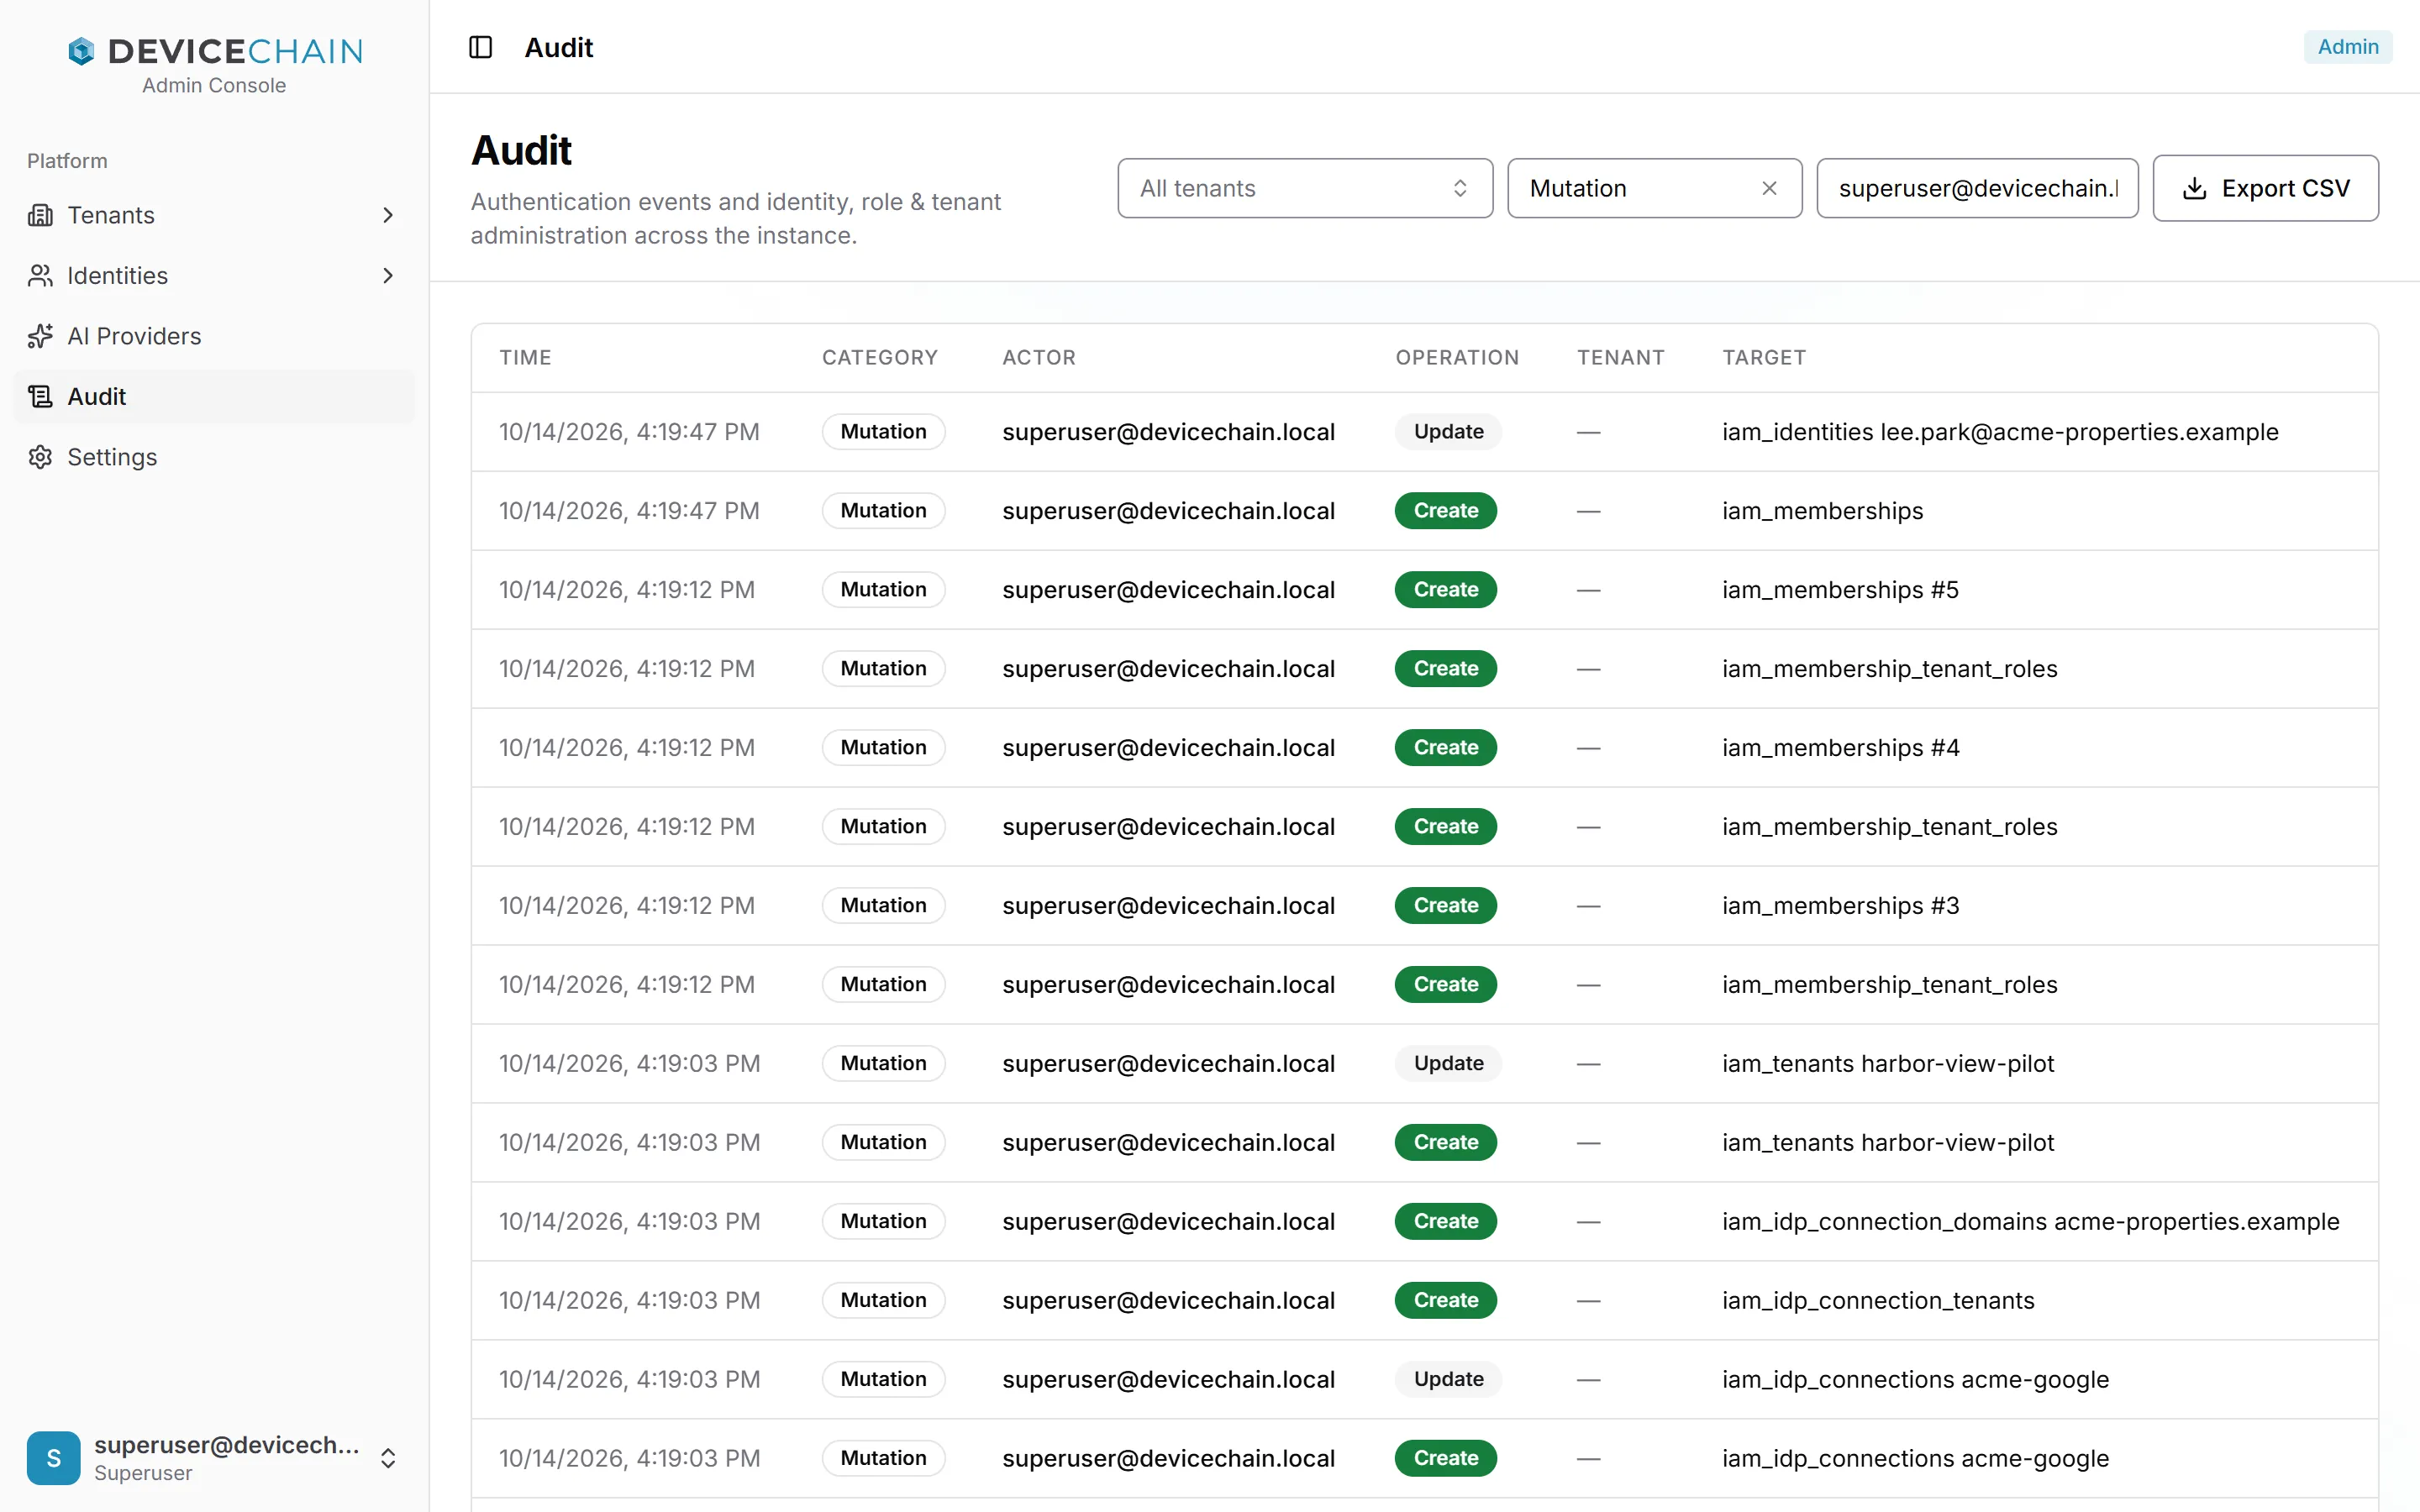
The screenshot is filtered to the operator's own changes. Unfiltered, the journal is mostly sign-ins.
Settings
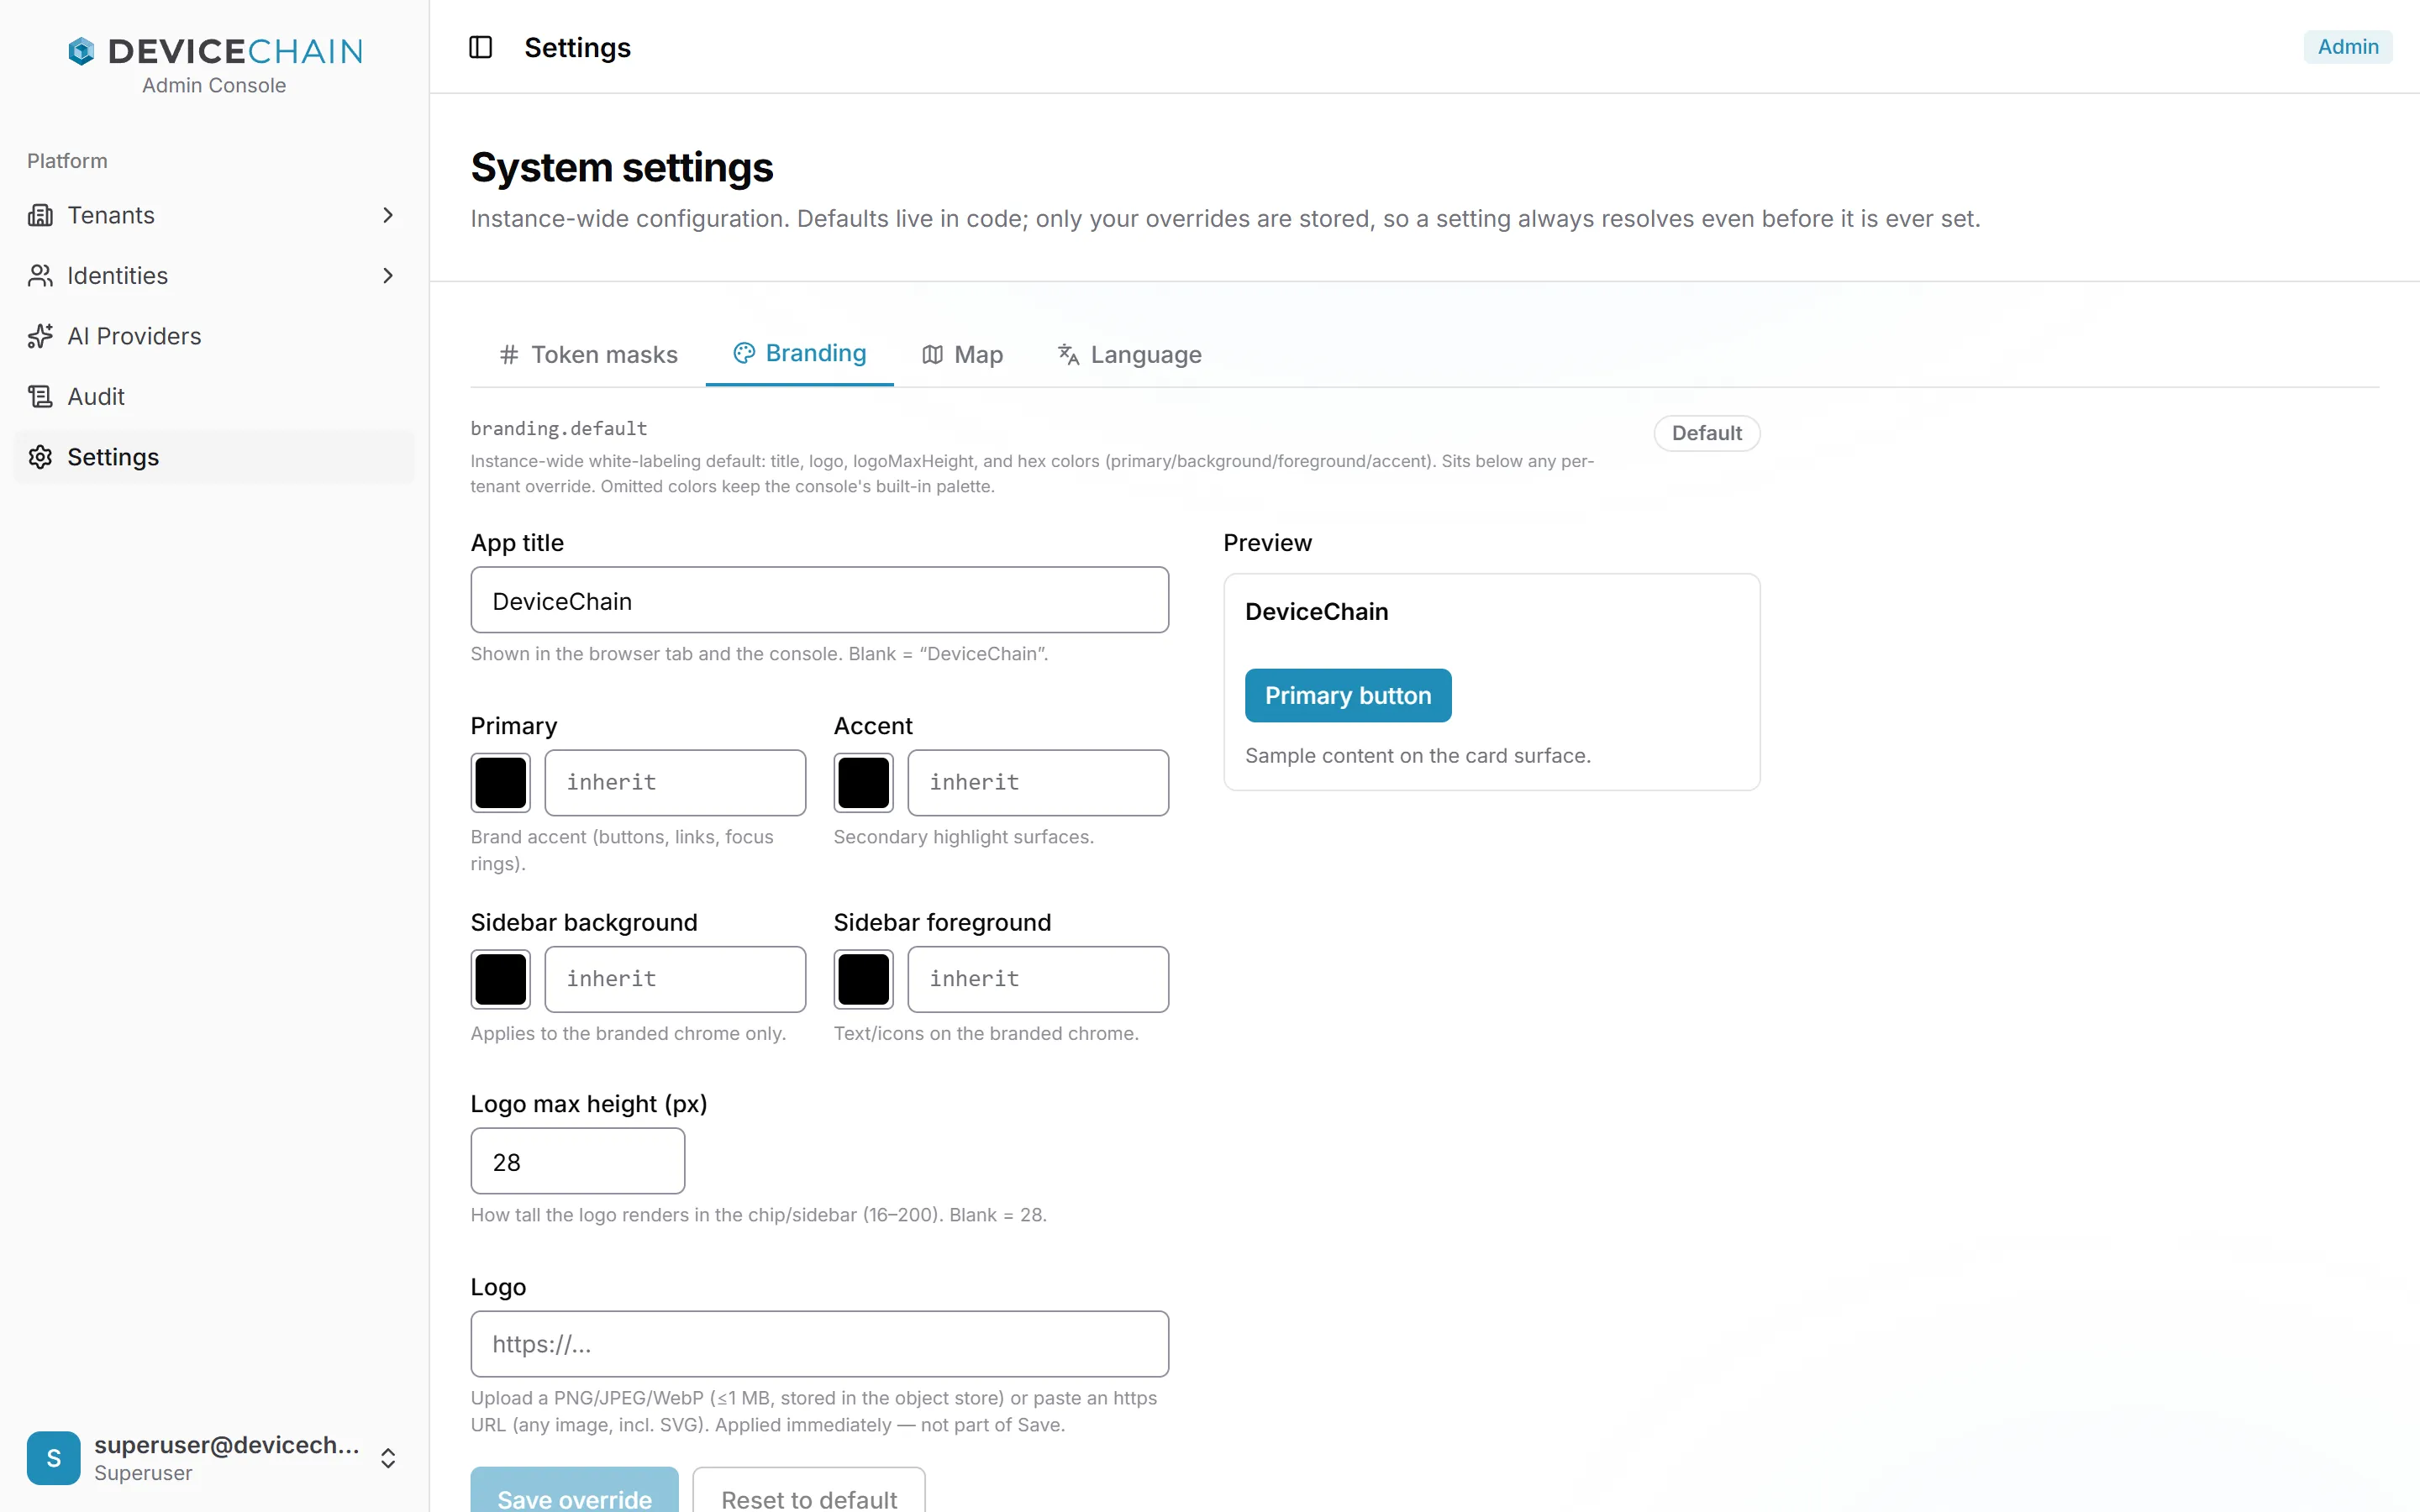
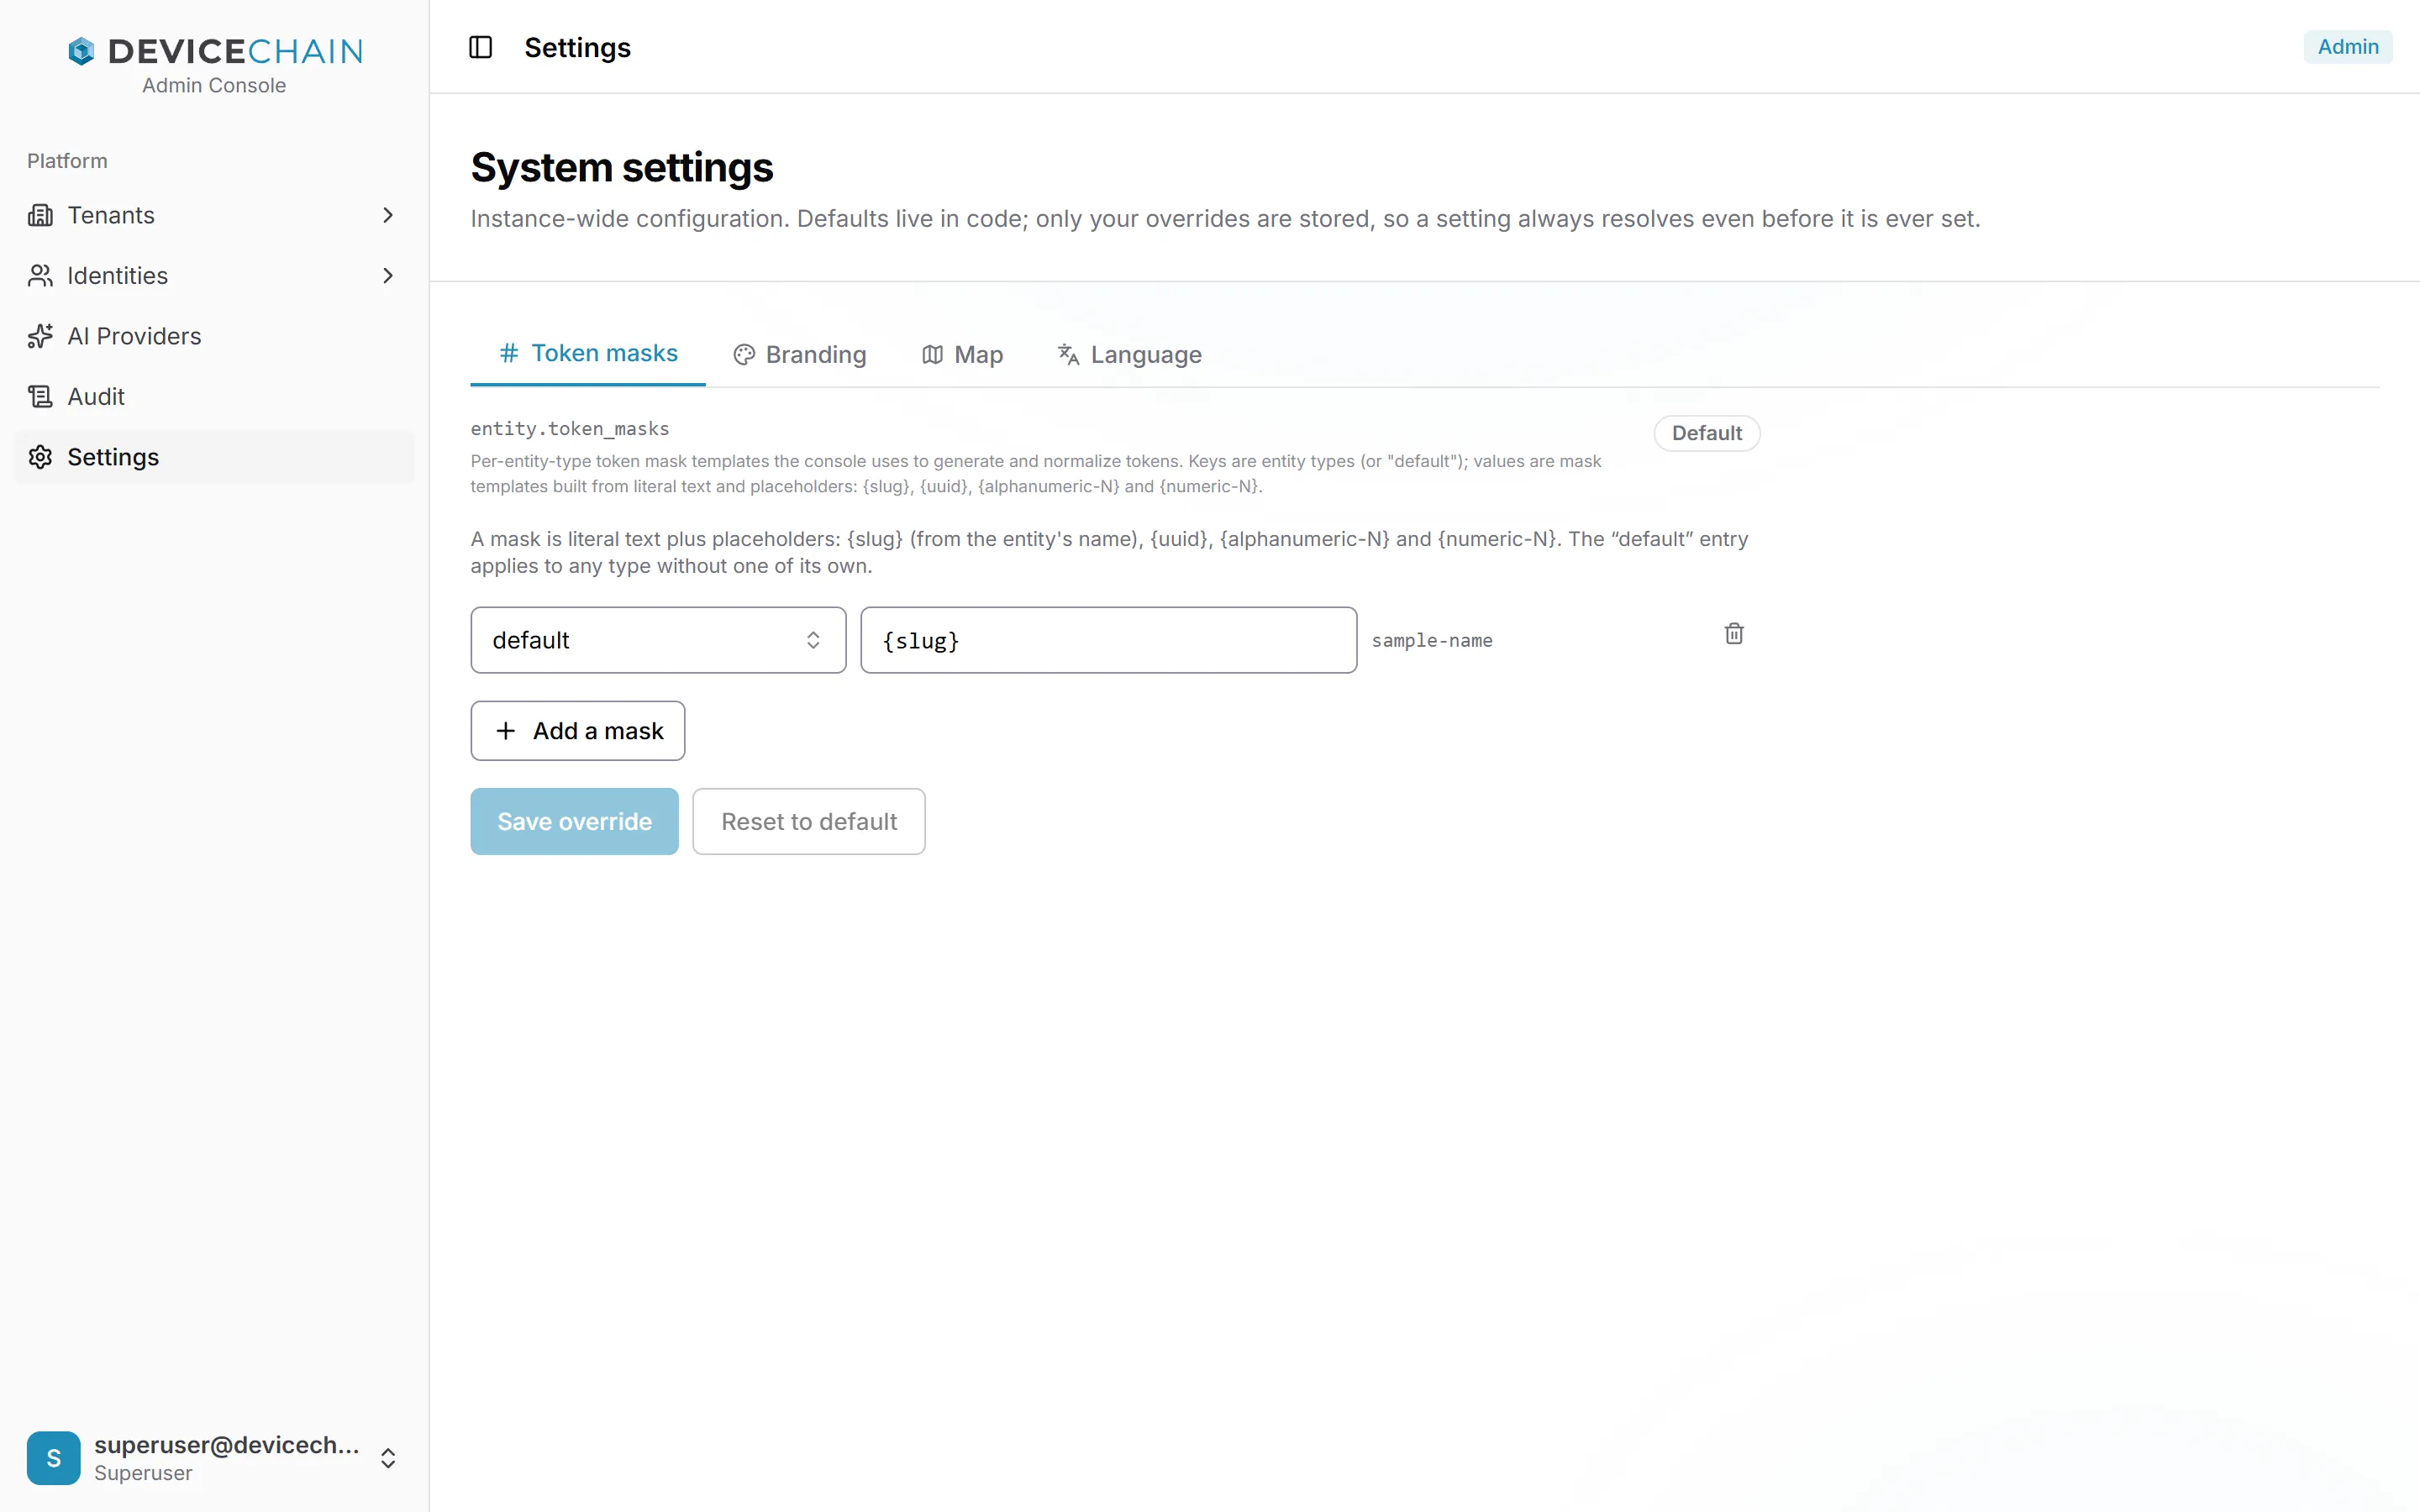
Settings holds the instance-wide settings, each on its own tab. Defaults live in the platform's code, and only your overrides are stored, so each tab shows a Default or Overridden badge. Save override stores your value; Reset to default removes it.
Branding sets the default app title, colours, logo height and logo every tenant gets unless it sets its own, with a live preview. The logo here is an https address, saved with the rest by Save override. See White-labeling.
Token masks sets how the console generates tokens for new records. A mask is literal text plus
placeholders: {slug} (from the record's name), {uuid}, {alphanumeric-N} and {numeric-N}.
The default entry applies to any type without a mask of its own, and each row previews a sample
token. Add a mask adds a row for one entity type. See
Token masks.
Map sets the basemap every tenant starts with (Basemaps), and Language sets the language the console opens in when a tenant has set none (Default language). Tenant administrators can override the branding, map and language for their own tenant; see Tenant settings.
Related
- Multi-tenancy: how tenants are kept apart on one shared installation.
- Tenant tiers and Governance and quotas: what a tier packages and how limits resolve.
- Tenant deletion: what a deletion erases, keeps, and how long it takes.
- Single sign-on and Configure single sign-on.
- System settings: the instance-wide defaults.