Devices
A device is one physical thing that connects to DeviceChain and reports data: a thermostat, a meter, a tracker. This chapter covers the device list, the ways to add devices (one at a time, in bulk, or from a CSV file), exporting the list, disabling a device, and every tab of a device's page.
It is for tenant users and administrators who register and look after devices. Every device belongs to a device type, so you need at least one device type before you can add a device. Device types are covered in the next chapter.
The device list
Open Devices in the sidebar, then Devices in its sub-menu.
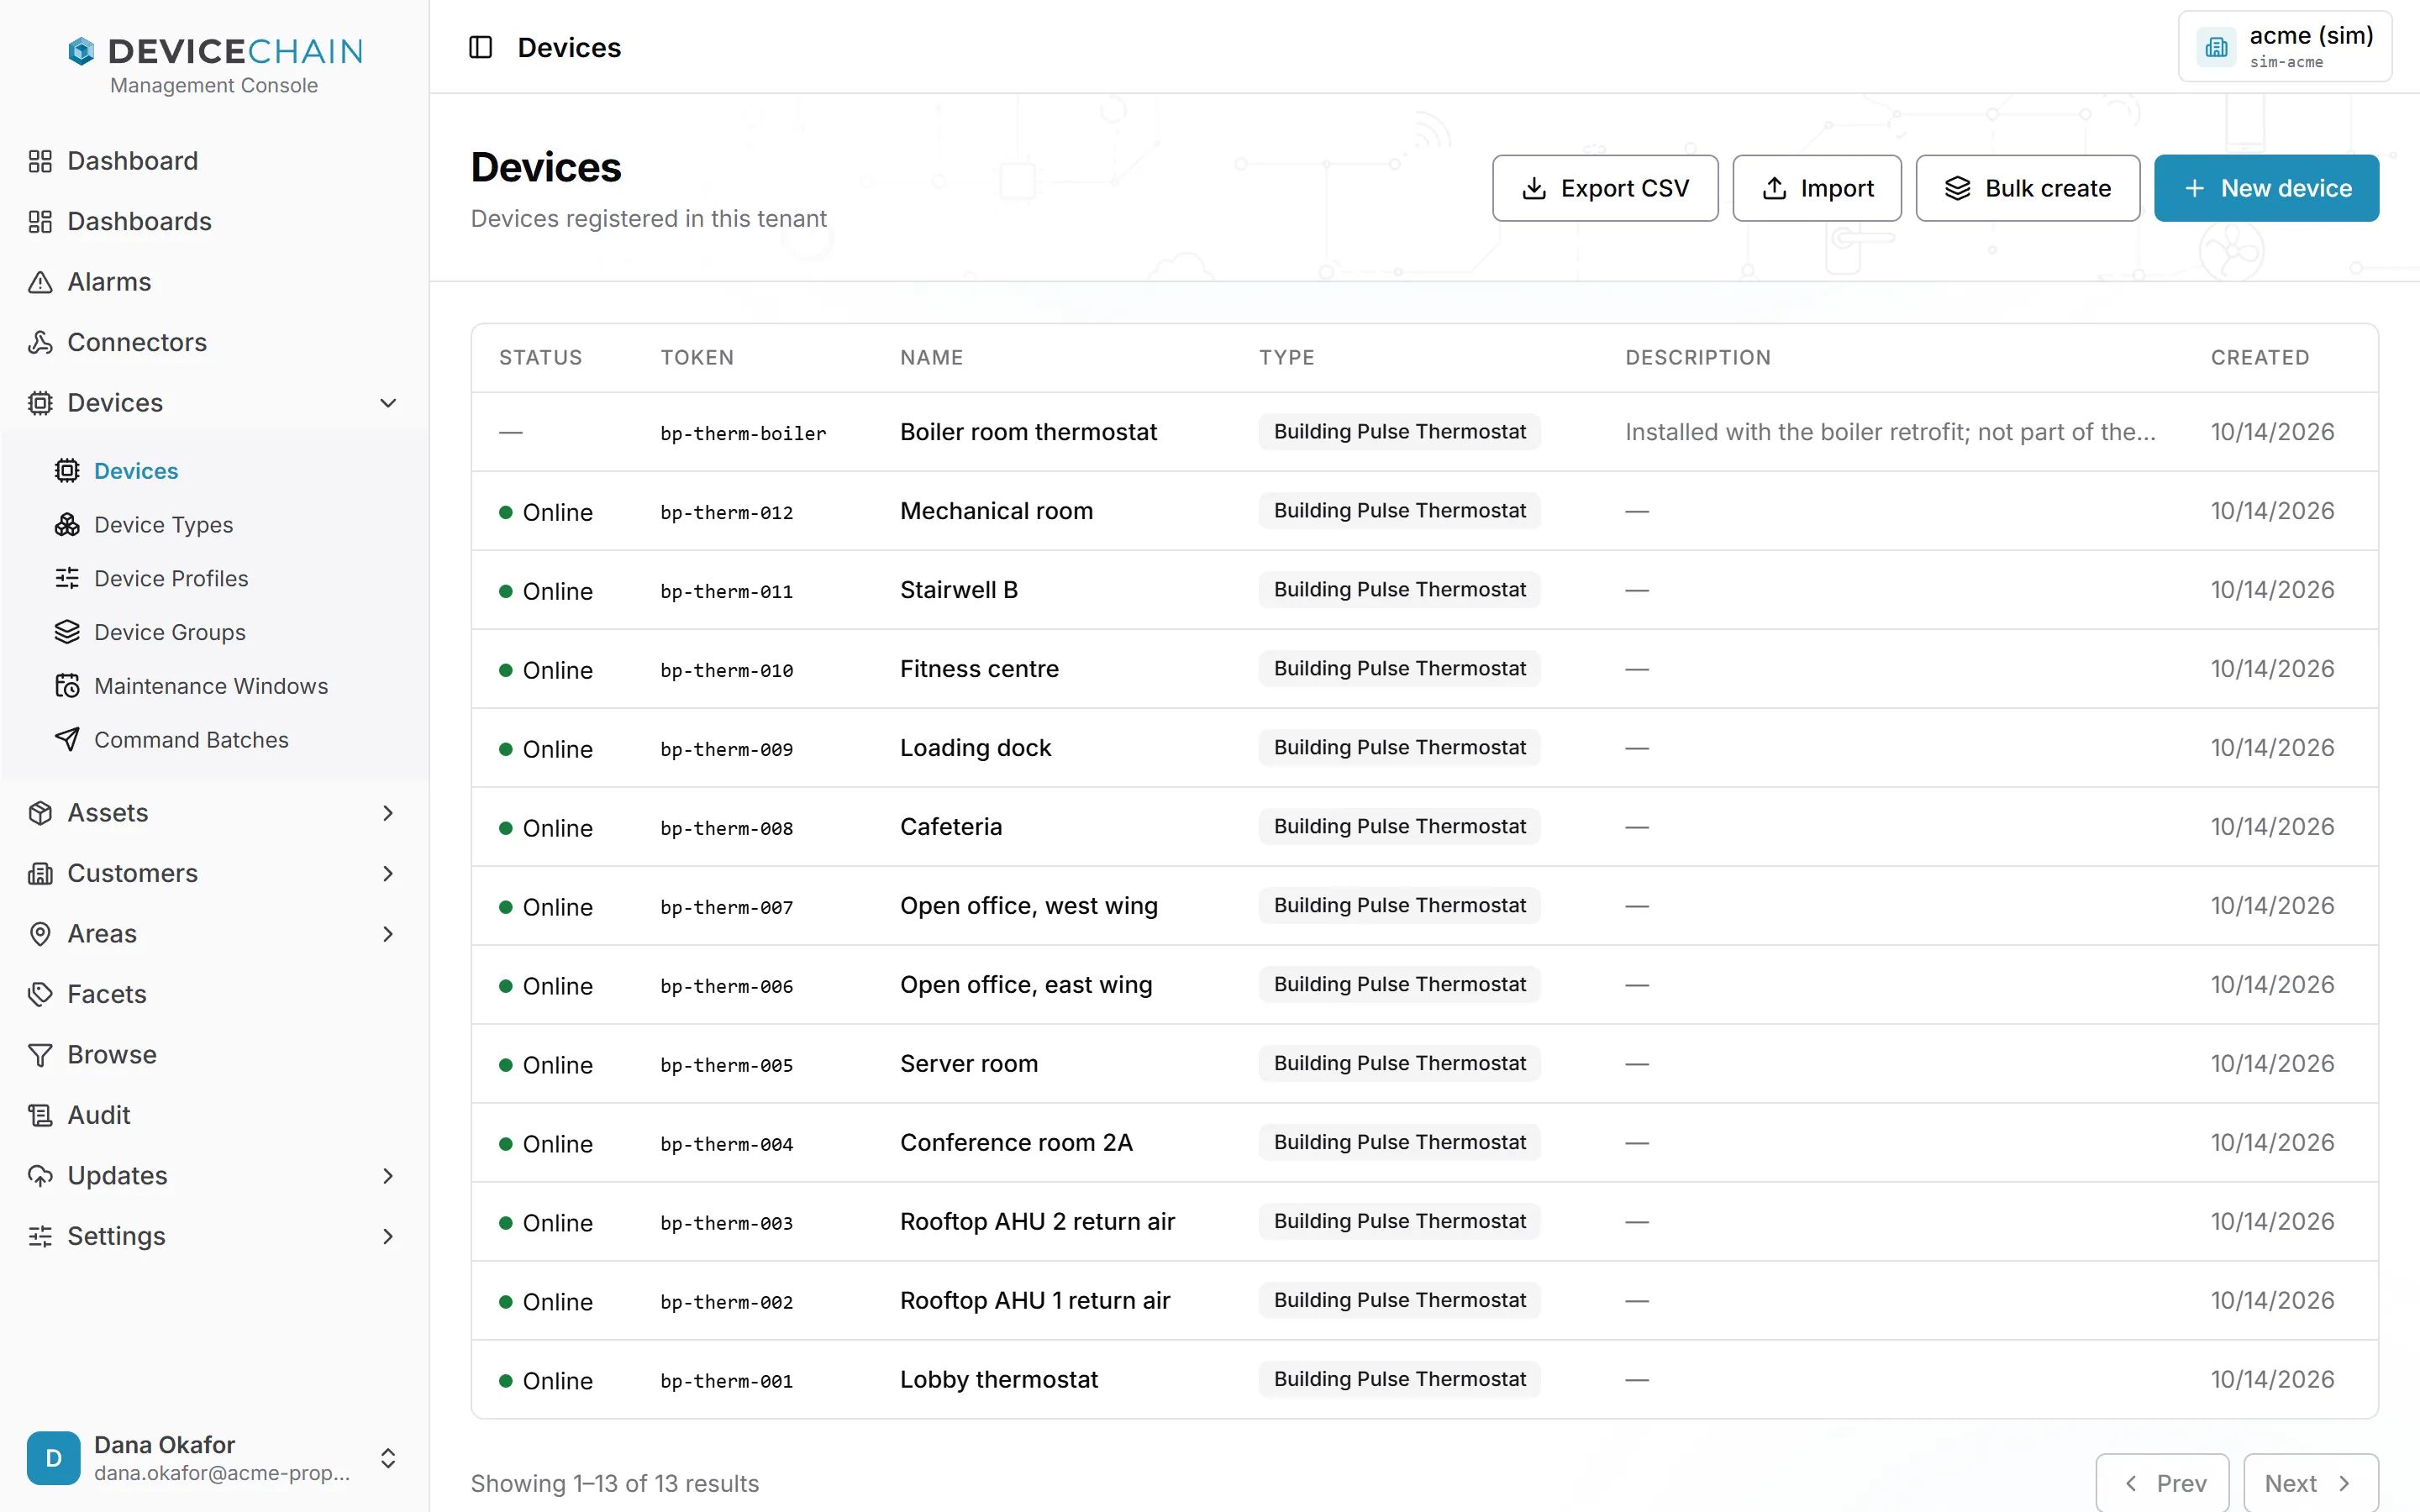
The list shows 20 devices per page. Select a row to open that device's page. The columns are:
- Status: whether the device is connected right now. Online means it is connected or has reported recently. Disconnected means its connection reported that it went away. Offline means it has simply not been heard from for a while. A dash means nothing is known yet: the device has never reported, or you are not allowed to see its state.
- Token: the device's unique id in this tenant. It cannot change.
- Name: a readable name. A disabled device has a Disabled badge next to its name.
- Type: the device type, in the colors and icon the type was given.
- Description and Created.
How DeviceChain decides whether a device is online is explained in Device presence.
Adding one device
Choose New device.
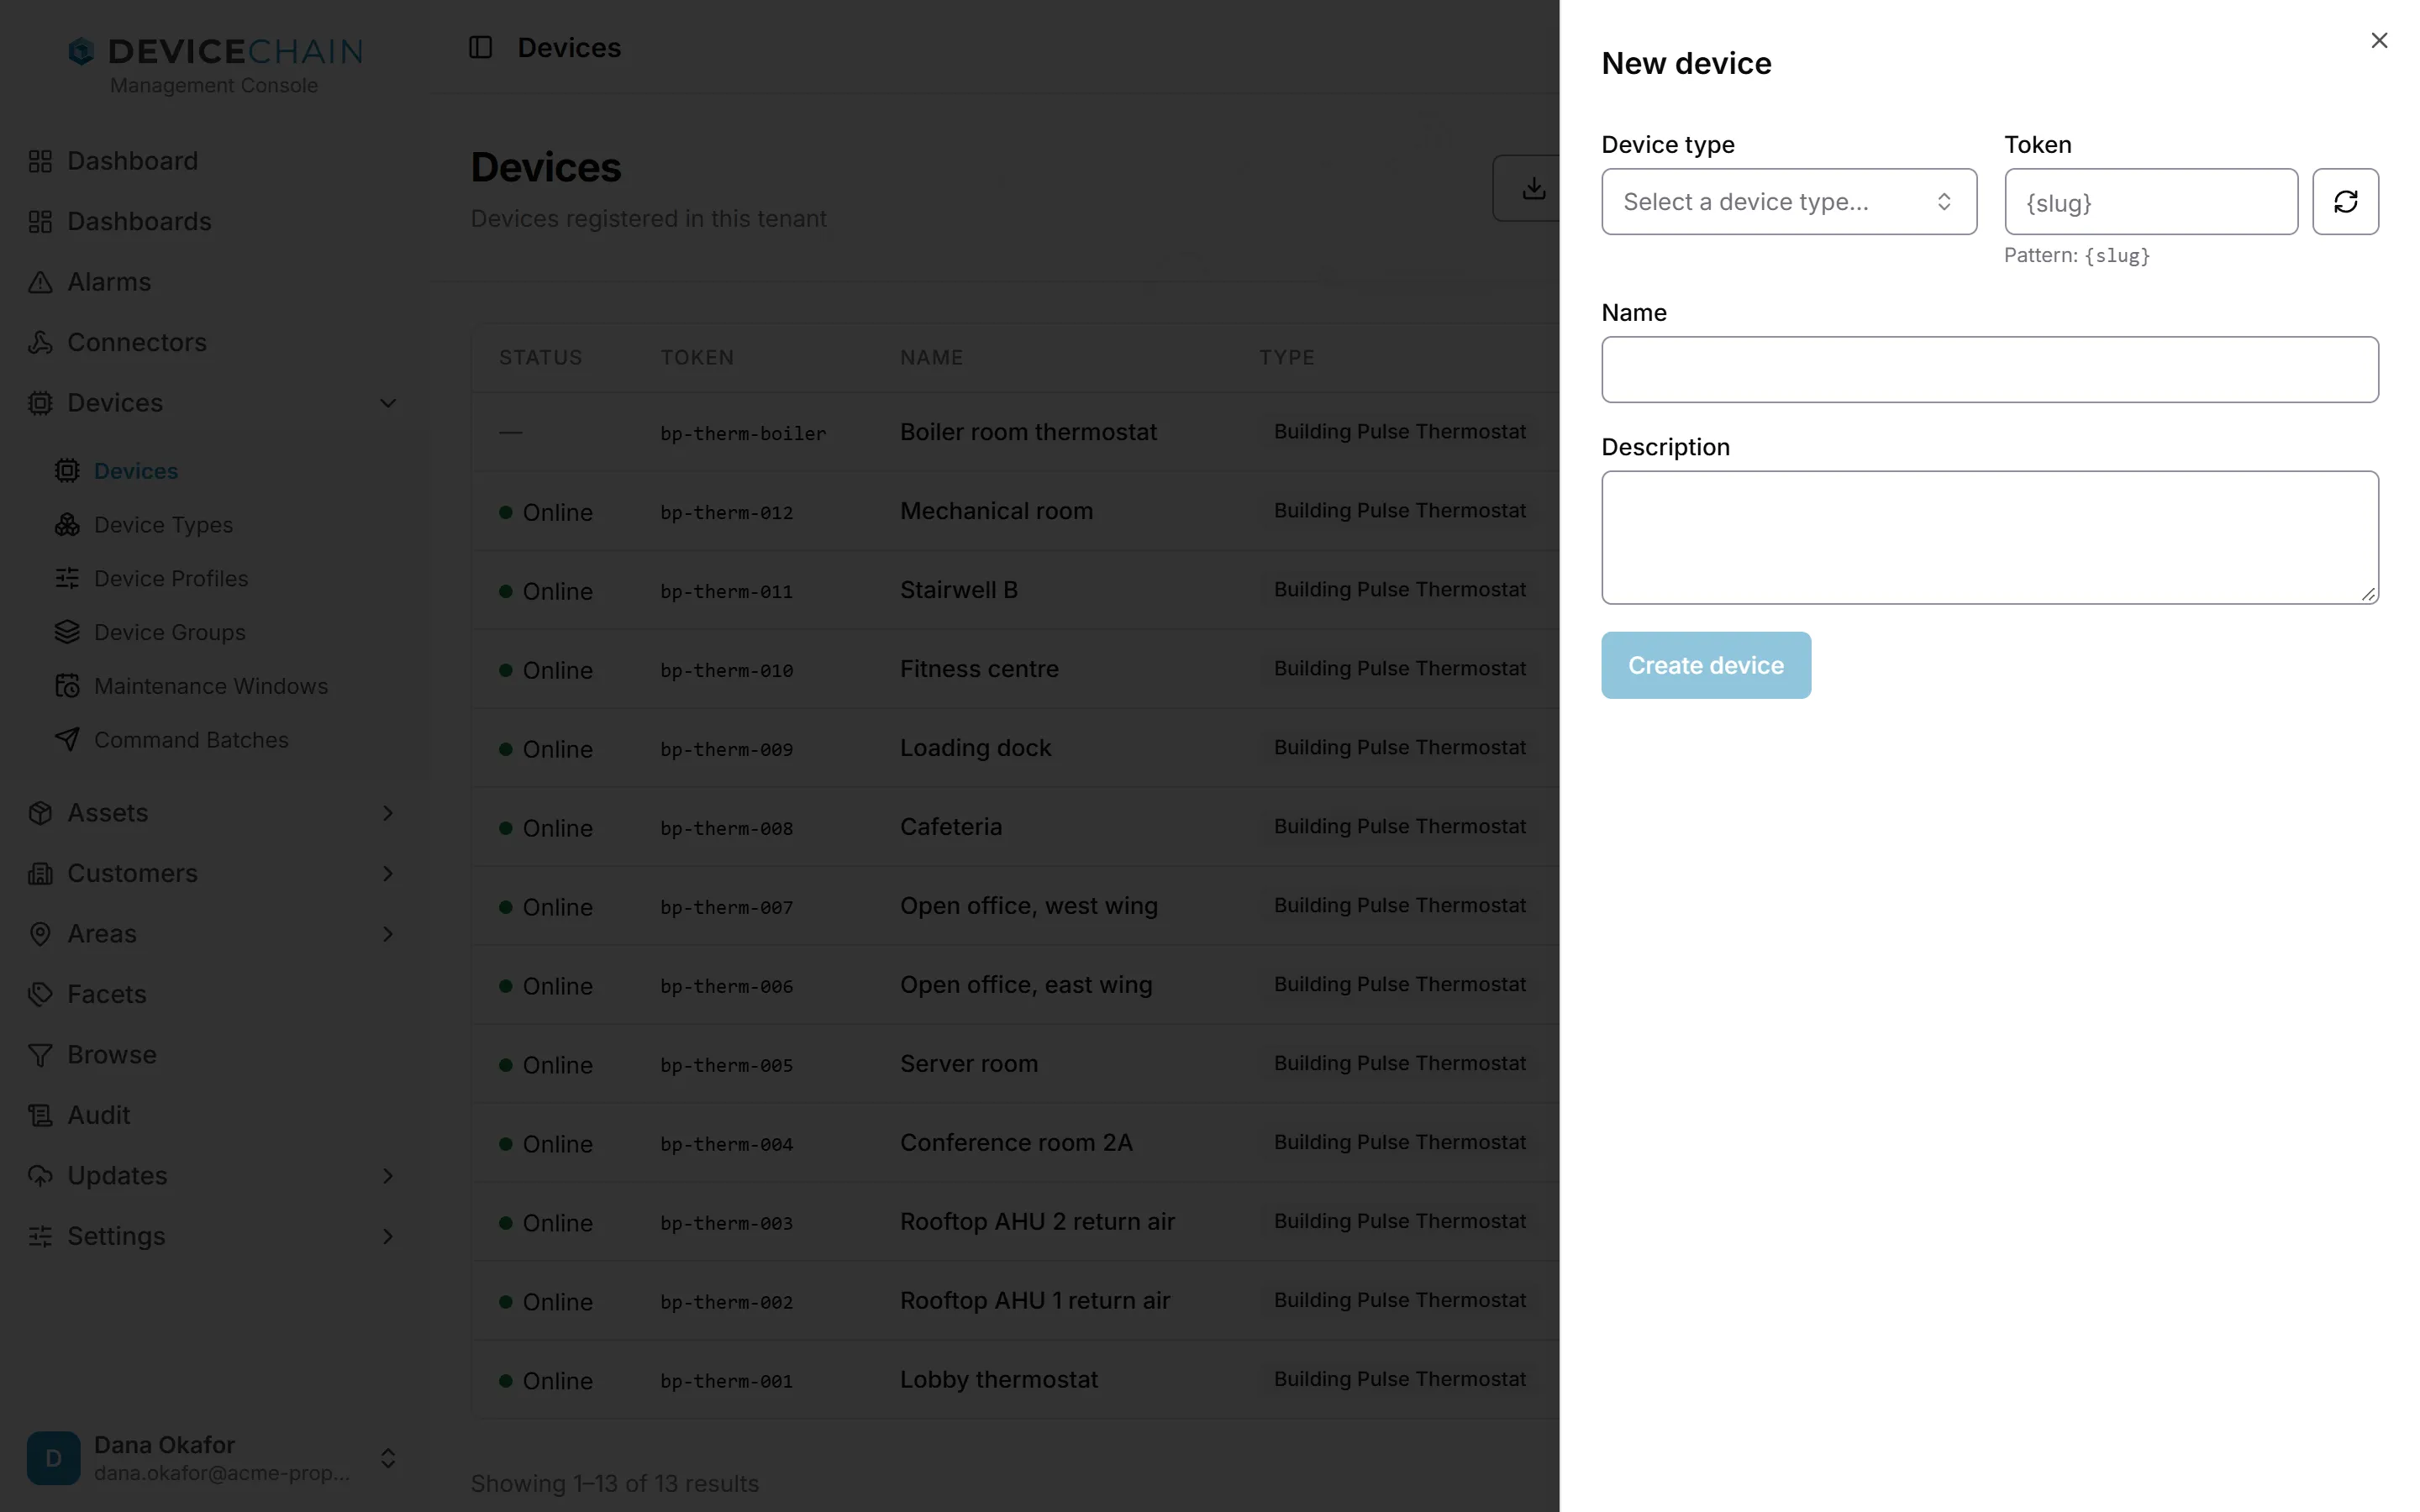
- Choose the Device type.
- Enter a Token, or use the button next to the field to generate one from your
installation's token pattern. The pattern is shown under the field.
{slug}is filled in from the name you enter. - Enter a Name and, if you like, a Description.
- Choose Create device.
A new device cannot report anything until it has a credential. Add one from its Credentials tab.
Creating many devices at once
Bulk create makes a batch of devices of the same type, numbered in sequence.
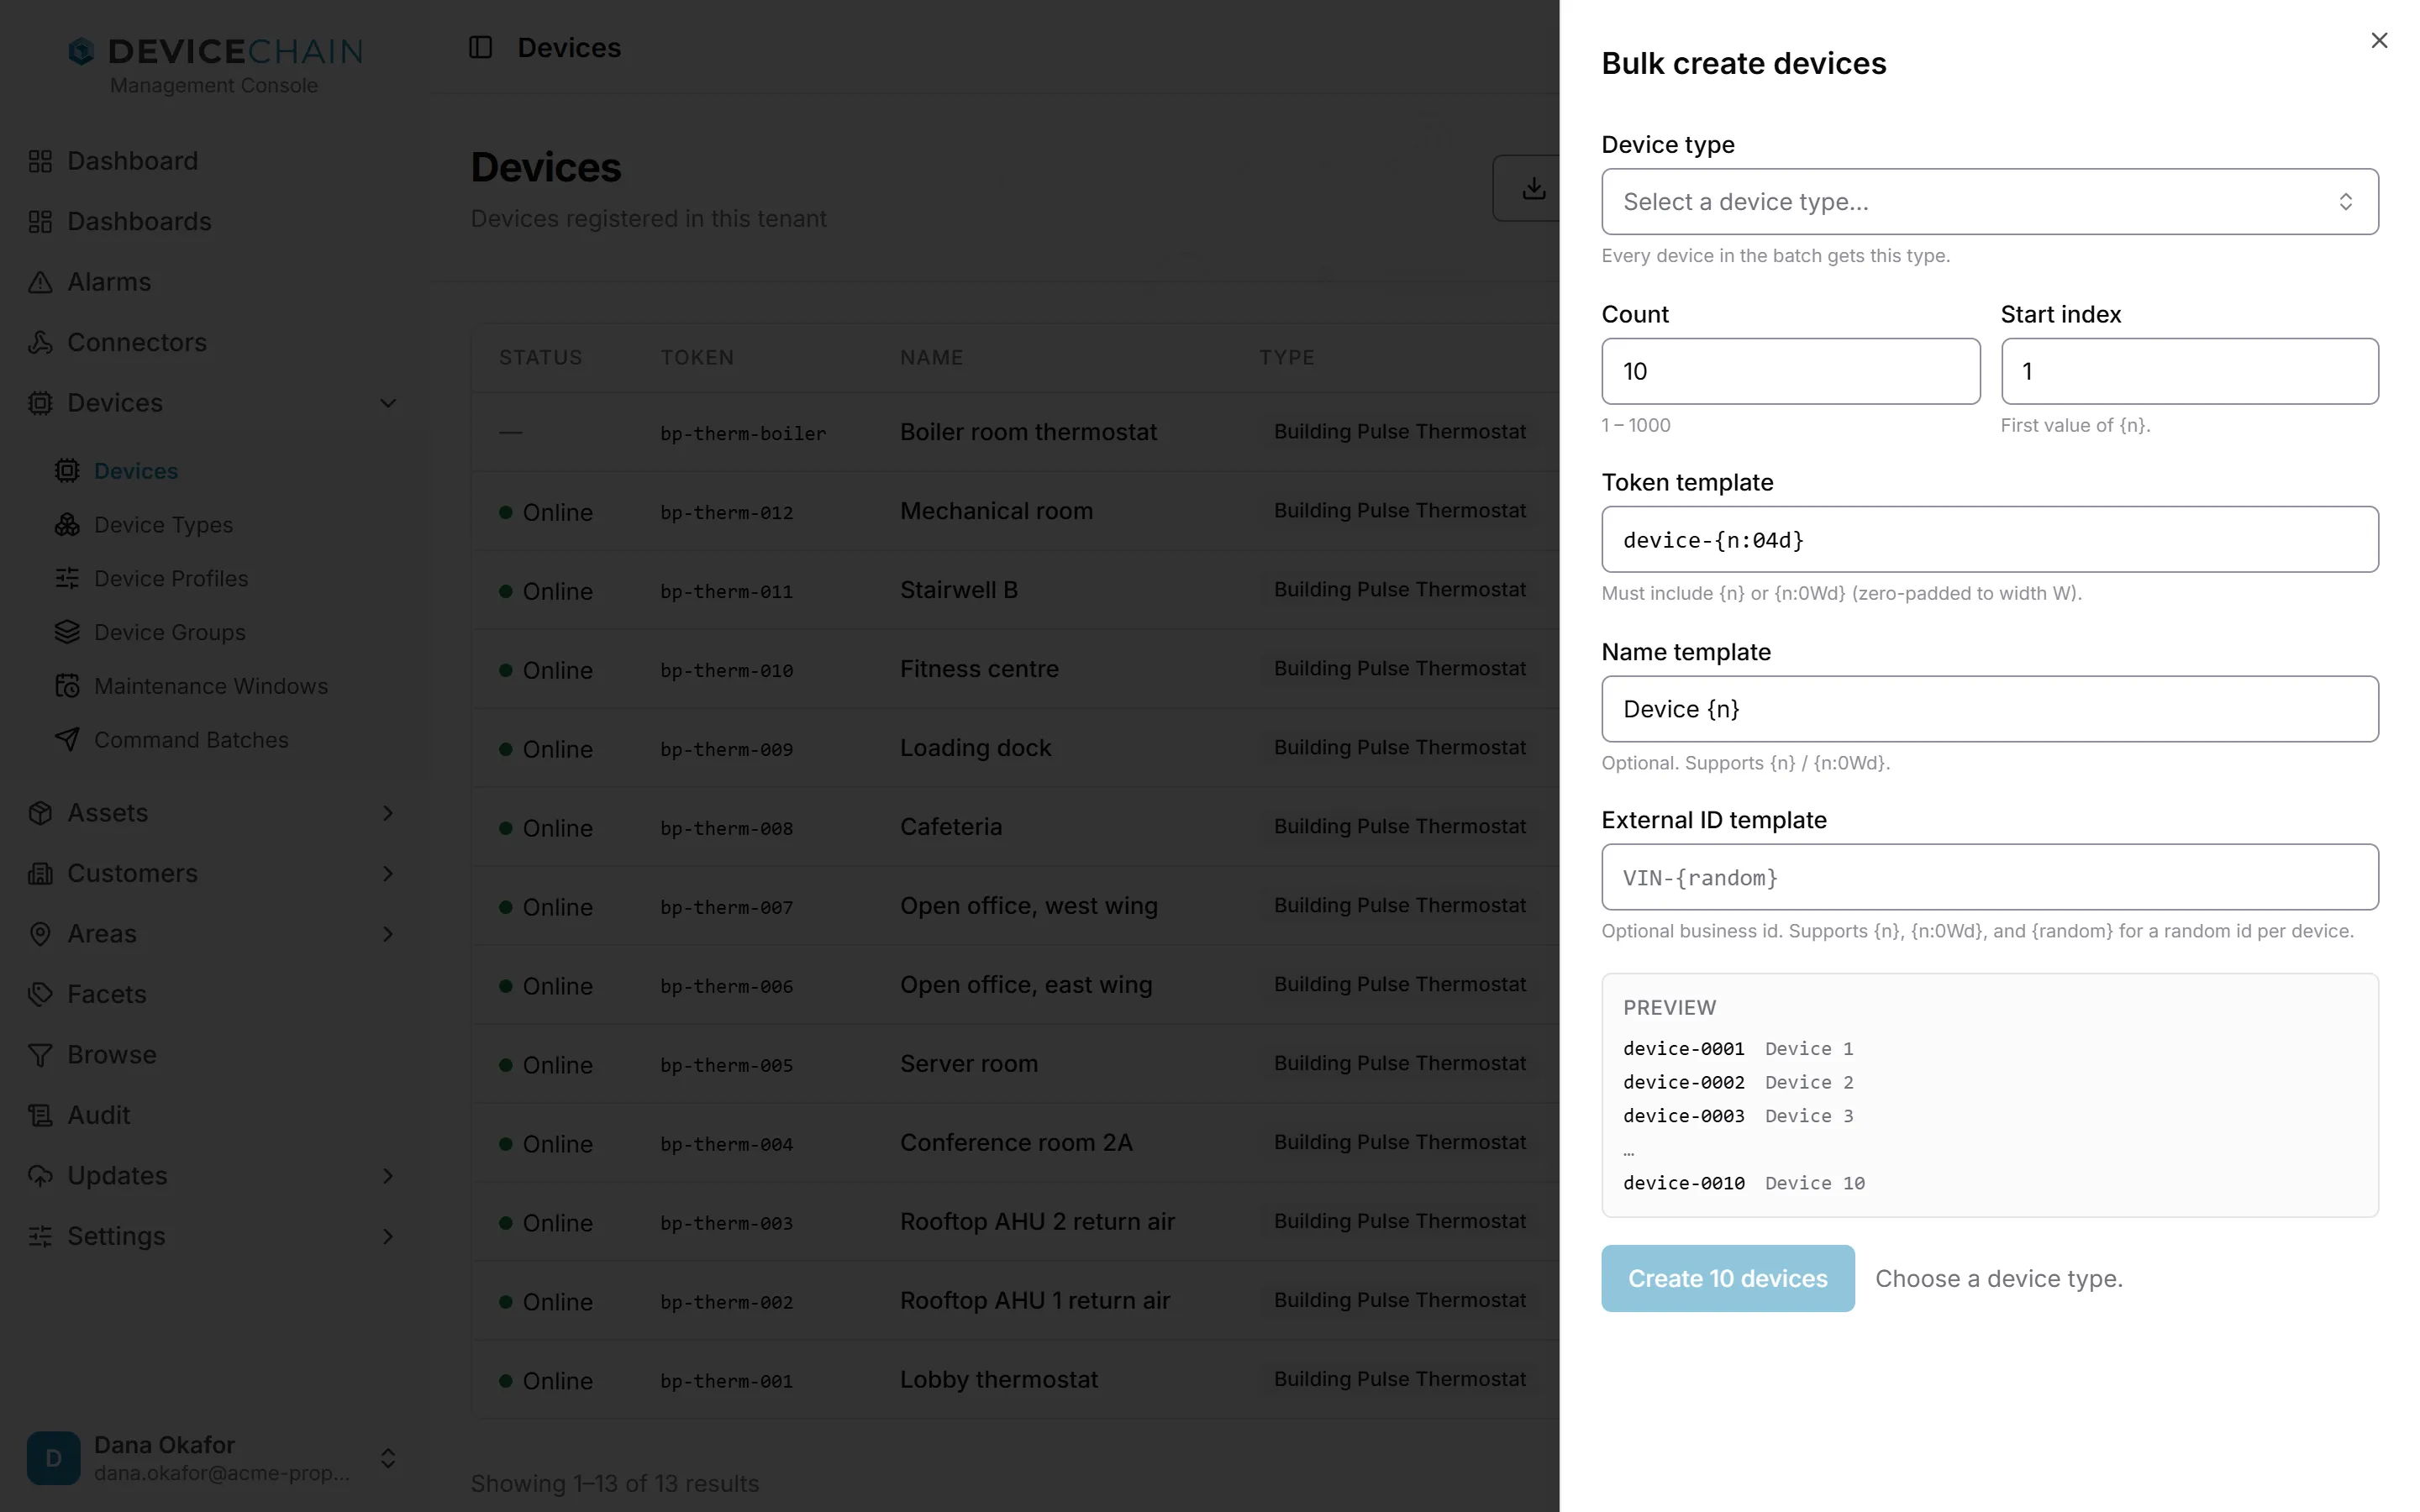
- Device type: every device in the batch gets this type.
- Count: how many devices to create, from 1 to 1000.
- Start index: the first number to use.
- Token template: must include
{n}, or{n:0Wd}to pad the number with zeros to width W.device-{n:04d}givesdevice-0001,device-0002, and so on. - Name template (optional): may use
{n}or{n:0Wd}. - External ID template (optional): your own business id for each device. It may also use
{random}for a random id per device. When you create more than one device, it must include{n},{n:0Wd}or{random}, so that each device gets a different id.
The Preview box shows the first and last tokens and names the batch will get. Check it, then choose Create N devices.
Importing devices from a CSV file
Import creates devices from a CSV file. Use it to load a fleet you already list in a spreadsheet, or a file your manufacturer supplied.
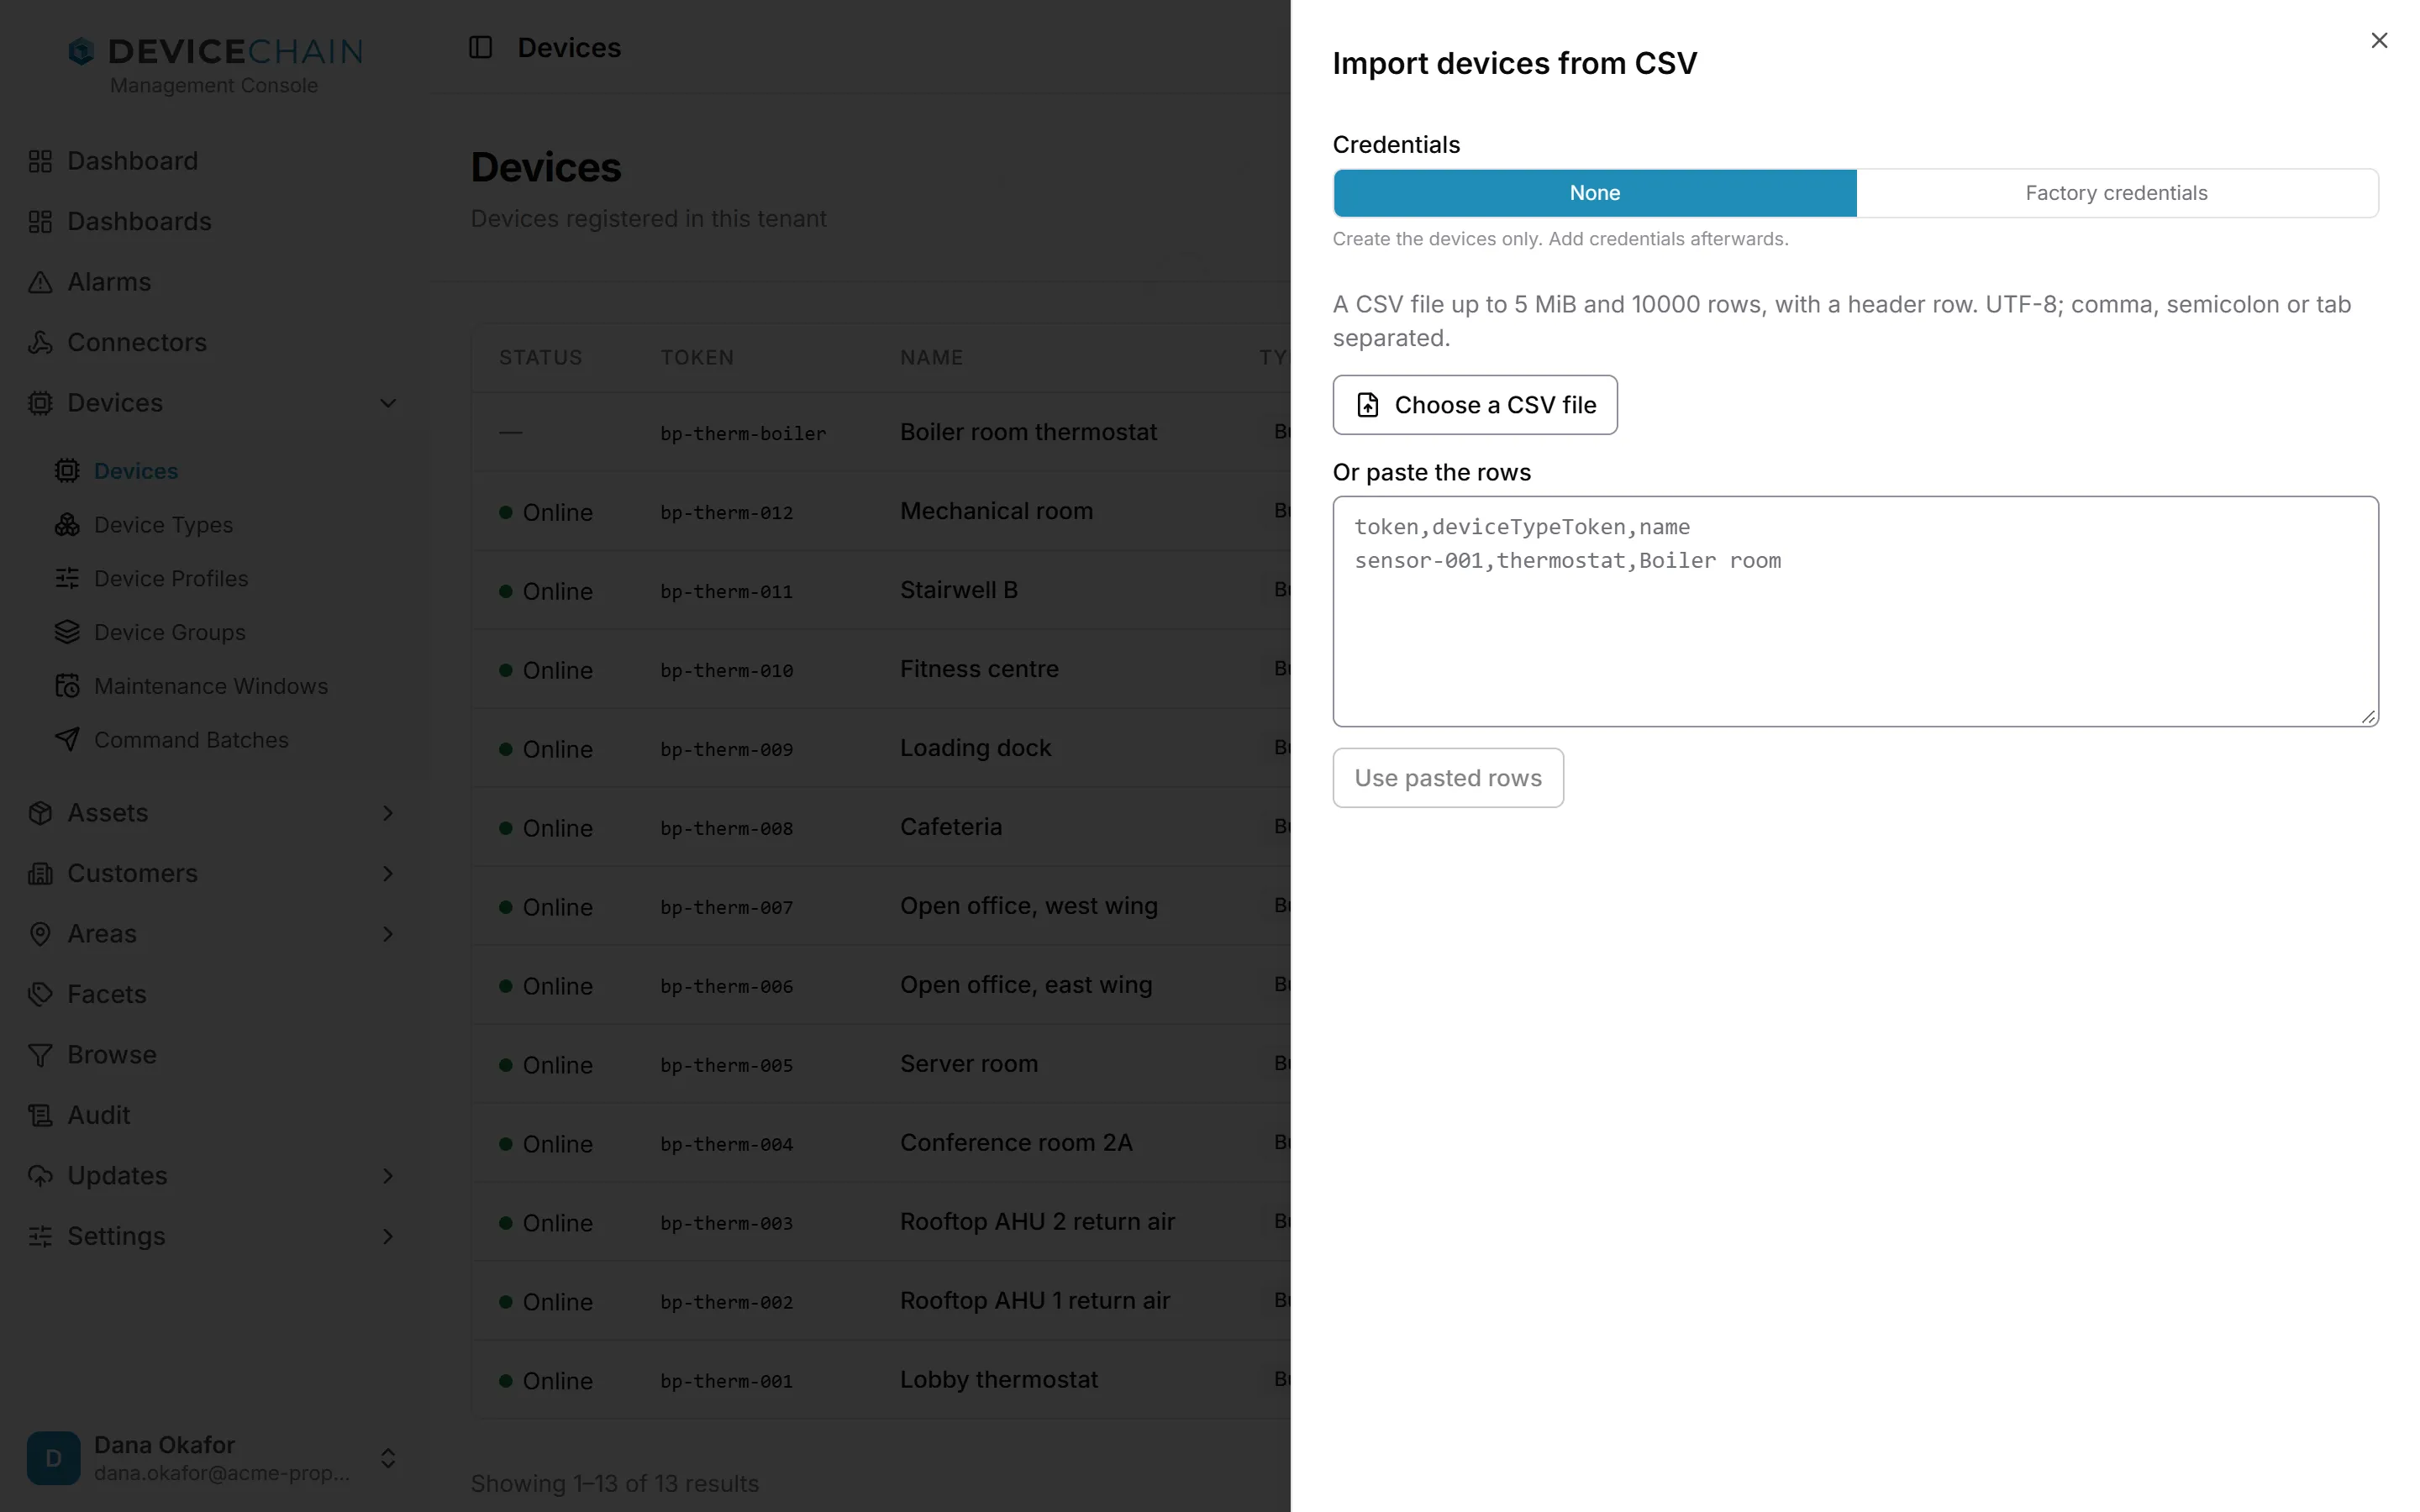
- Under Credentials, choose None to create the devices only, or Factory credentials to create each device together with the credential your factory supplied for it.
- Choose a CSV file with Choose a CSV file, or paste the rows and choose Use pasted rows. The file needs a header row, and can hold up to 10,000 rows and 5 MiB.
- Under Map the columns, check which column of your file feeds each field. The token column must be mapped, and every row needs a device type: map a type column, or choose a Device type for the whole file. With Factory credentials, the credential type and credential id columns must be mapped too. A preview shows the first rows as they will be sent.
- Choose Check the file. This is a dry run: the server decides every row exactly as the real import would, and creates nothing.
- Read What an import would do. Each row has an outcome: Created, Already exists, Conflict, Invalid or Refused, with details for anything that is not created. You can filter the rows by outcome.
- Choose Import N devices, where N is the number of rows the check found would be created. A progress bar shows how far it has got. Stop after this batch stops cleanly between batches. Importing the same file again carries on where it stopped.
- When it finishes, the summary says how many devices were created, how many already existed and how many need attention. Download results saves every row's outcome, and Download failed rows saves just the rows to fix. Fix them and import that file. Devices that were already created are reported as existing and left alone.
With Factory credentials, the file carries secrets. They are sent once, are never shown or written to the results, and are cleared from the page when the import ends. The file itself is your responsibility.
The columns, the credential modes and every outcome are described in full in Importing devices from CSV.
Exporting the list
Export CSV downloads every device in the list as a CSV file. The file has the token, name, type, type token, description and creation time of each device, with times in ISO-8601 format. It does not include the live status. The headers match what Import expects, so an exported file can be imported again as it is.
While the export runs, the button shows how many rows it has collected, with a Cancel export button. A message confirms how many rows were exported. An export stops at 10,000 rows. If it reaches that limit, the console tells you that the file holds only the first 10,000.
Disabling and enabling a device
Disabling a device cuts it off without deleting it. Use it to quarantine a device that is misbehaving or may be compromised, and enable it again when it is fixed.
Open the device and choose Disable at the top right. The console asks you to confirm. While the device is disabled:
- its events are discarded instead of stored, and they do not come back when you enable it;
- it cannot open a new connection, although a connection it already has stays open until it ends;
- new commands to it are refused;
- commands that were already queued for it are held: they are neither sent nor cancelled.
Its data, credentials and configuration are kept. A disabled device has a Disabled badge on its page and in the device list.
When commands are being held, the device's Commands tab shows how many, for example "2 queued commands held while this device is disabled". They go out, oldest first, when you enable the device, or lapse at their own expiry time. If they should never be sent, choose Cancel all. A command that was already sent cannot be recalled.
To bring the device back, choose Enable. Its events are stored again, and it can connect and receive commands.
The full list of what disabling does, including configuration and alarms, is in Disabling a device.
The device page
Select a device in the list to open its page. The header shows the device's name, its token (with a copy button), its type and, when it is disabled, a Disabled badge. On the right are Disable (or Enable) and Delete. Deleting a device cannot be undone.
The page is organized in tabs. You may not see all of them: Credentials and Replacement need permission to change devices, and Updates appears only when your installation runs the update service and you are allowed to see updates.
Basic
Basic holds the device's type, token, name and description.
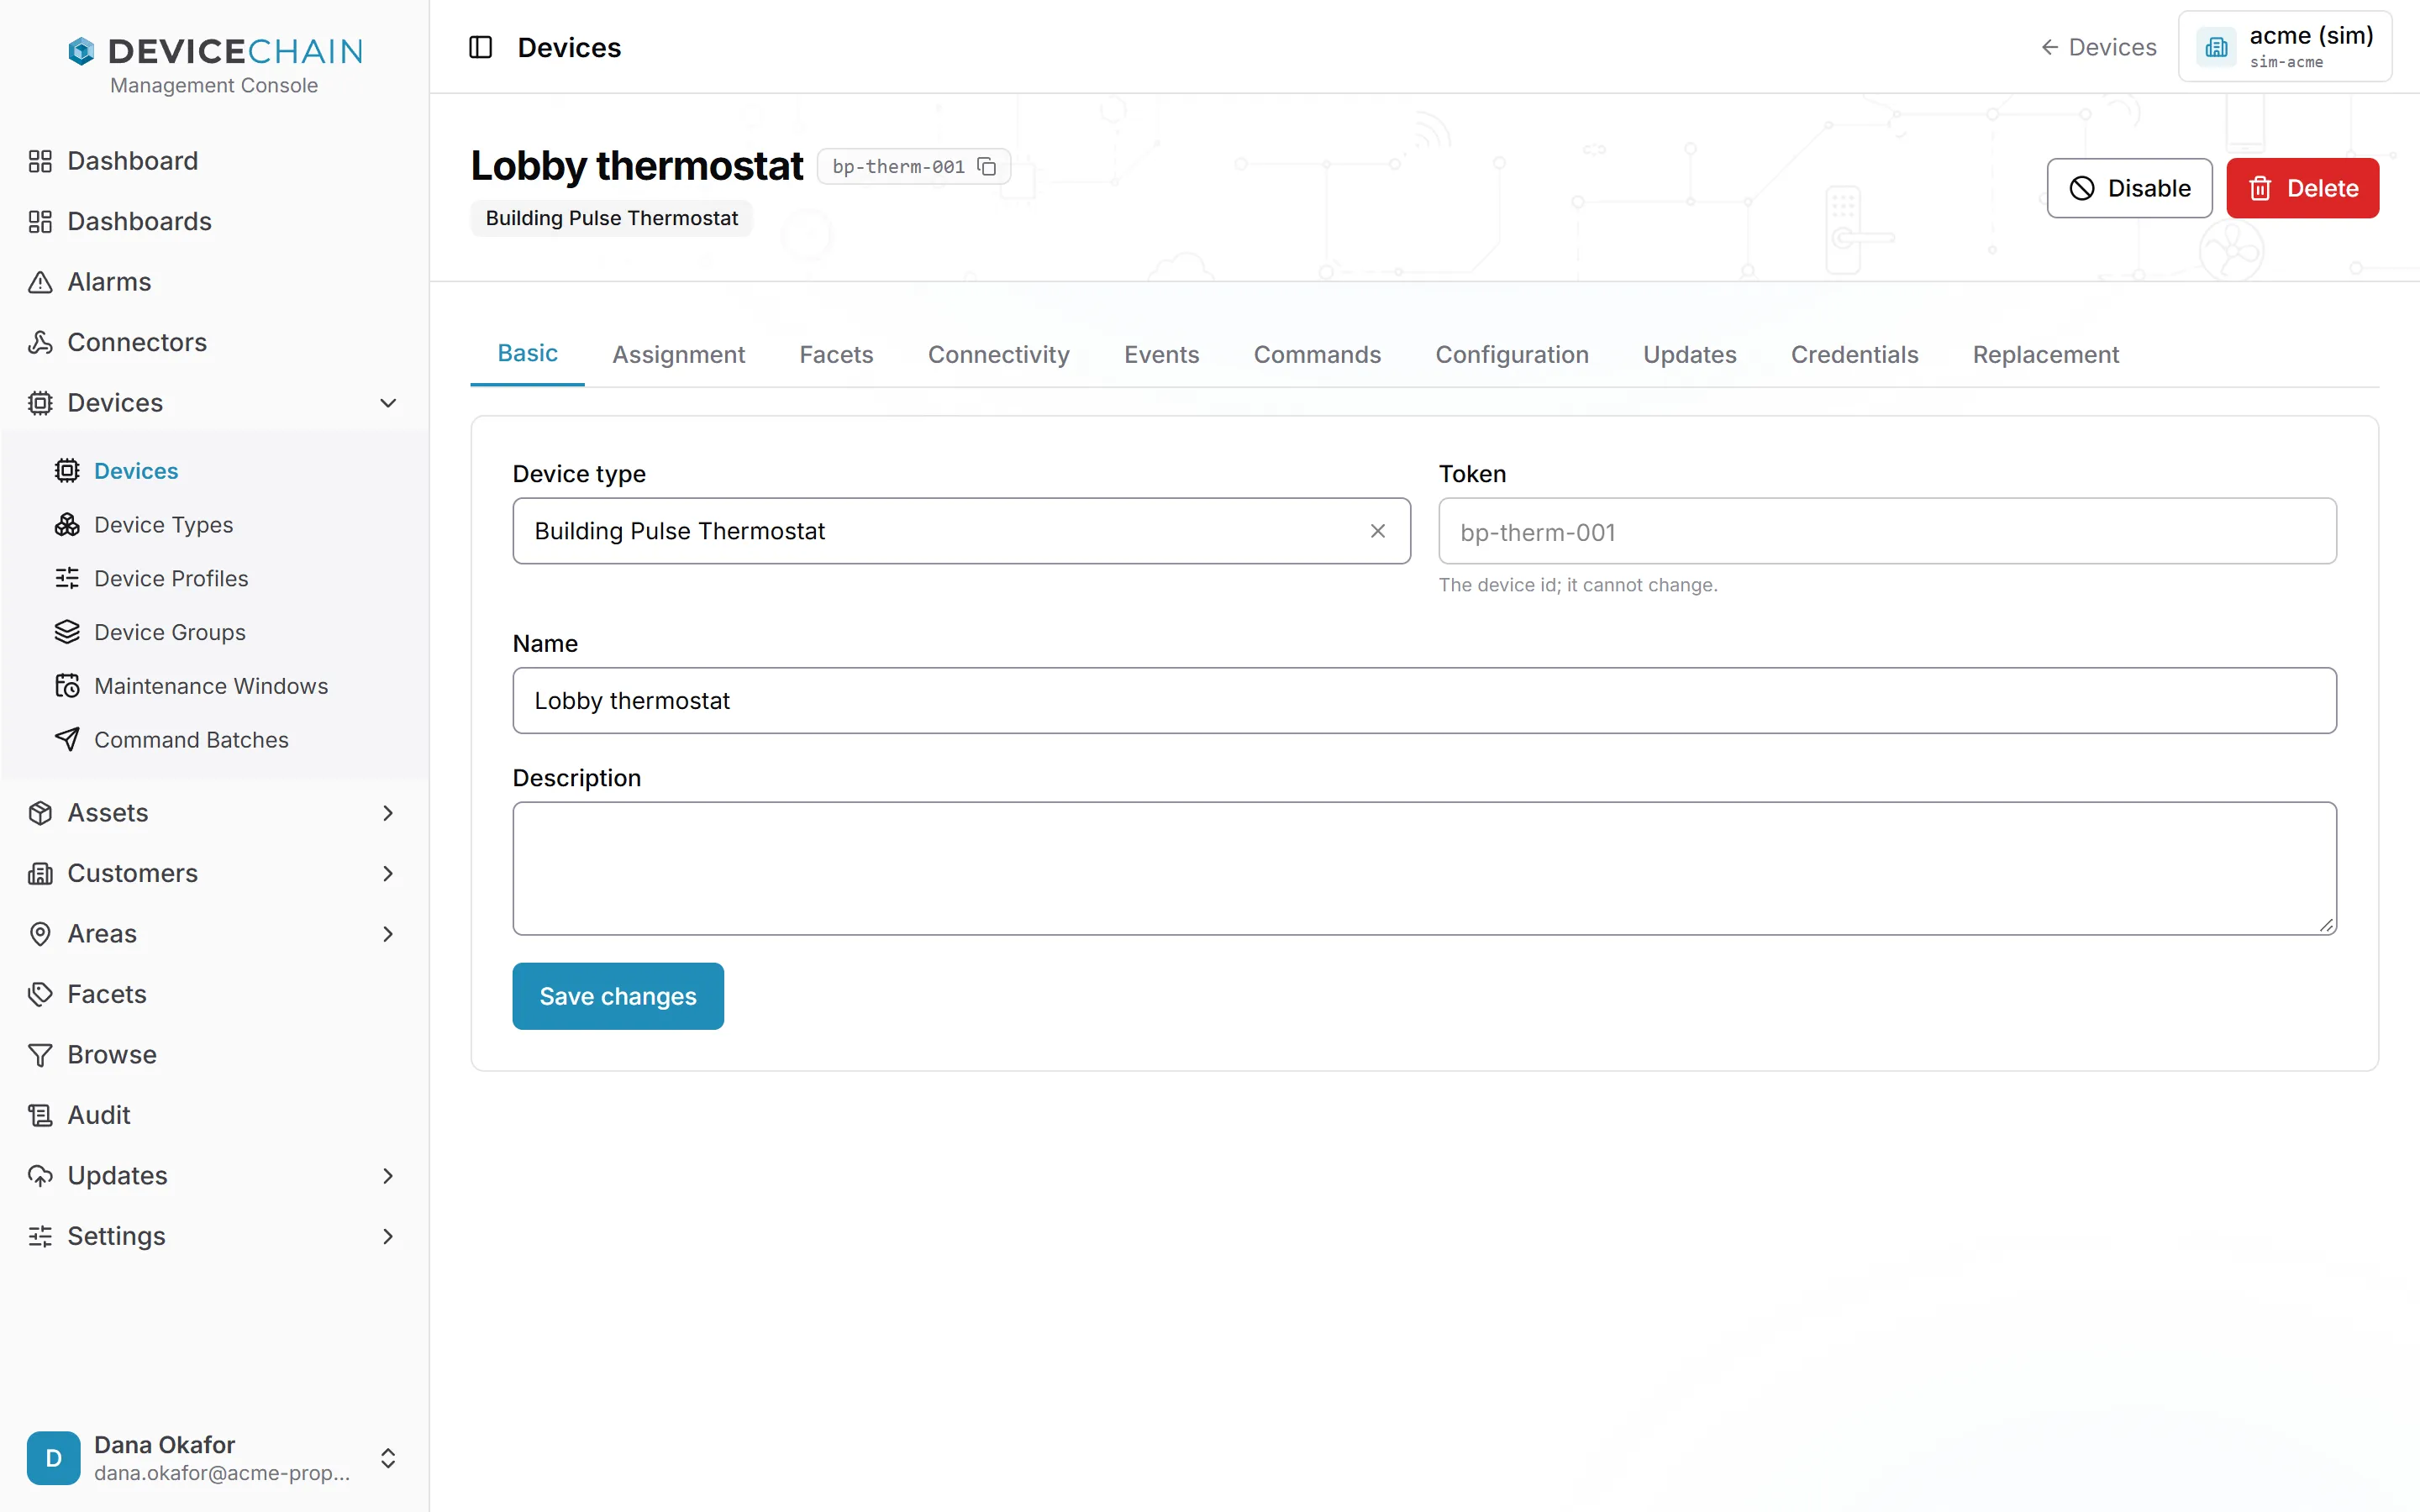
You can change the type, name and description, then choose Save changes. The token cannot change.
Assignment
Assignment links the device to the customer, area or asset it serves. It organizes the device's data. It does not decide whether the device may report: a device with no assignment still reports.
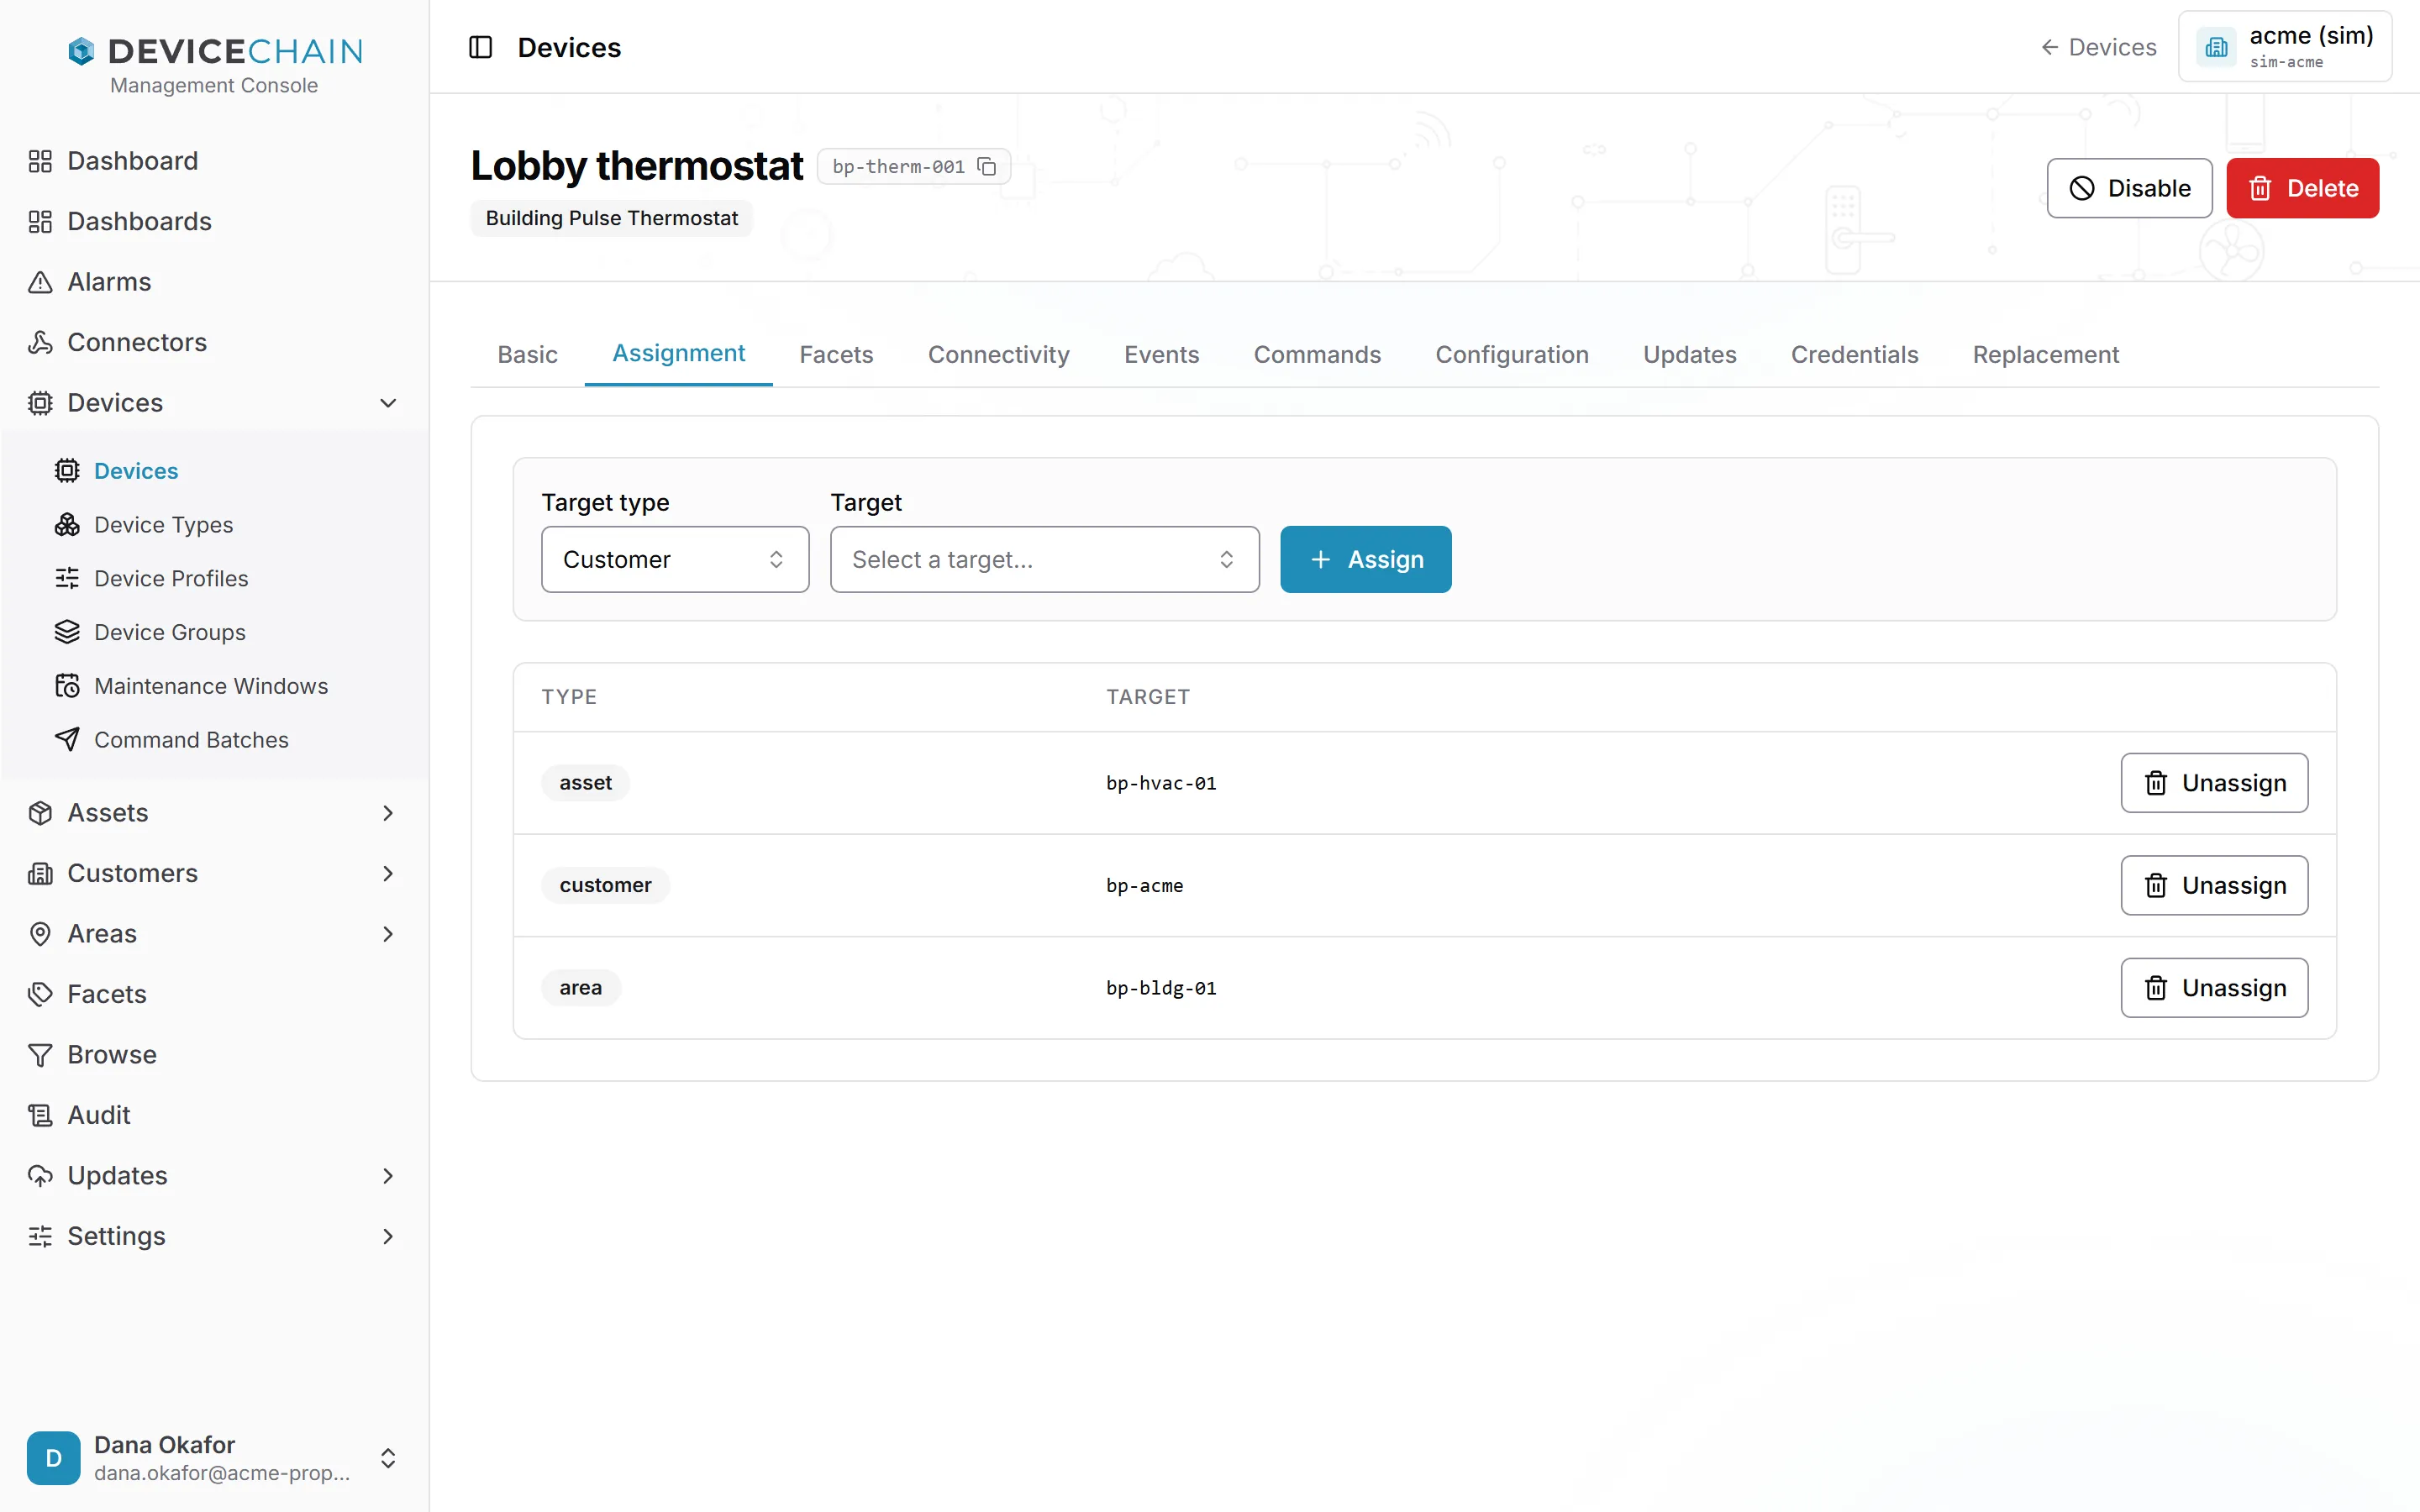
Choose a Target type (Customer, Area or Asset), pick the Target, and choose Assign. A device can hold several assignments at once. Unassign removes one. Events the device already reported keep the assignments they were recorded with.
See Managing device assignments.
Facets
Facets holds the values that describe this device, such as the zone or floor it is on. Browse and dynamic groups find devices by these values.
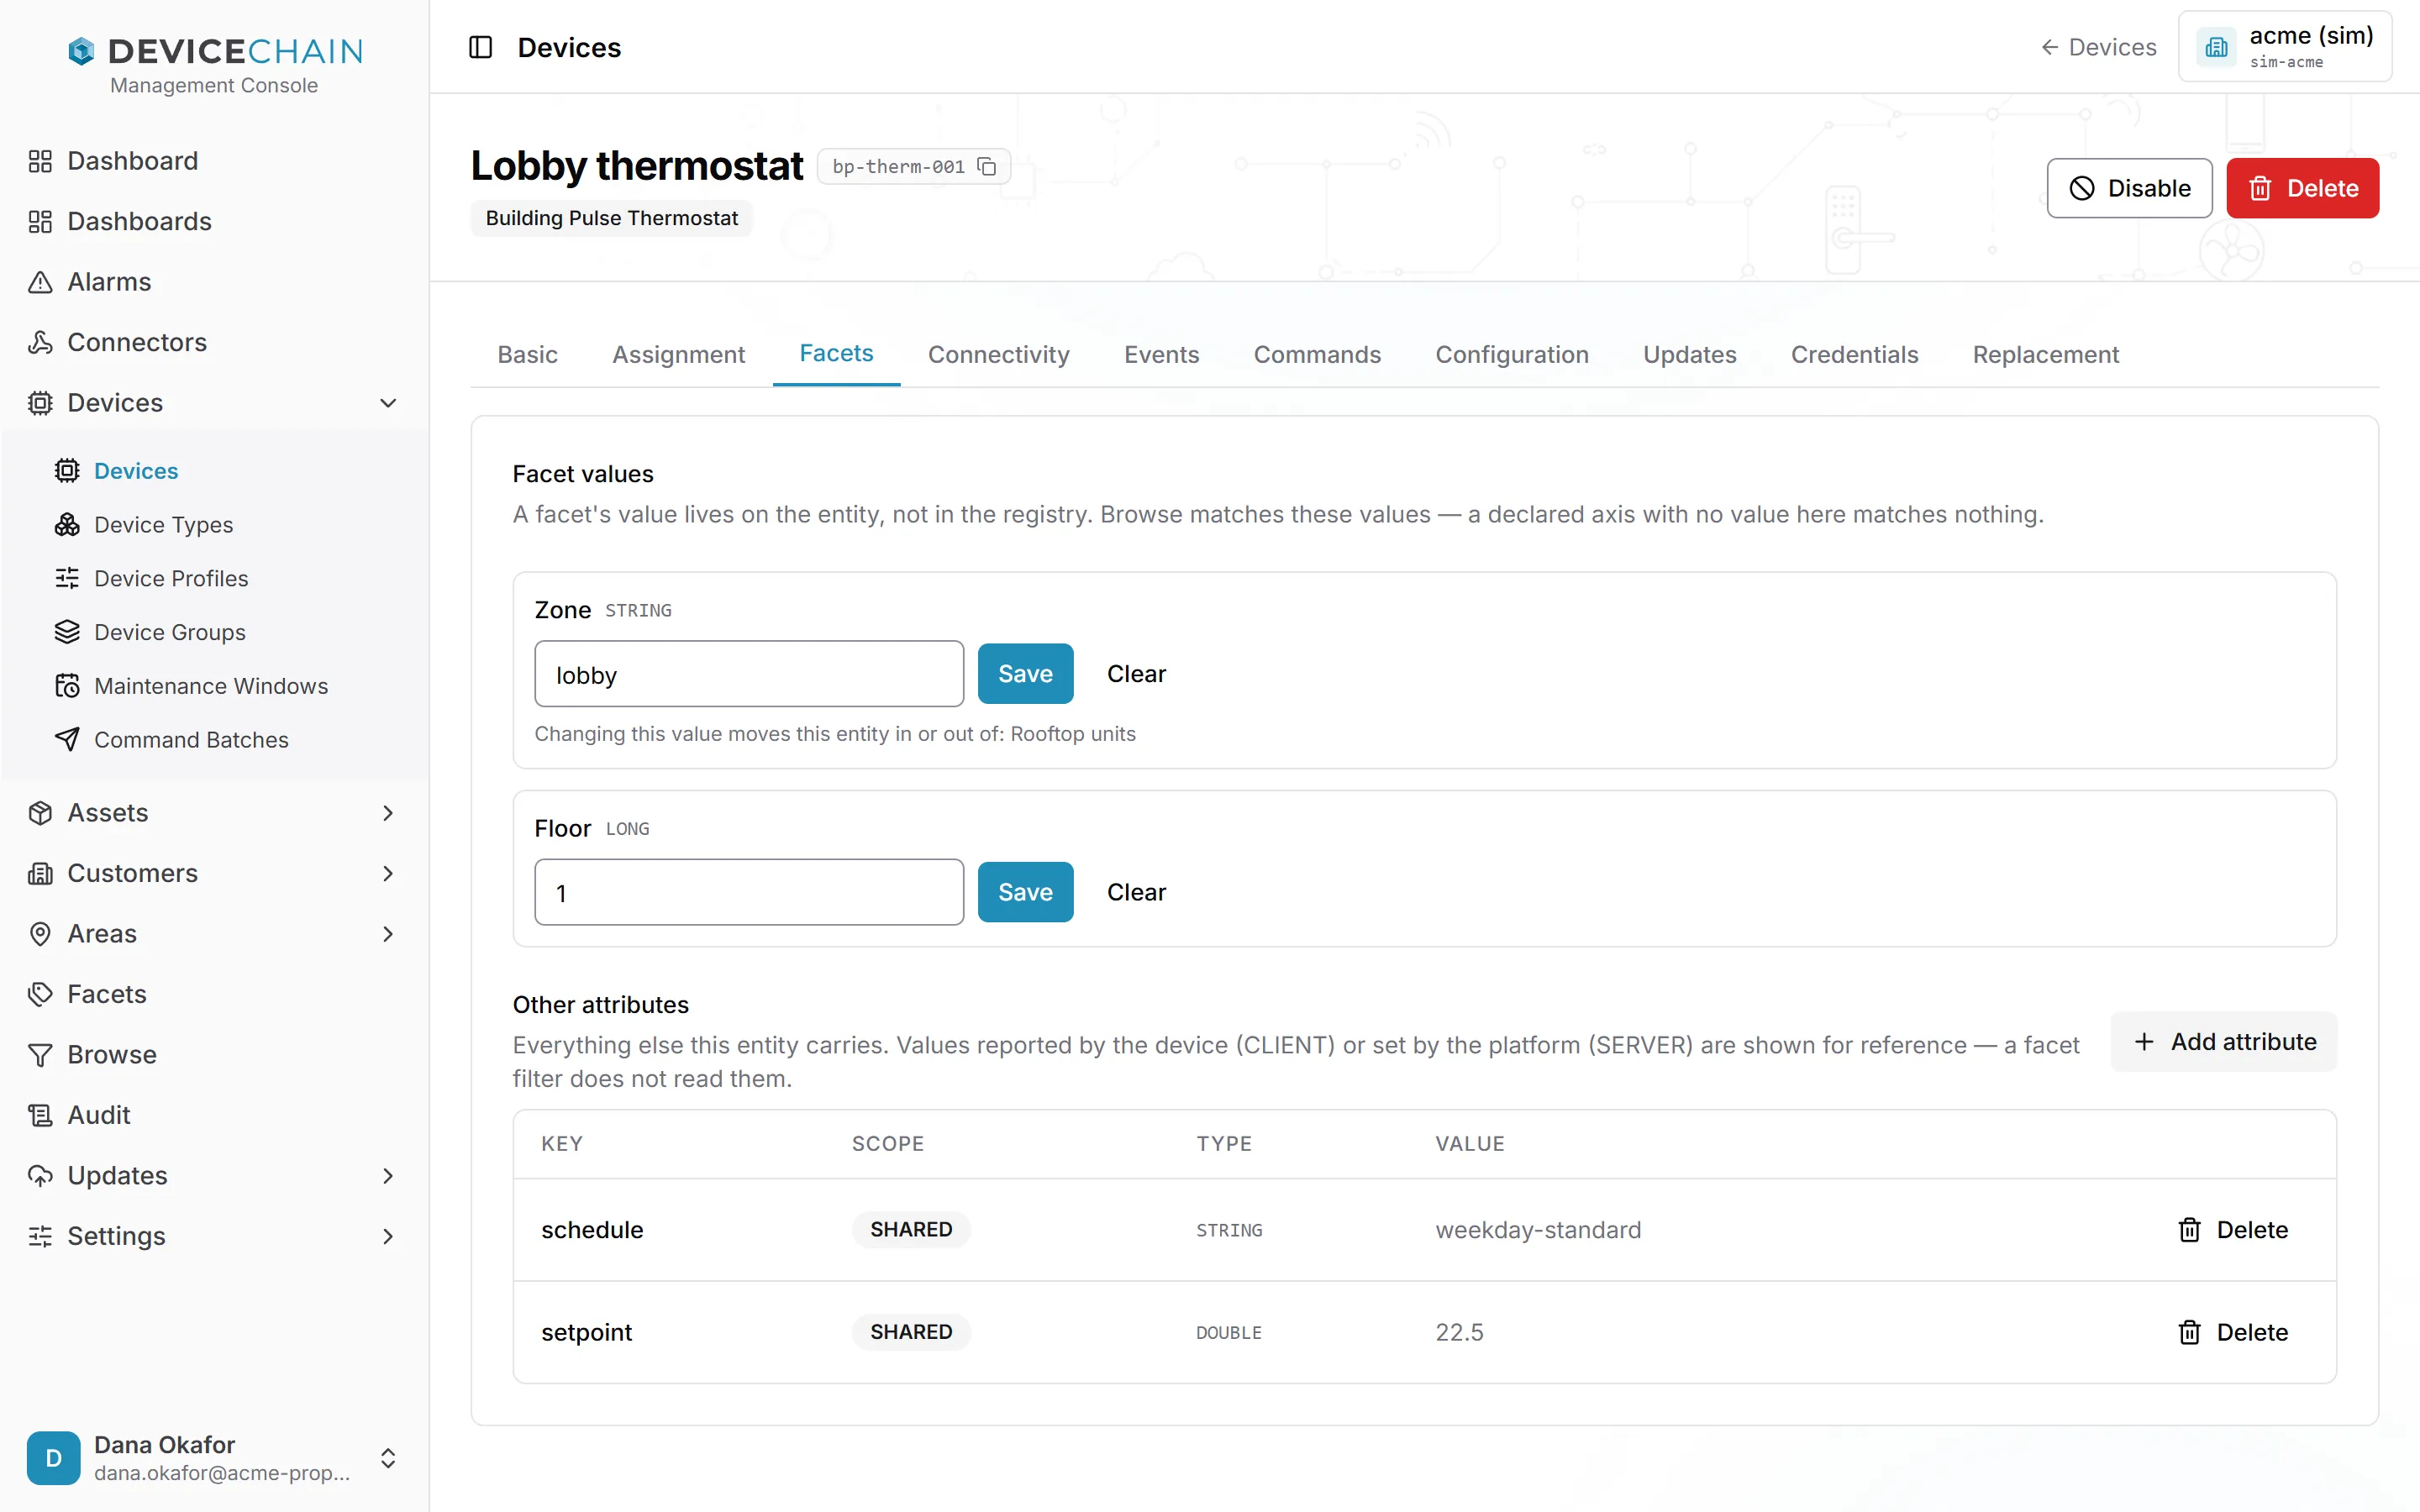
- Facet values lists the facets your tenant has declared. Enter a value and choose Save, or Clear it. When a value decides membership of a dynamic group, the tab tells you which groups a change would move the device in or out of.
- Other attributes lists everything else stored on the device. You can add a shared attribute with Add attribute, and delete one. Values the device reports (CLIENT) or the platform sets (SERVER) are shown for reference only. Shared attributes are also where a device's configuration values live.
Facets and Browse have their own chapter.
Connectivity
Connectivity shows whether the device is connected, and its most recent readings.
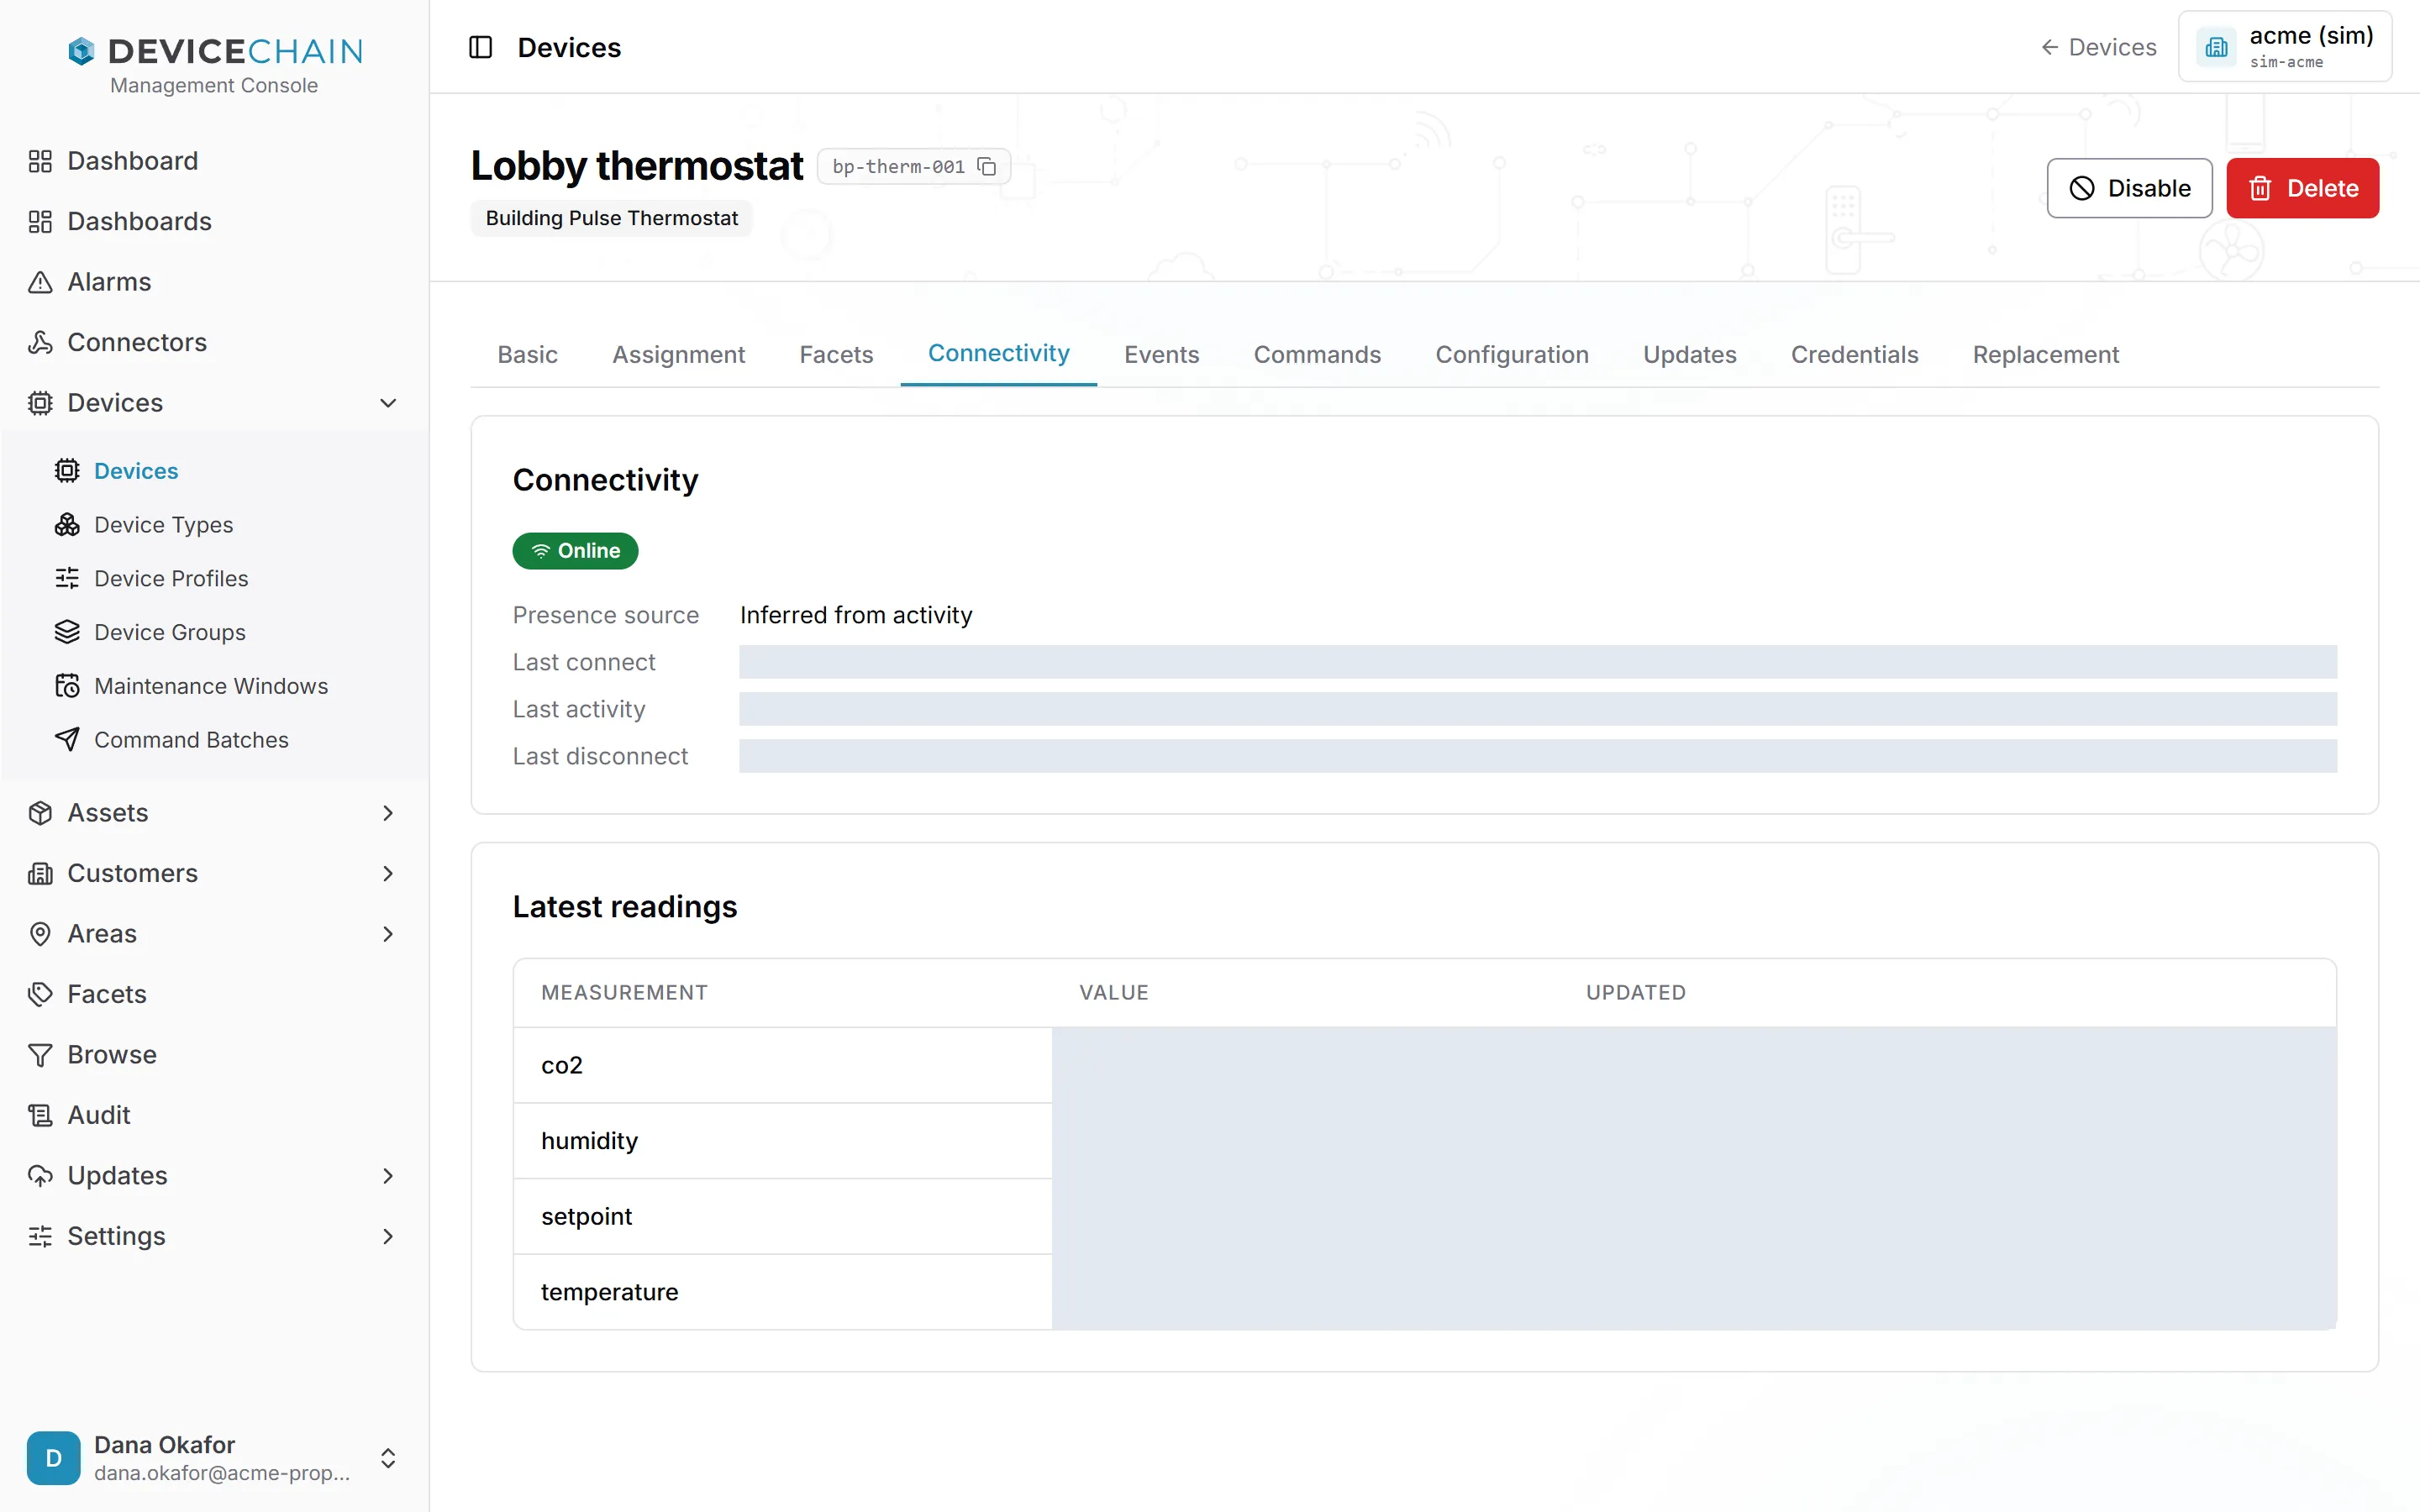
- The badge says Online, Disconnected or Offline.
- Presence source says how that is known. Reported by the transport means the connection itself told DeviceChain. Inferred from activity means DeviceChain judged it from how recently the device sent something.
- Last connect, Last activity and Last disconnect give the times.
- Latest readings lists the last value of each measurement, and when it arrived.
When an inferred device has gone quiet, the tab adds a "No recent activity" note: it has not sent anything for a while, which a healthy device on a slow schedule can also look like.
A device whose profile declares a position, or that has reported one, also gets a Last known position section, with its latitude, longitude and, when reported, elevation, accuracy, speed and heading. The thermostat in the screenshot does neither, so the section is not shown.
Events
Events lists the 10 most recent events the device sent.
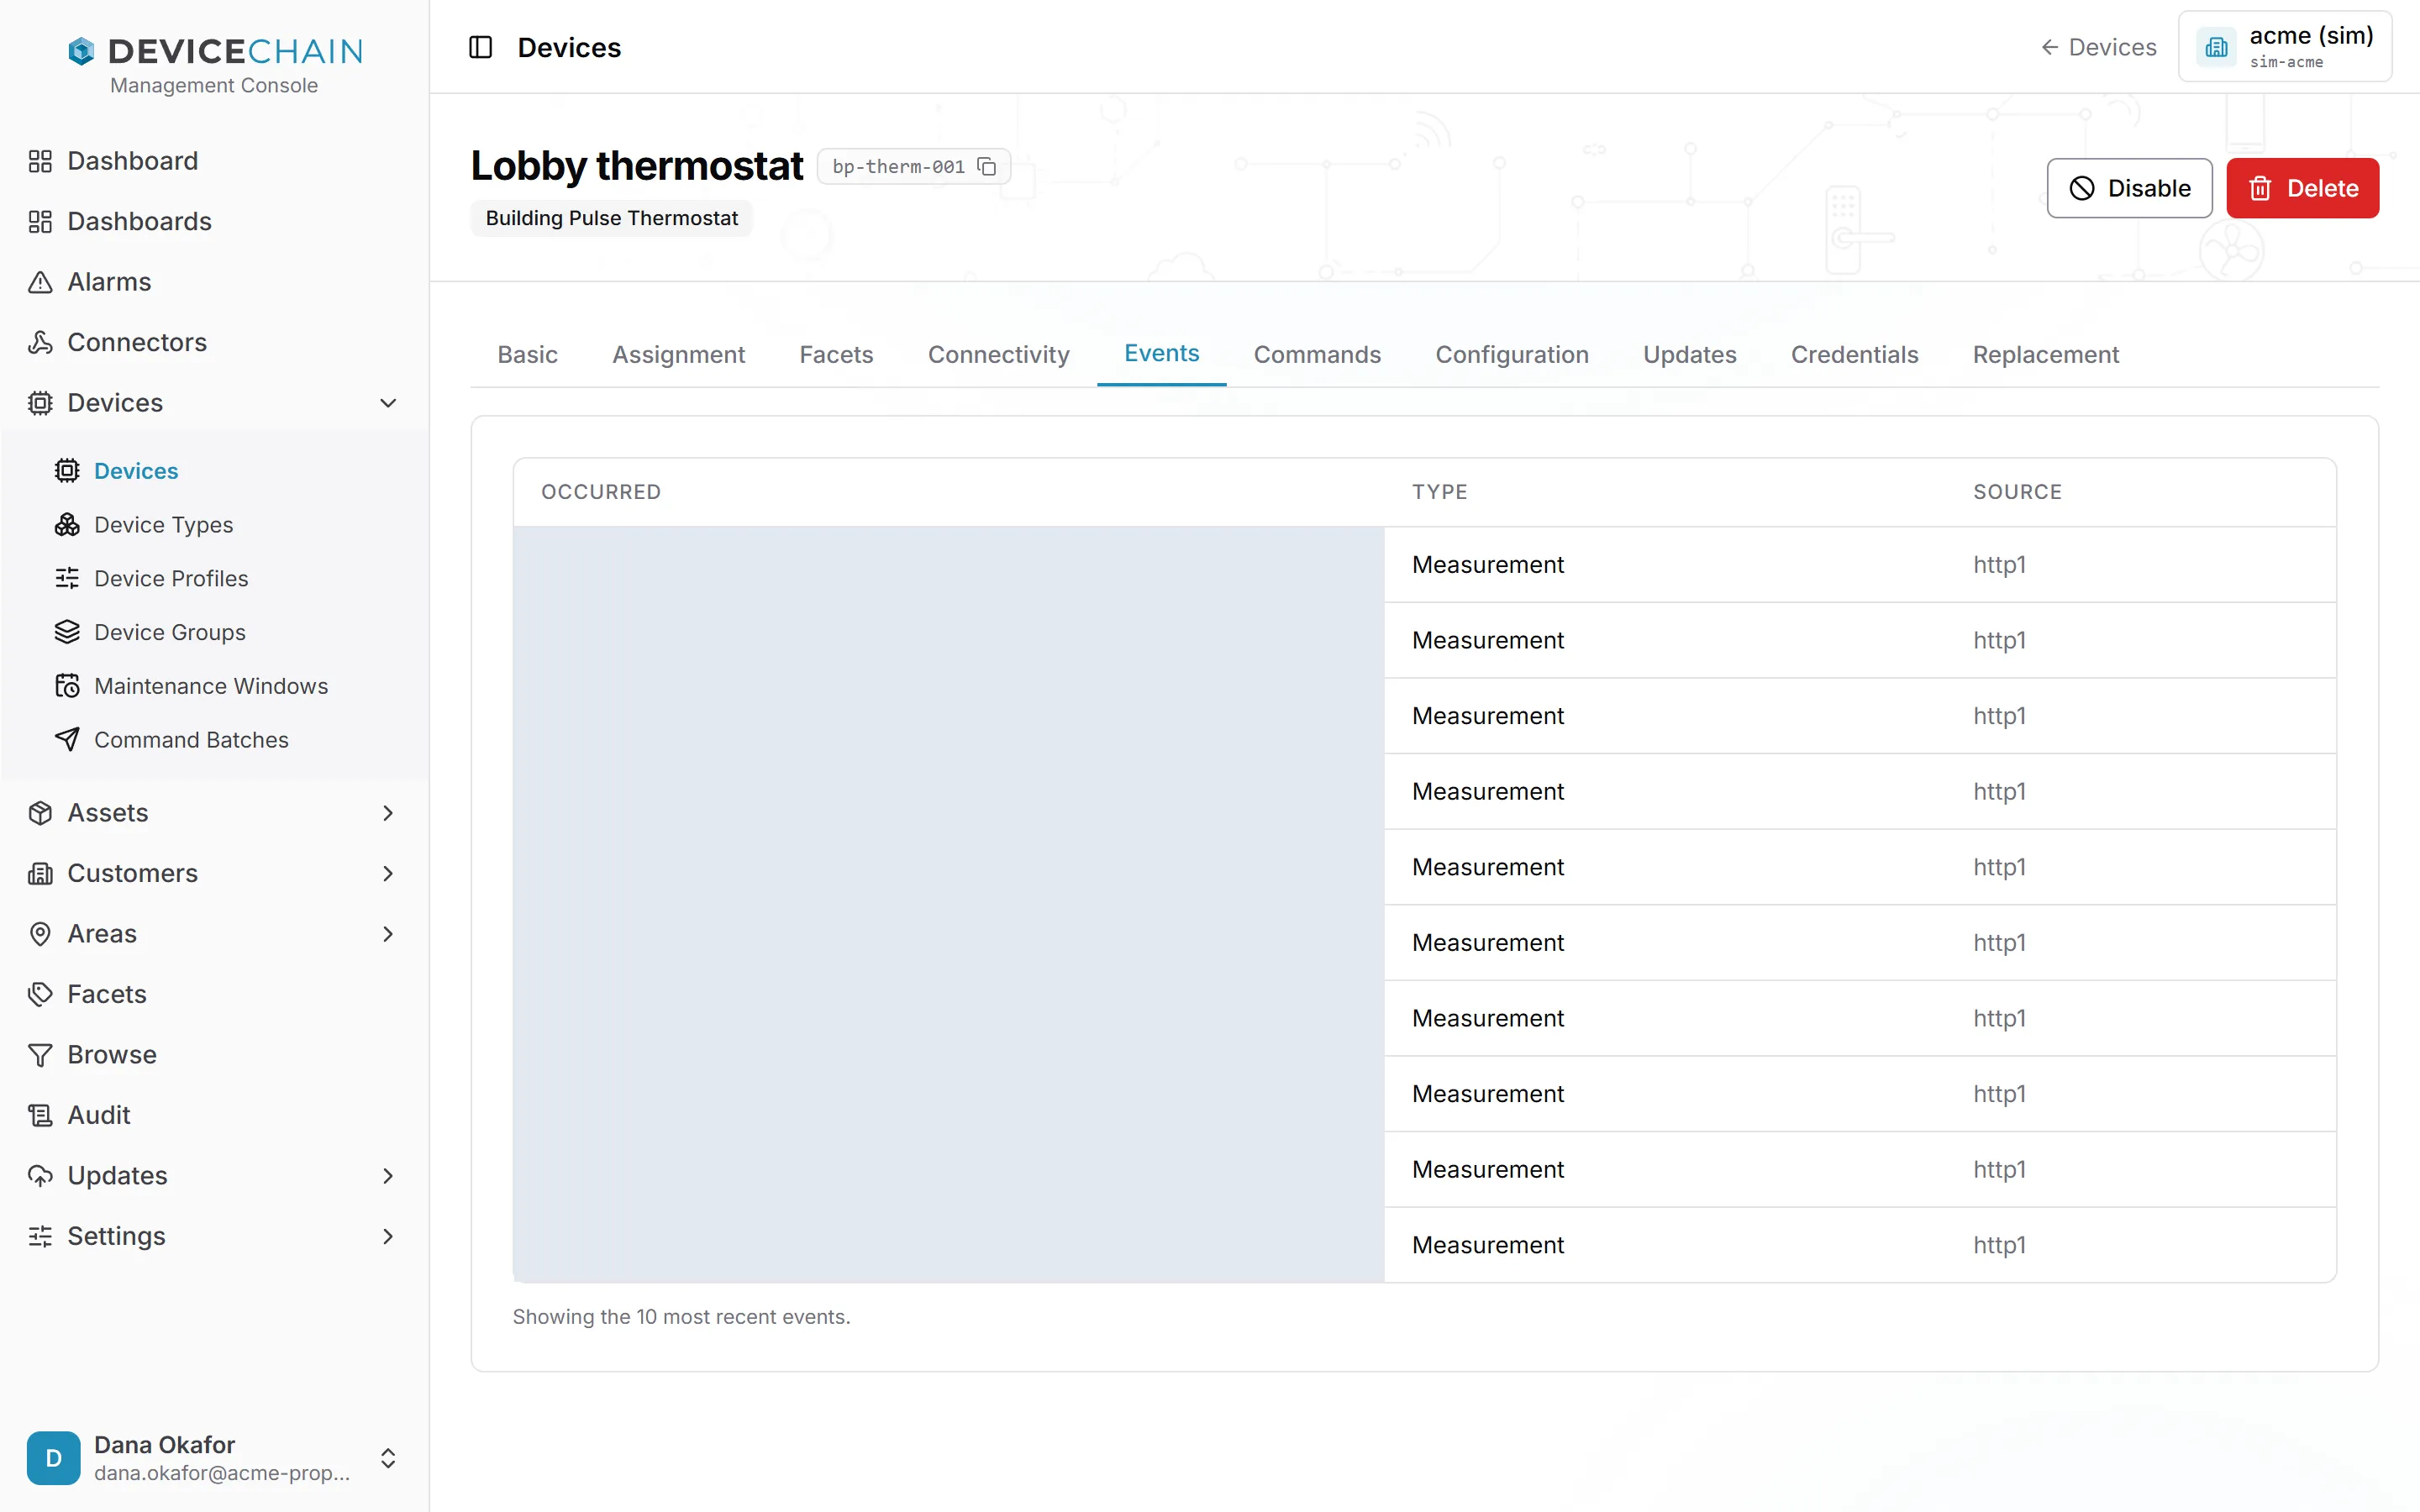
Each row shows when the event occurred, its type (such as Measurement) and the source it arrived through. For a longer history, use a dashboard.
Commands
Commands is where you send a command to this one device, and follow the commands already sent to it.
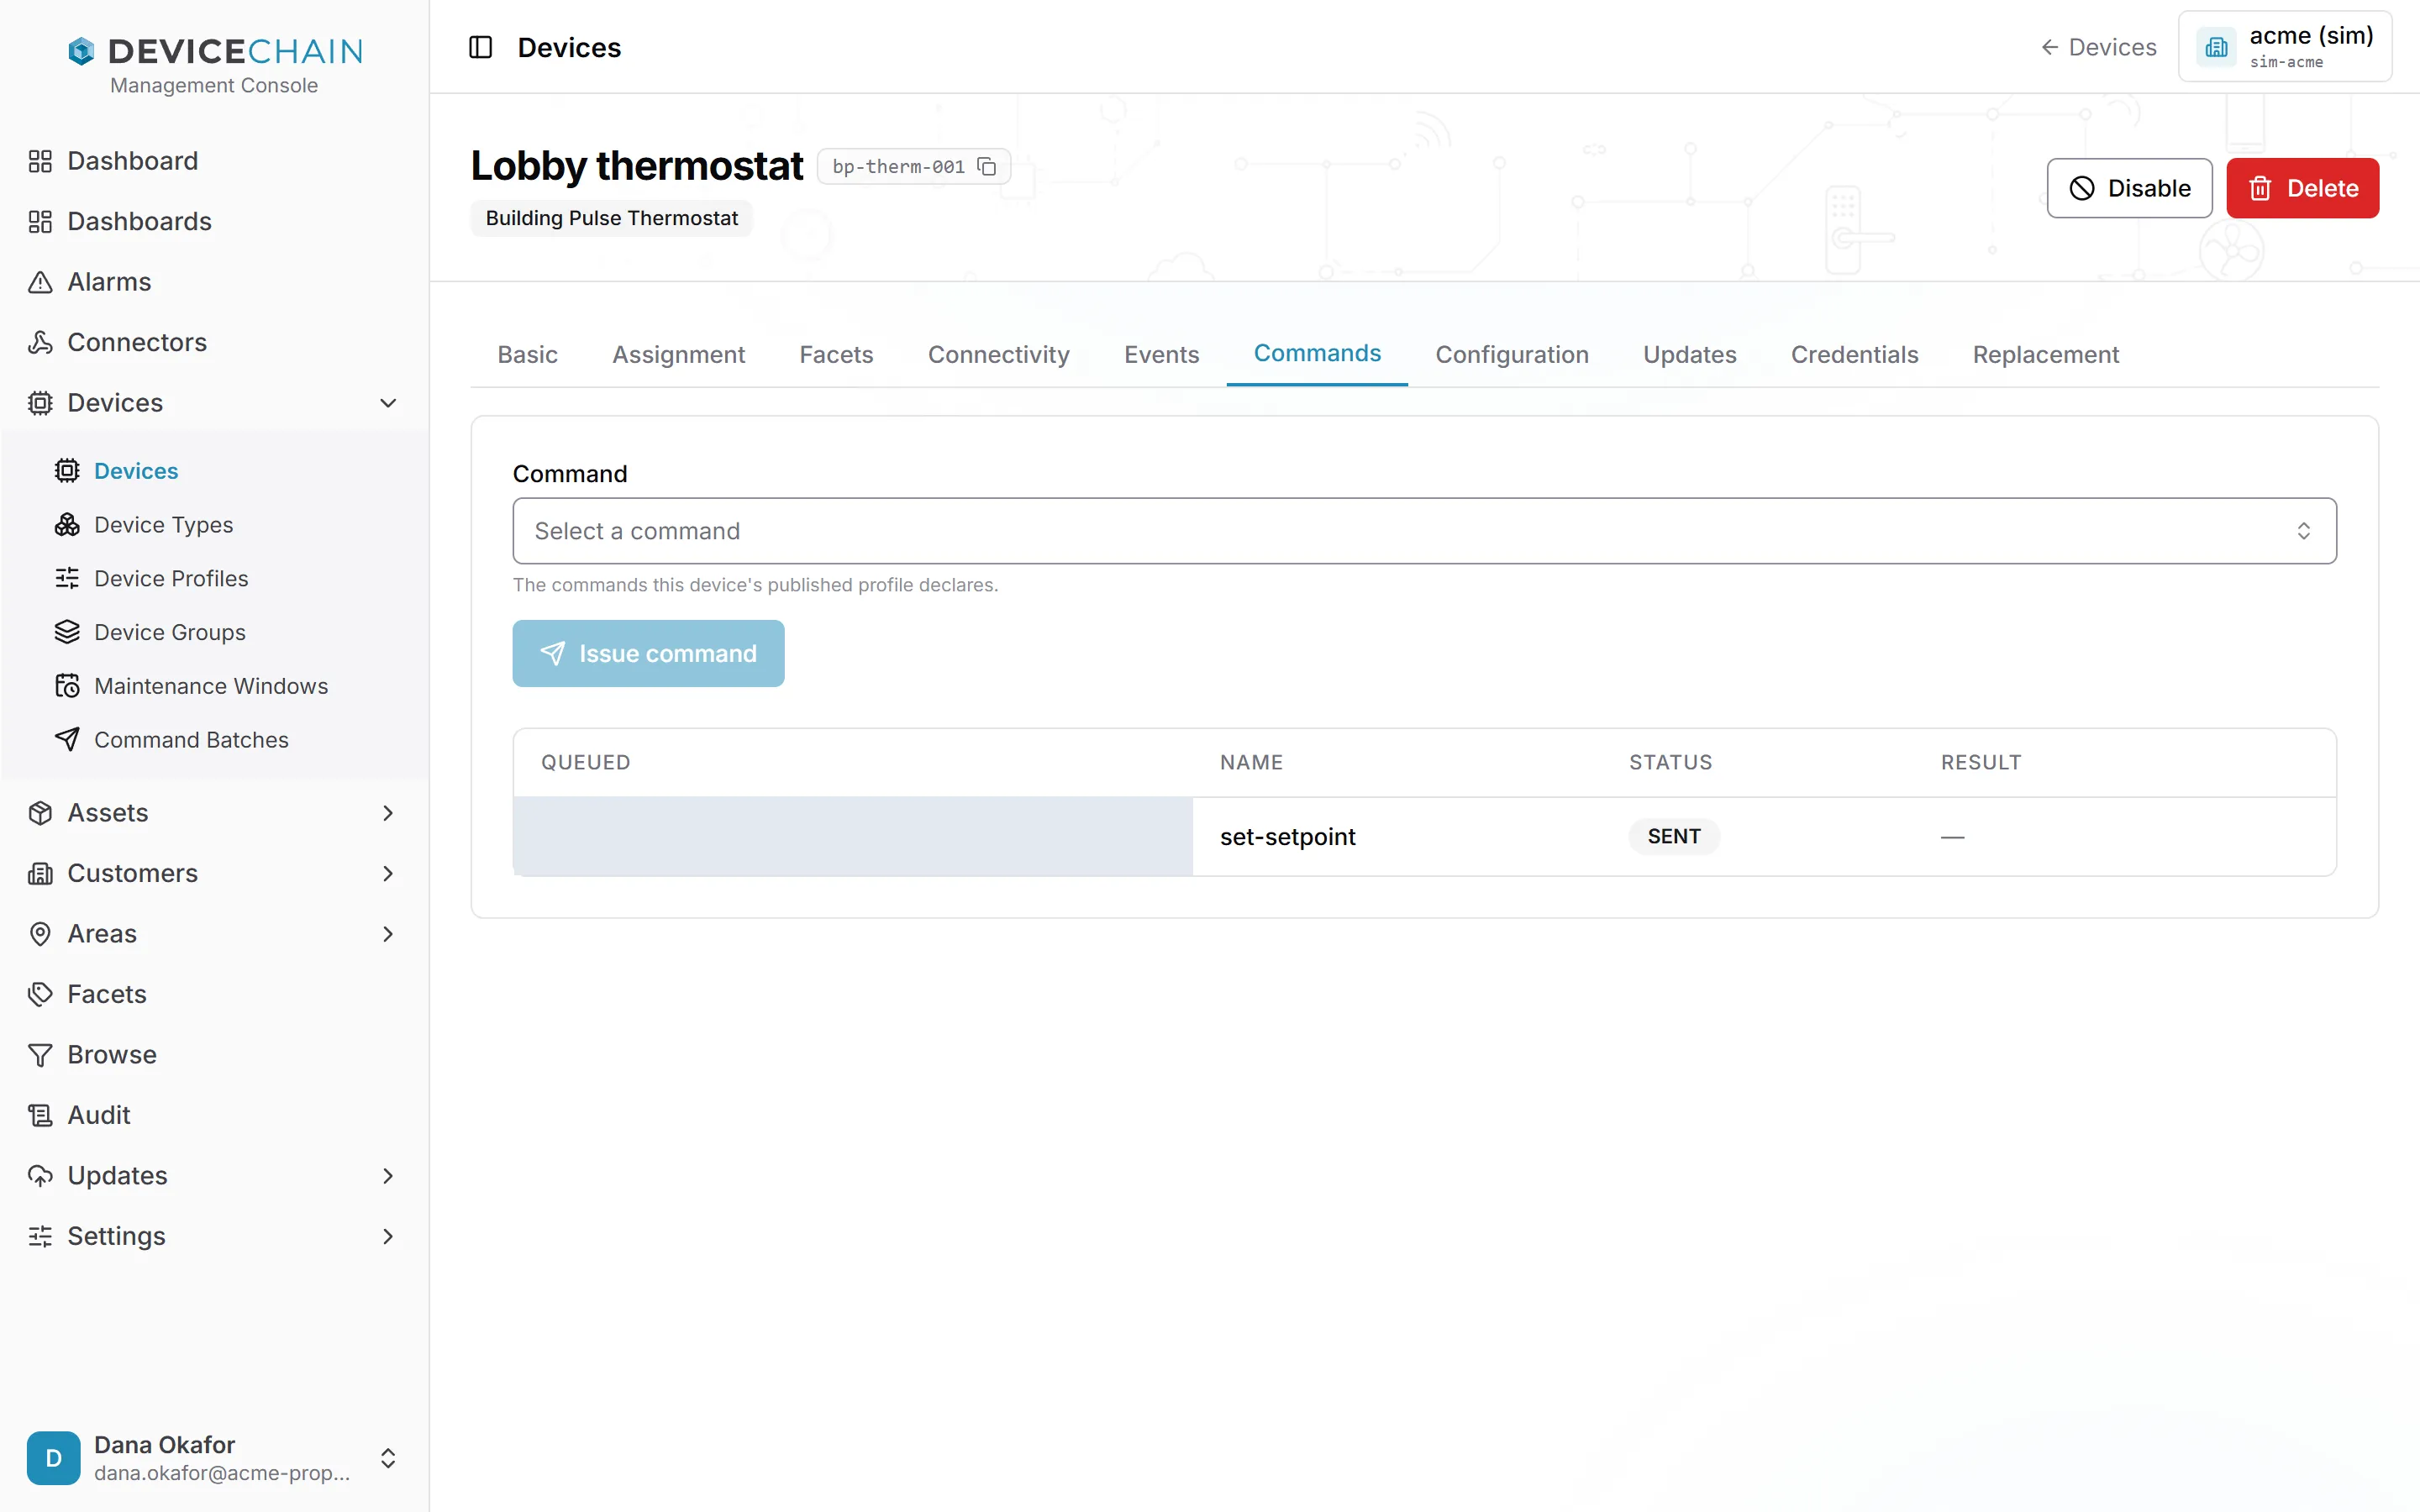
The Command picker offers the commands the device's profile declares. Pick one, and the console shows a form for its parameters.
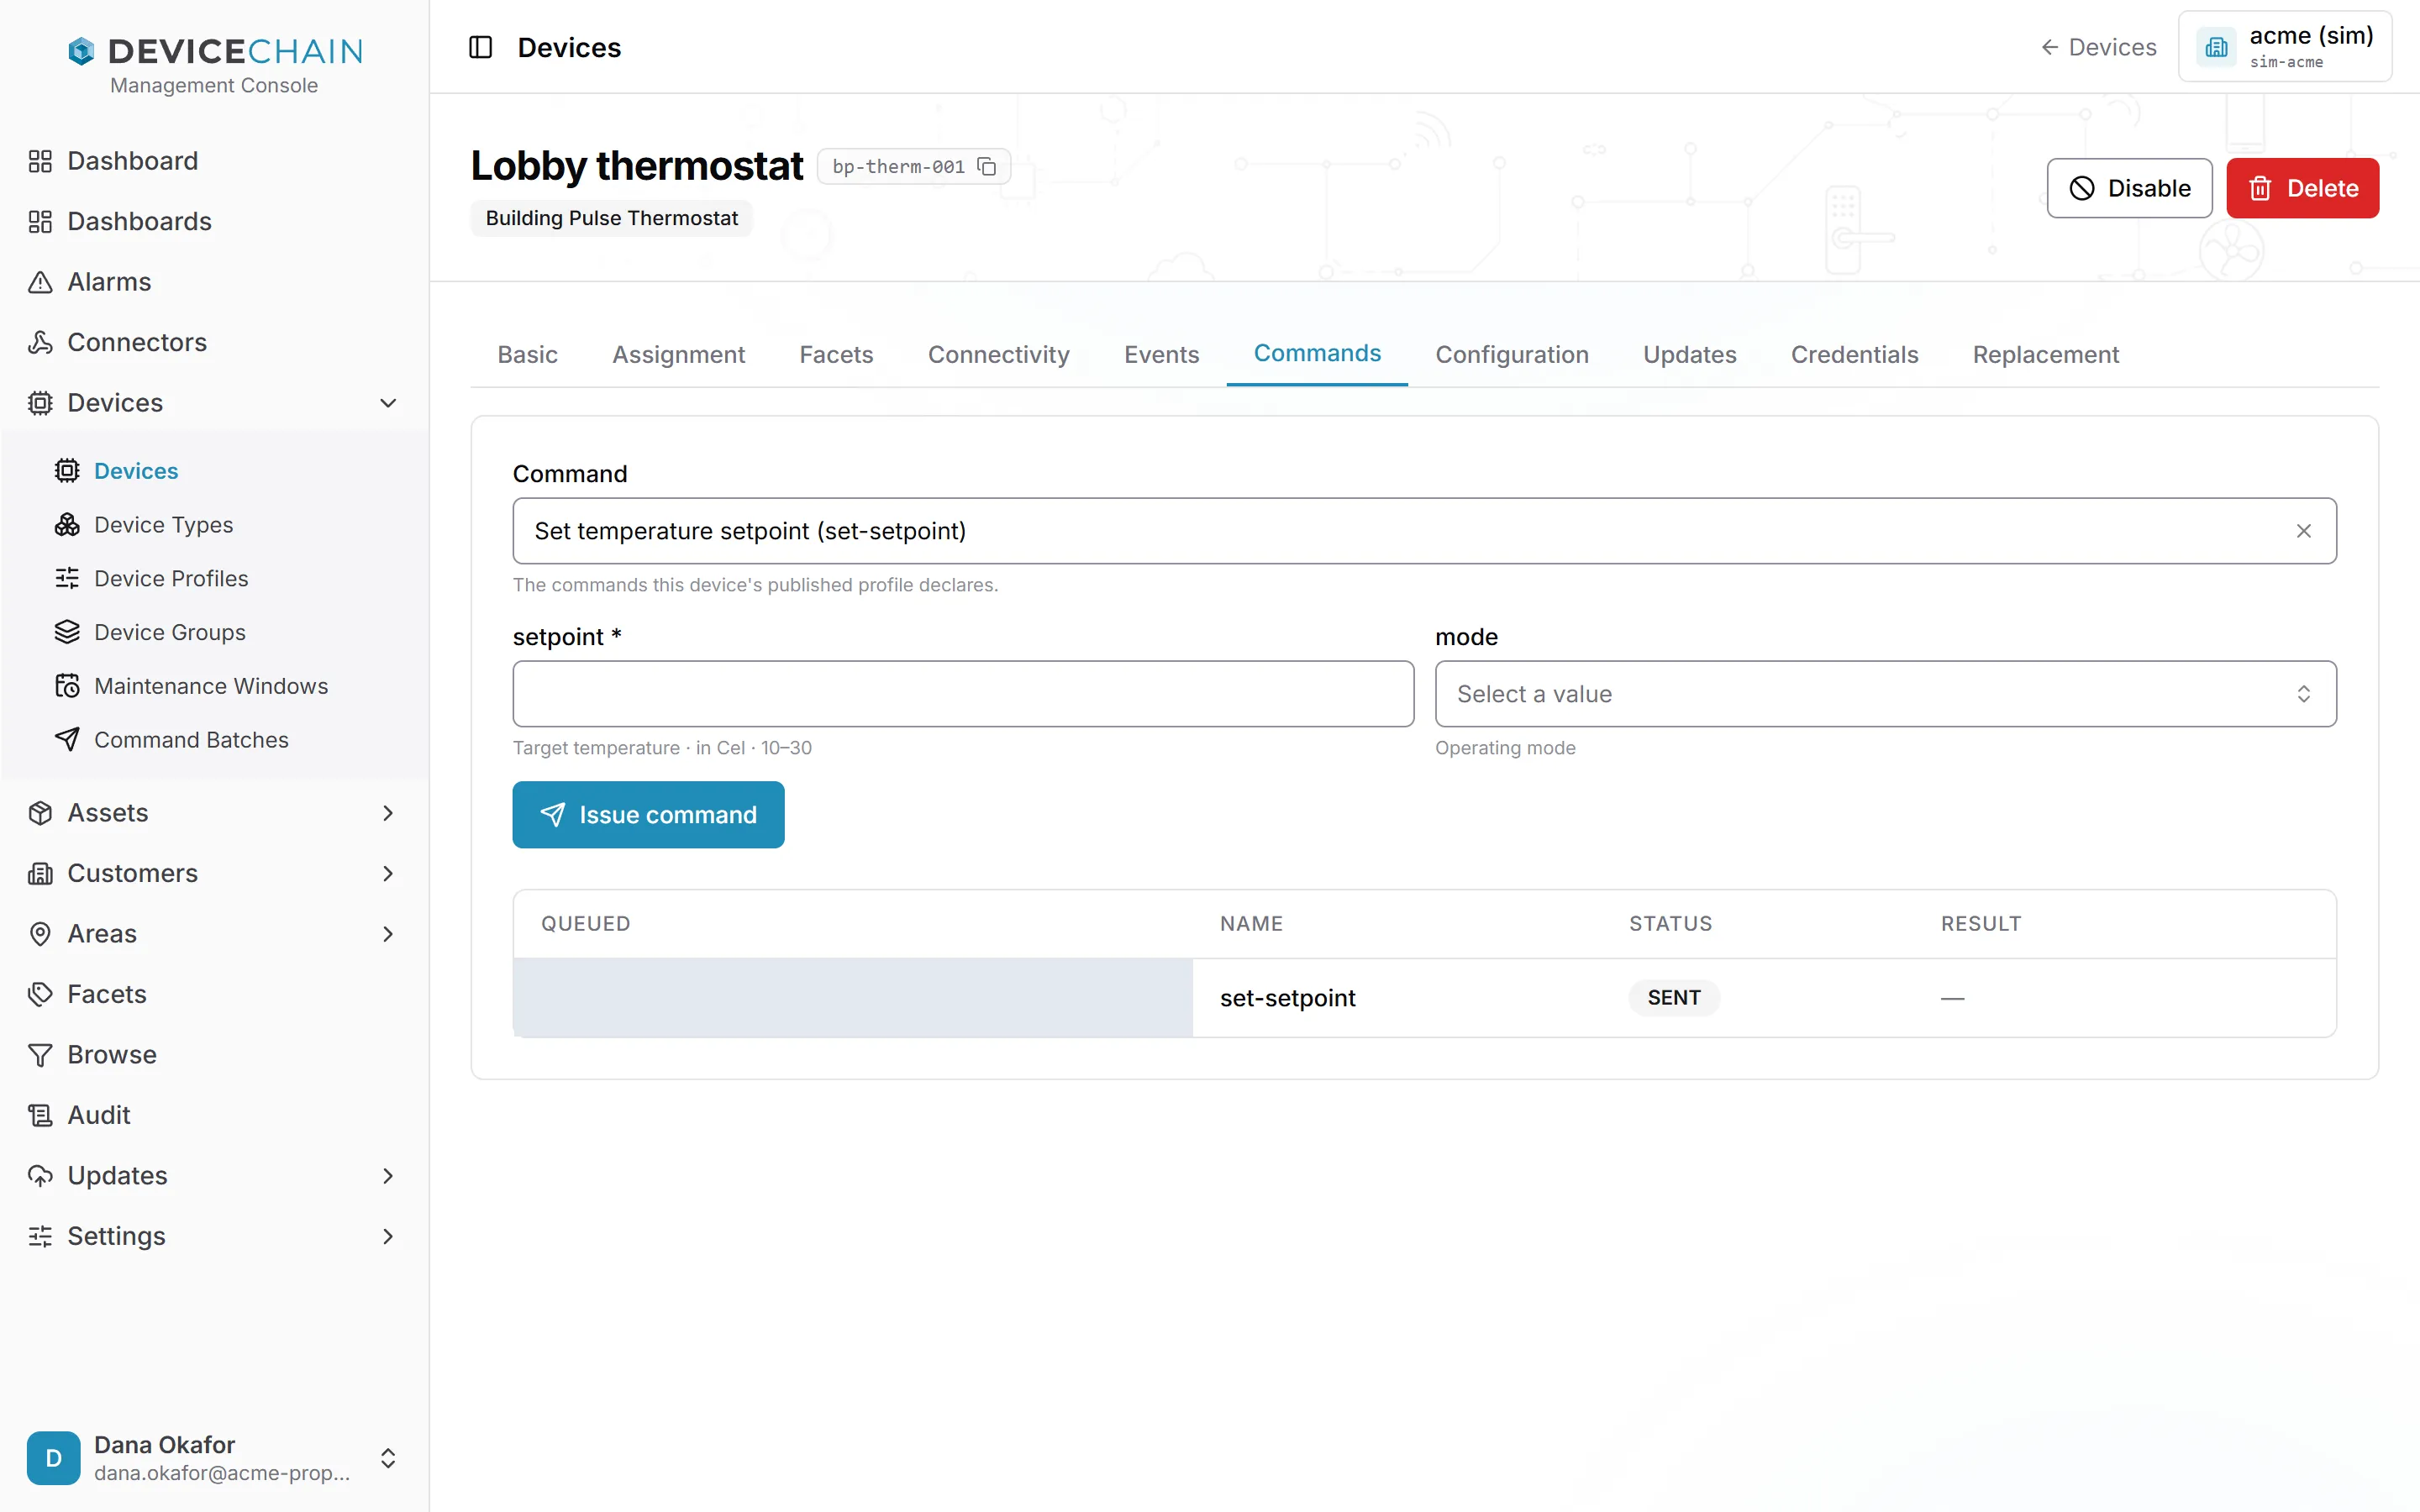
Fill in the parameters and choose Issue command. The form checks each value against the profile, for example the allowed range, before anything is sent. If the profile declares no commands, you can type any command name and an optional payload instead.
The table below lists the device's commands with their status, such as QUEUED, SENT or SUCCESSFUL, and the result the device reported. A command that has not reached the device yet (QUEUED, HELD or PARKED) has a Cancel button. A command that has been sent cannot be cancelled.
What each status means is explained in Commands, and Sending a command covers sending and following one. To send a command to many devices at once, use a command batch.
Configuration
Configuration shows the settings DeviceChain keeps for the device to apply, and whether the device has applied them.
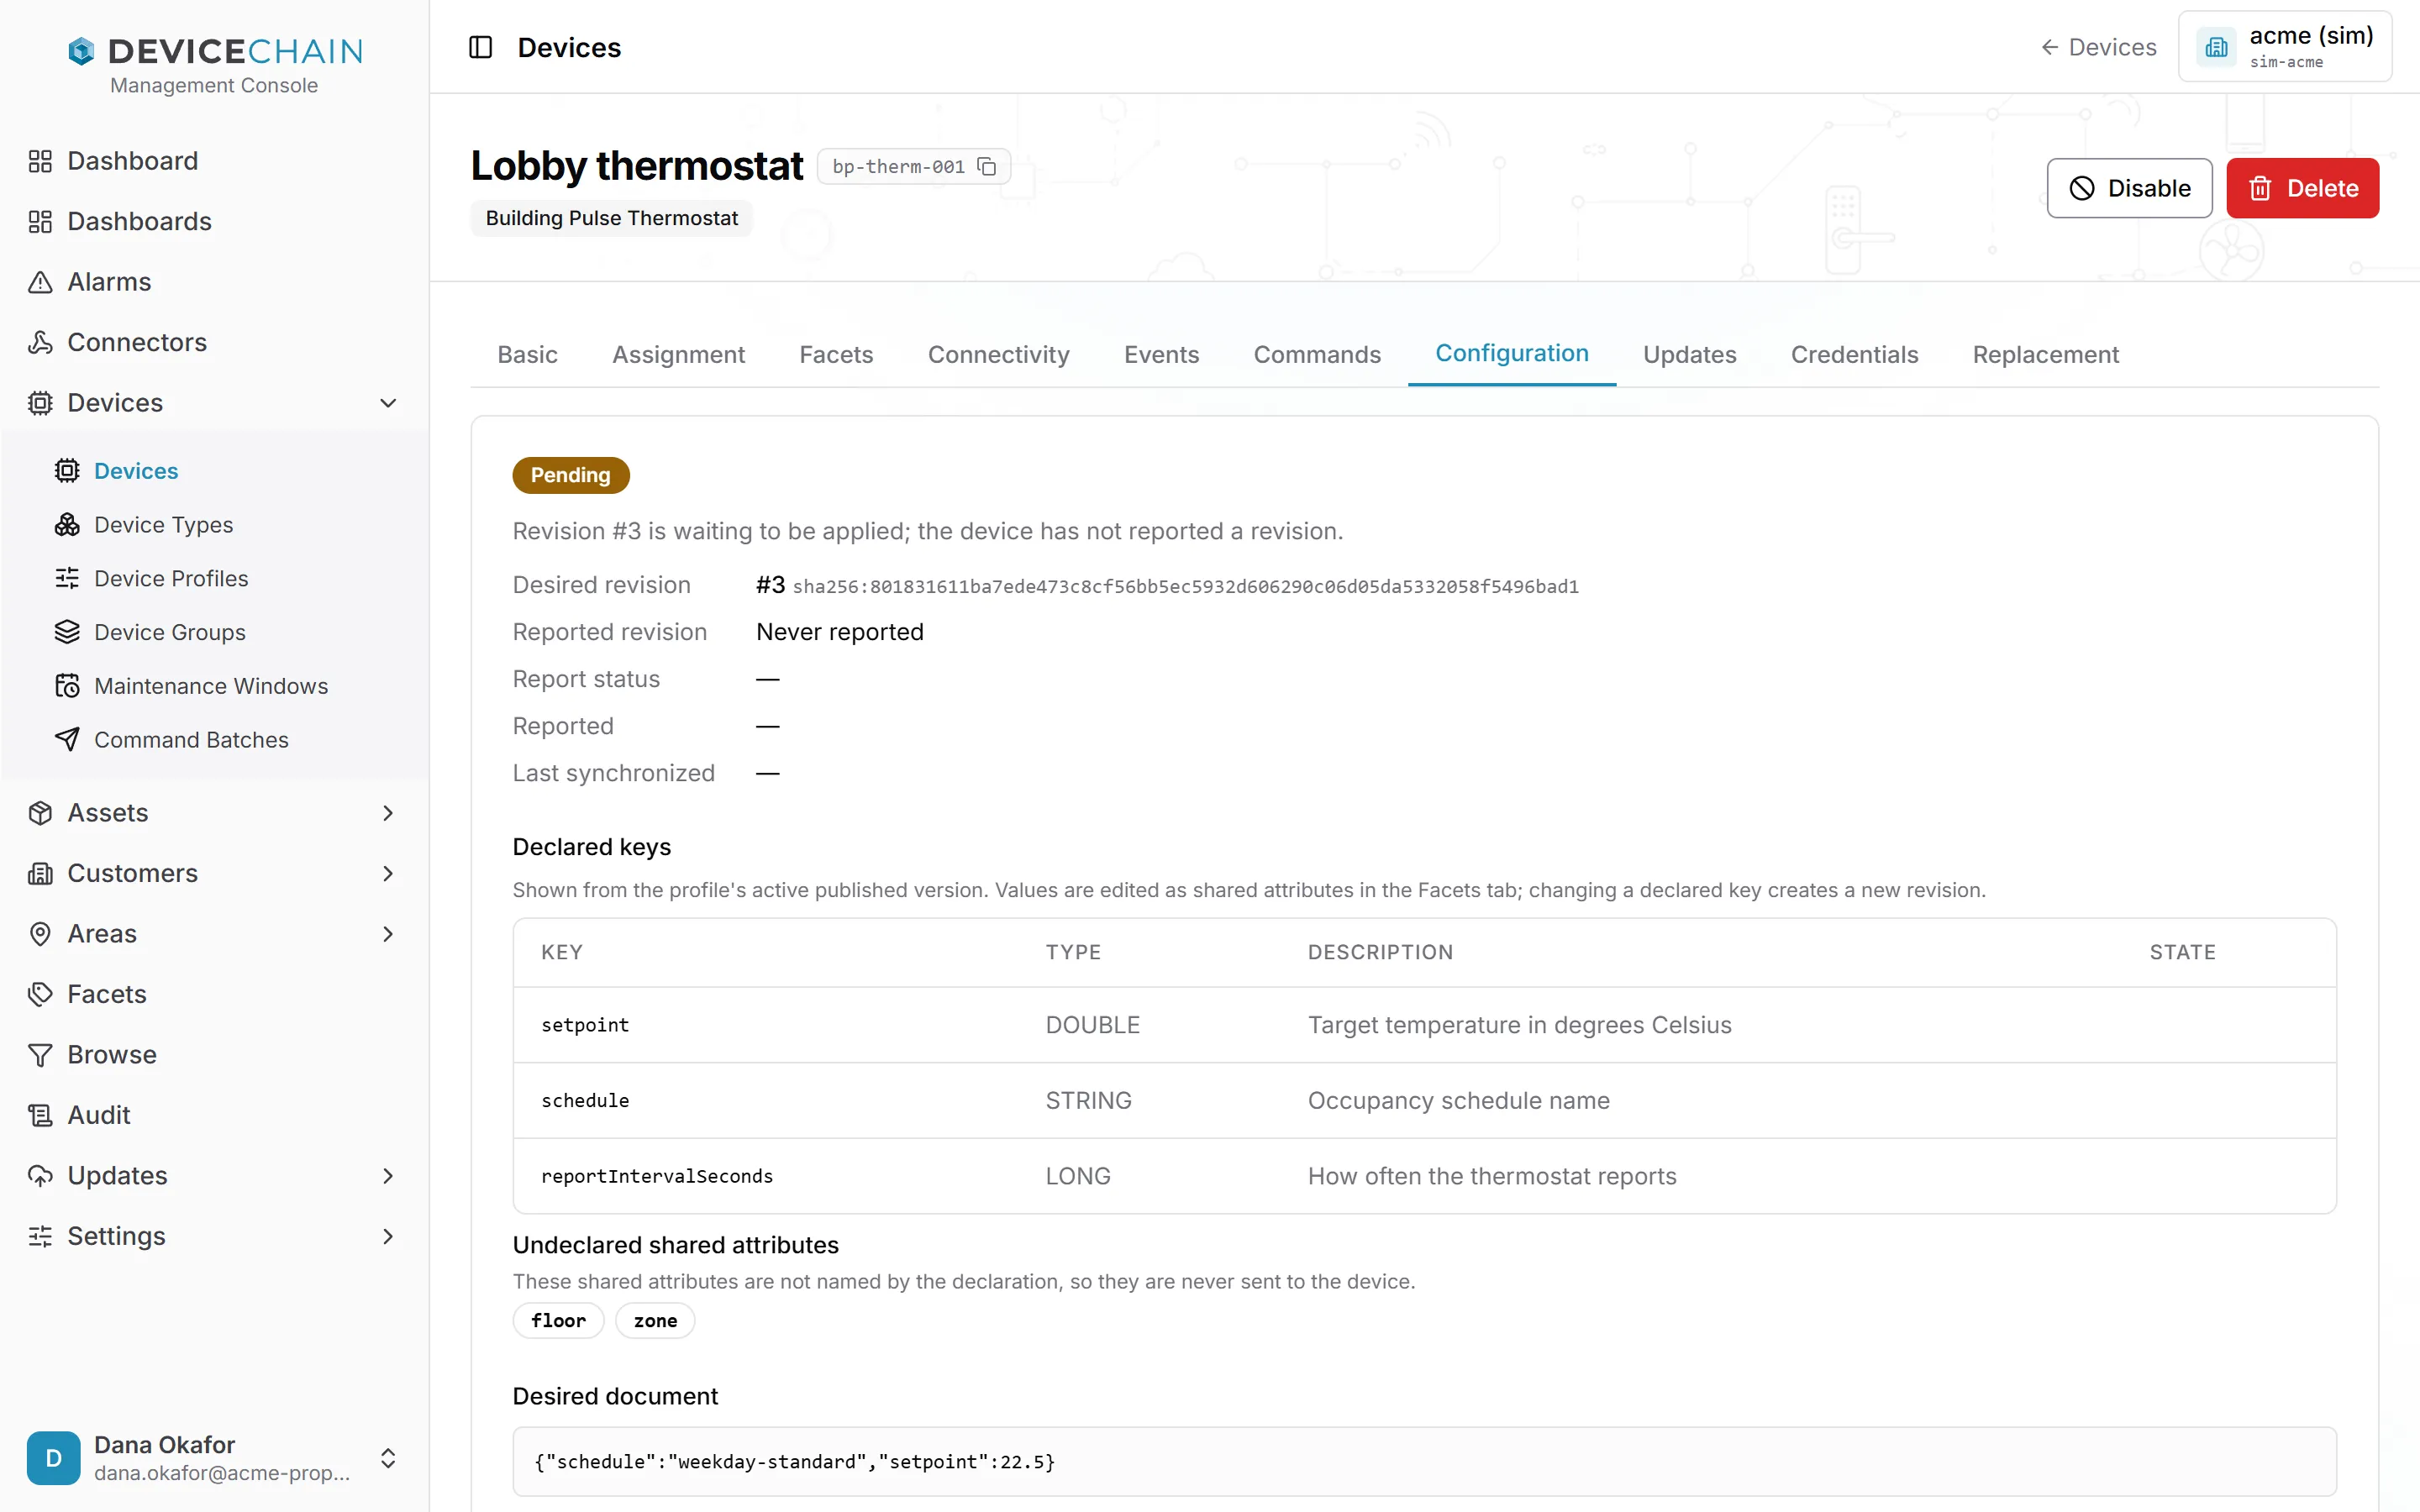
A device's configuration is a small document built from its shared attributes. Only the keys its profile declares are included. Each change makes a new numbered revision, which is sent to the device.
- The badge at the top says whether the device is up to date. In sync means it has applied the latest revision. Pending means a revision is waiting to be applied. Out of date means the values have changed since the latest revision. A new revision is made when a declared key is next written or the device next synchronizes. No revision yet means nothing has been made.
- Desired revision is the latest one, and Reported revision is the one the device last said it holds. Report status is what the device did with it: Received, Applied or Rejected. When the device rejects a configuration, its reasons are listed.
- Declared keys lists the keys the profile declares, from its active published version. You change their values as shared attributes in the Facets tab.
- Undeclared shared attributes are shared attributes the profile does not name. They are never sent to the device.
- Desired document is the exact document the device is sent.
- Revision history lists the device's revisions, newest first, with who made each one.
You can put a device back to an earlier configuration, or give it another device's. In both cases the console shows a preview first, and nothing changes until you choose Apply.
To restore an earlier revision, choose Restore on its row in Revision history.
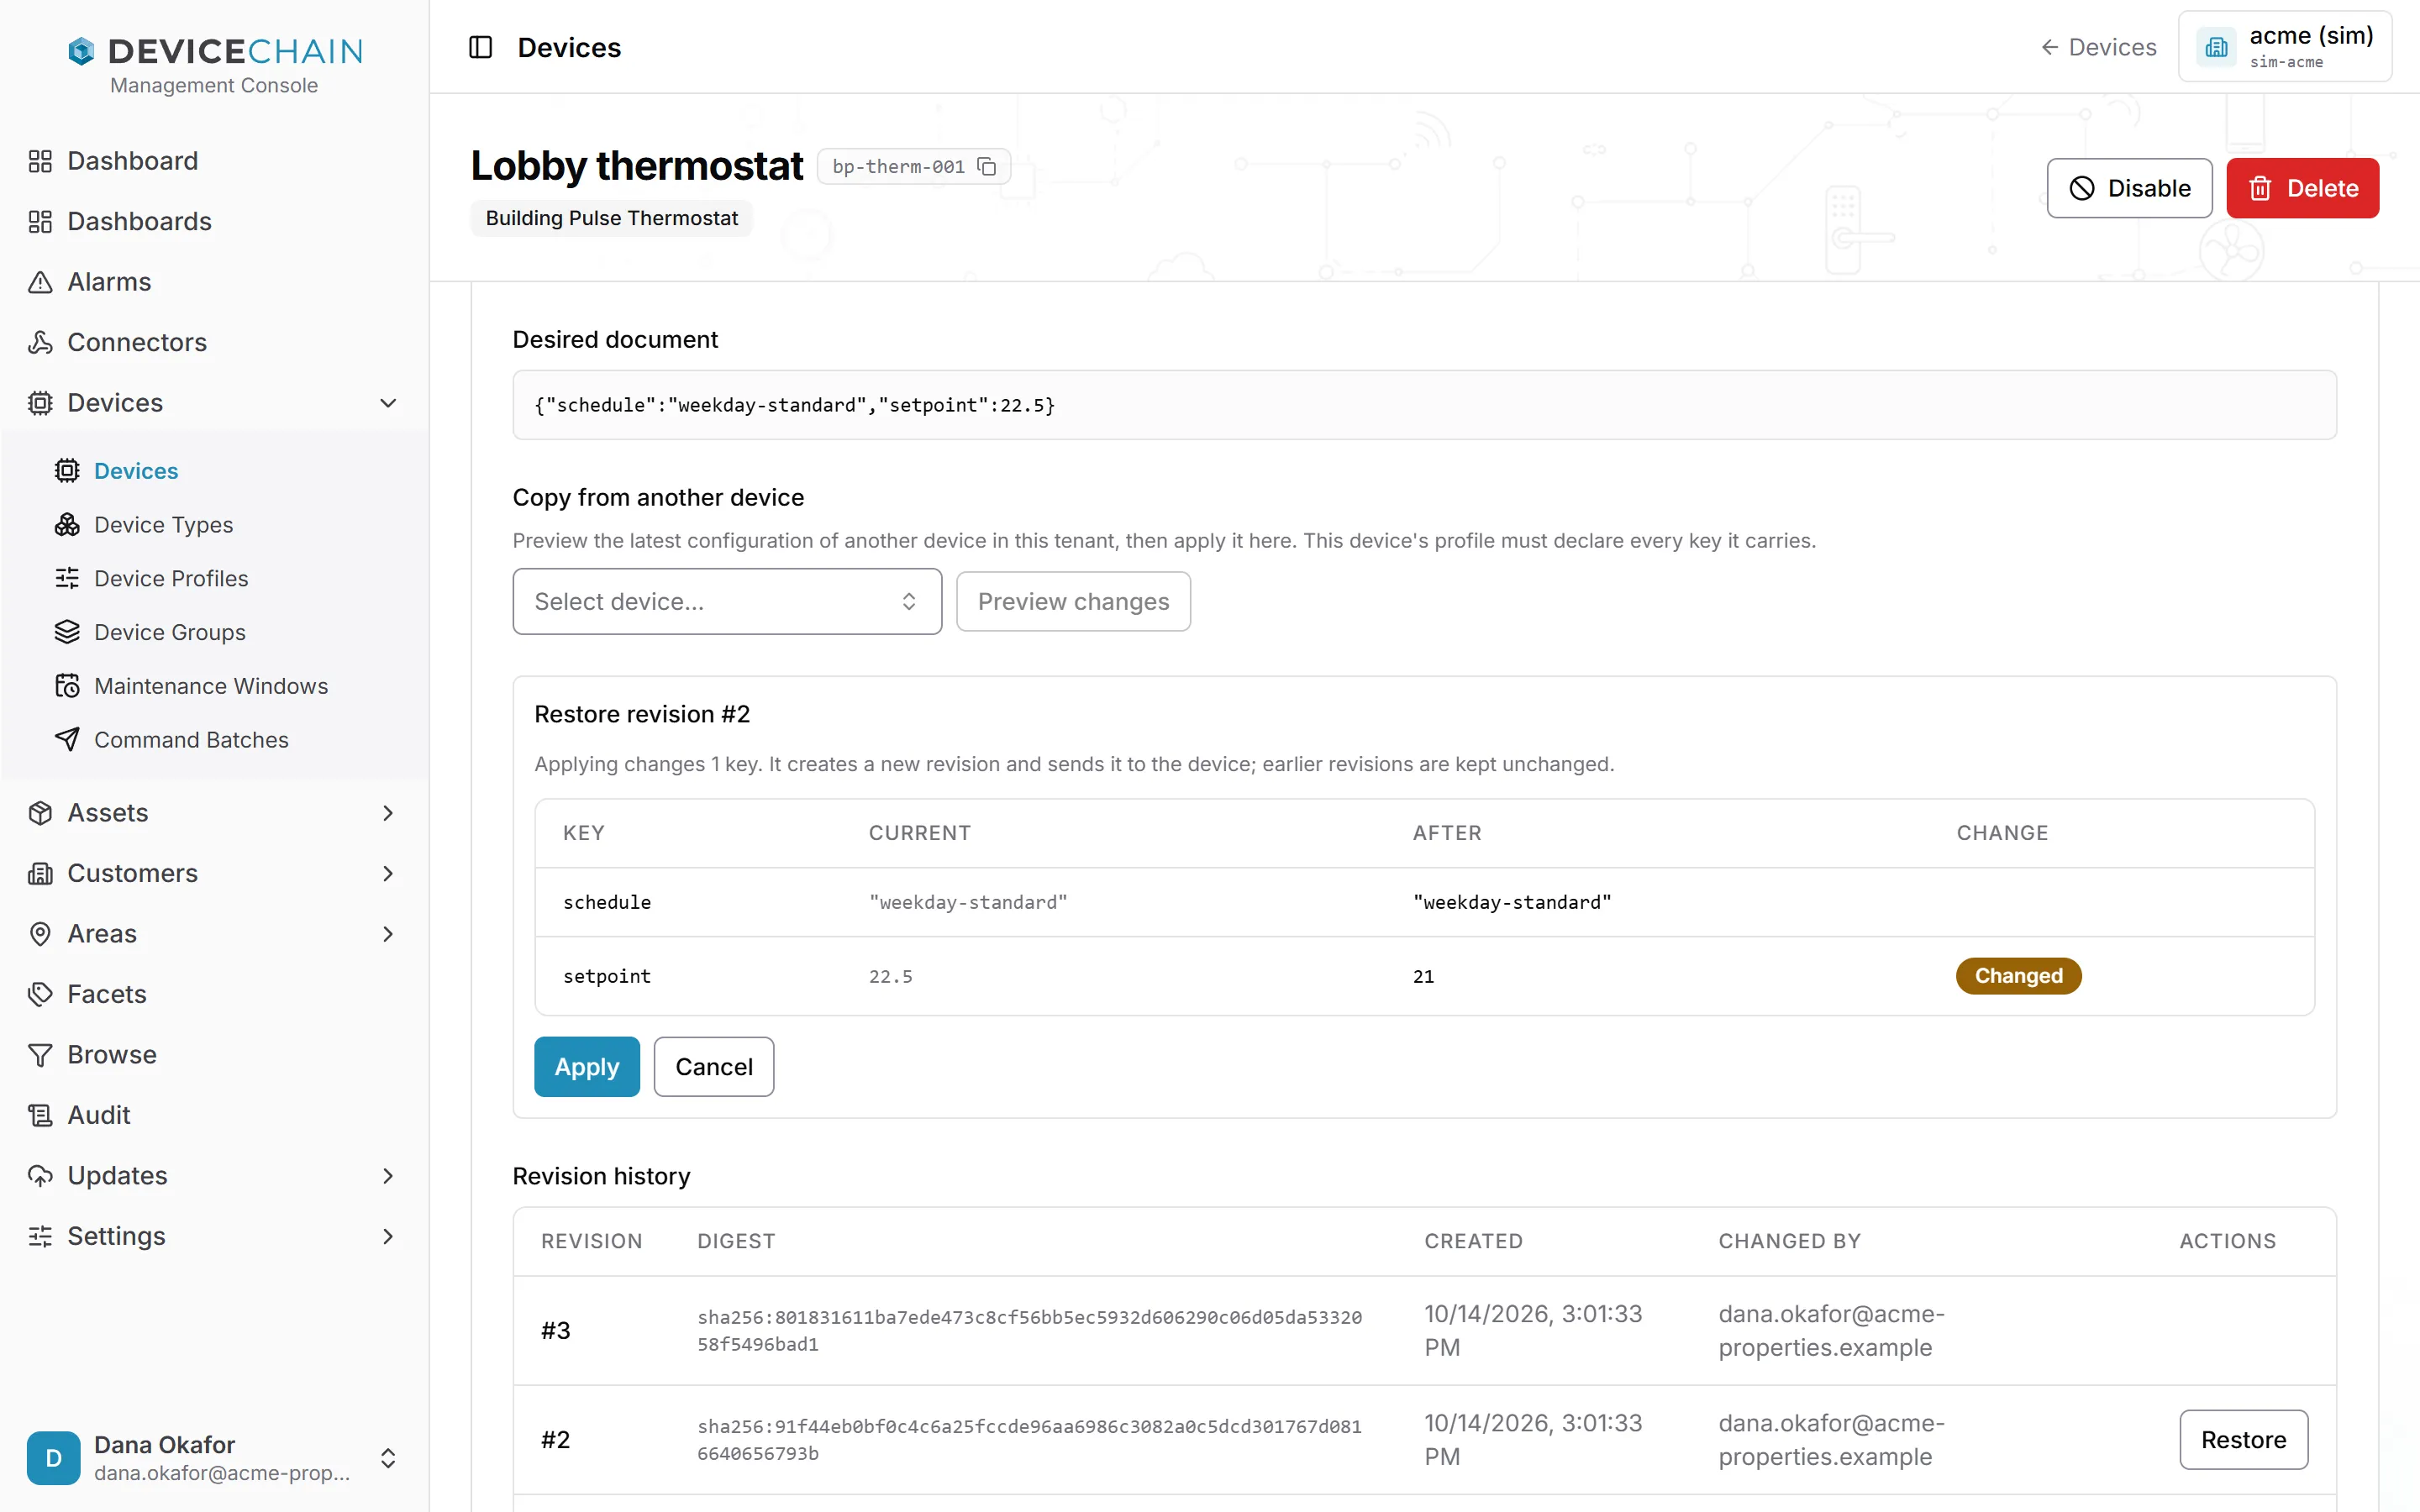
To copy another device's configuration, pick the device under Copy from another device and choose Preview changes. The copy takes that device's latest revision.
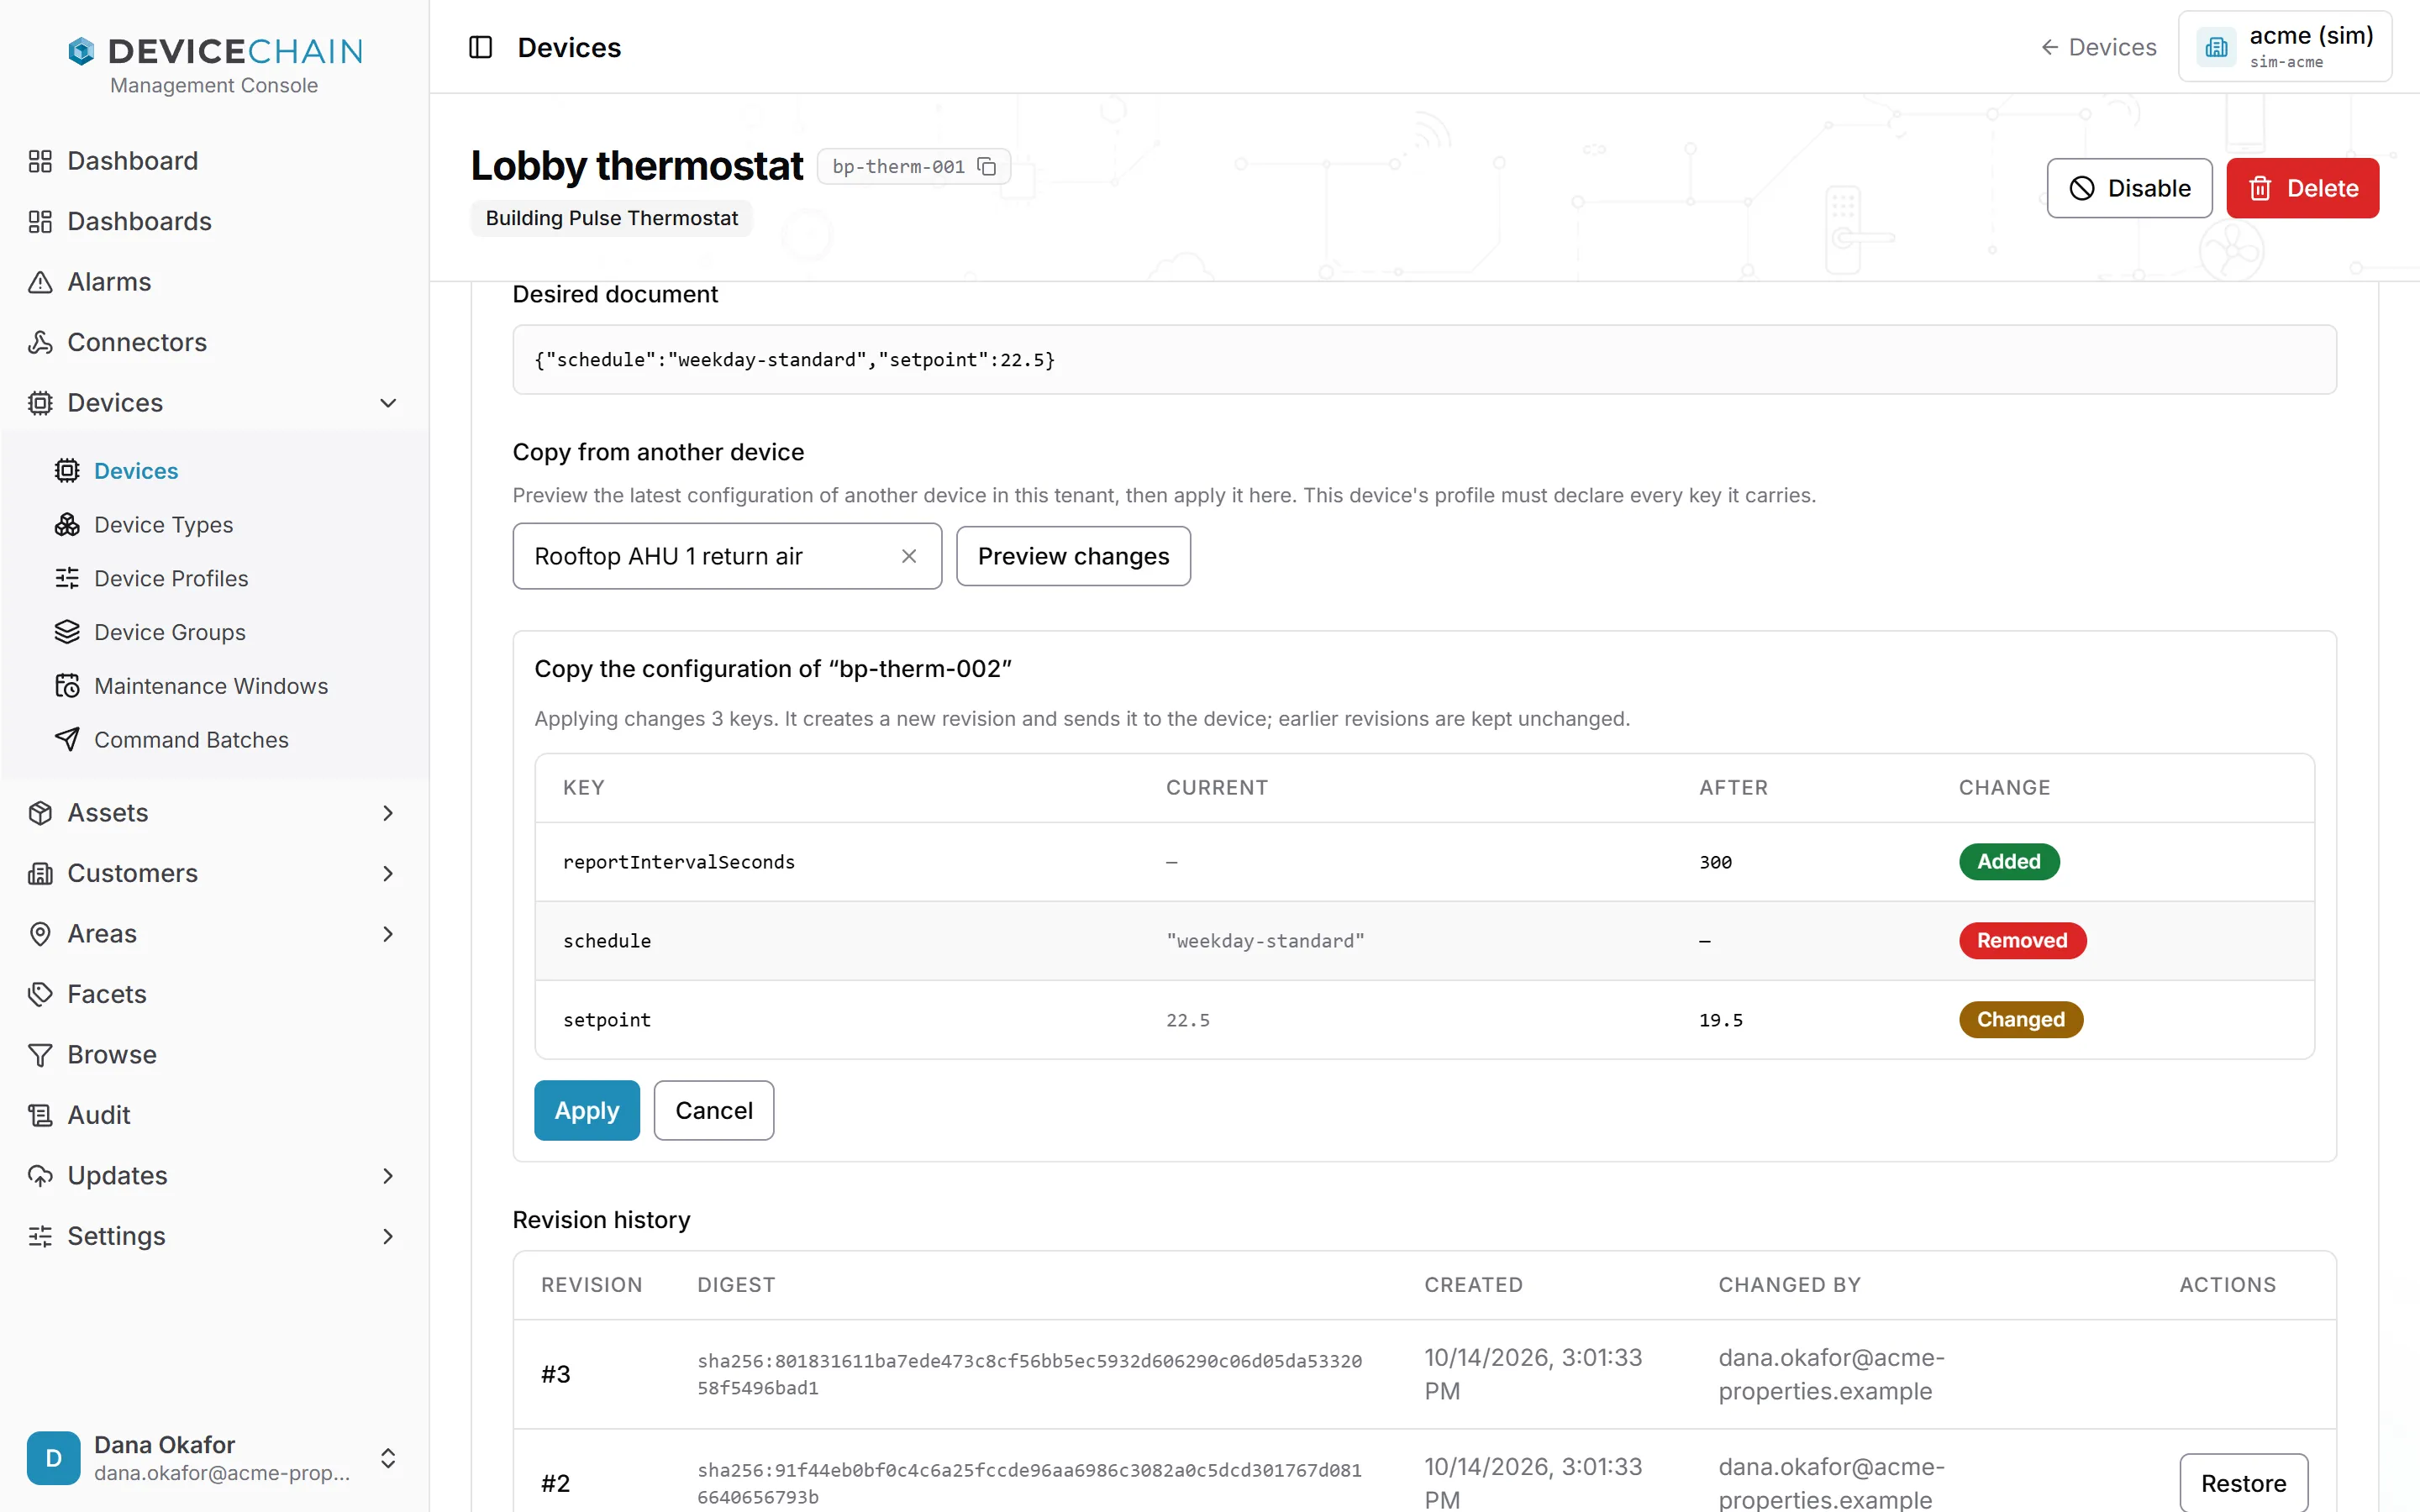
The preview lists every key with its Current value, the value it will have After, and whether it is Added, Changed or Removed. Applying makes a new revision and sends it to the device. Earlier revisions are kept unchanged. The change is refused if this device's profile does not declare every key the configuration carries.
How a device receives and reports its configuration is described in Restoring or copying a configuration.
Updates
Updates shows the over-the-air update assigned to the device, and its update history. It is covered in the over-the-air updates chapter.
Credentials
Credentials holds what the device uses to prove who it is when it connects.
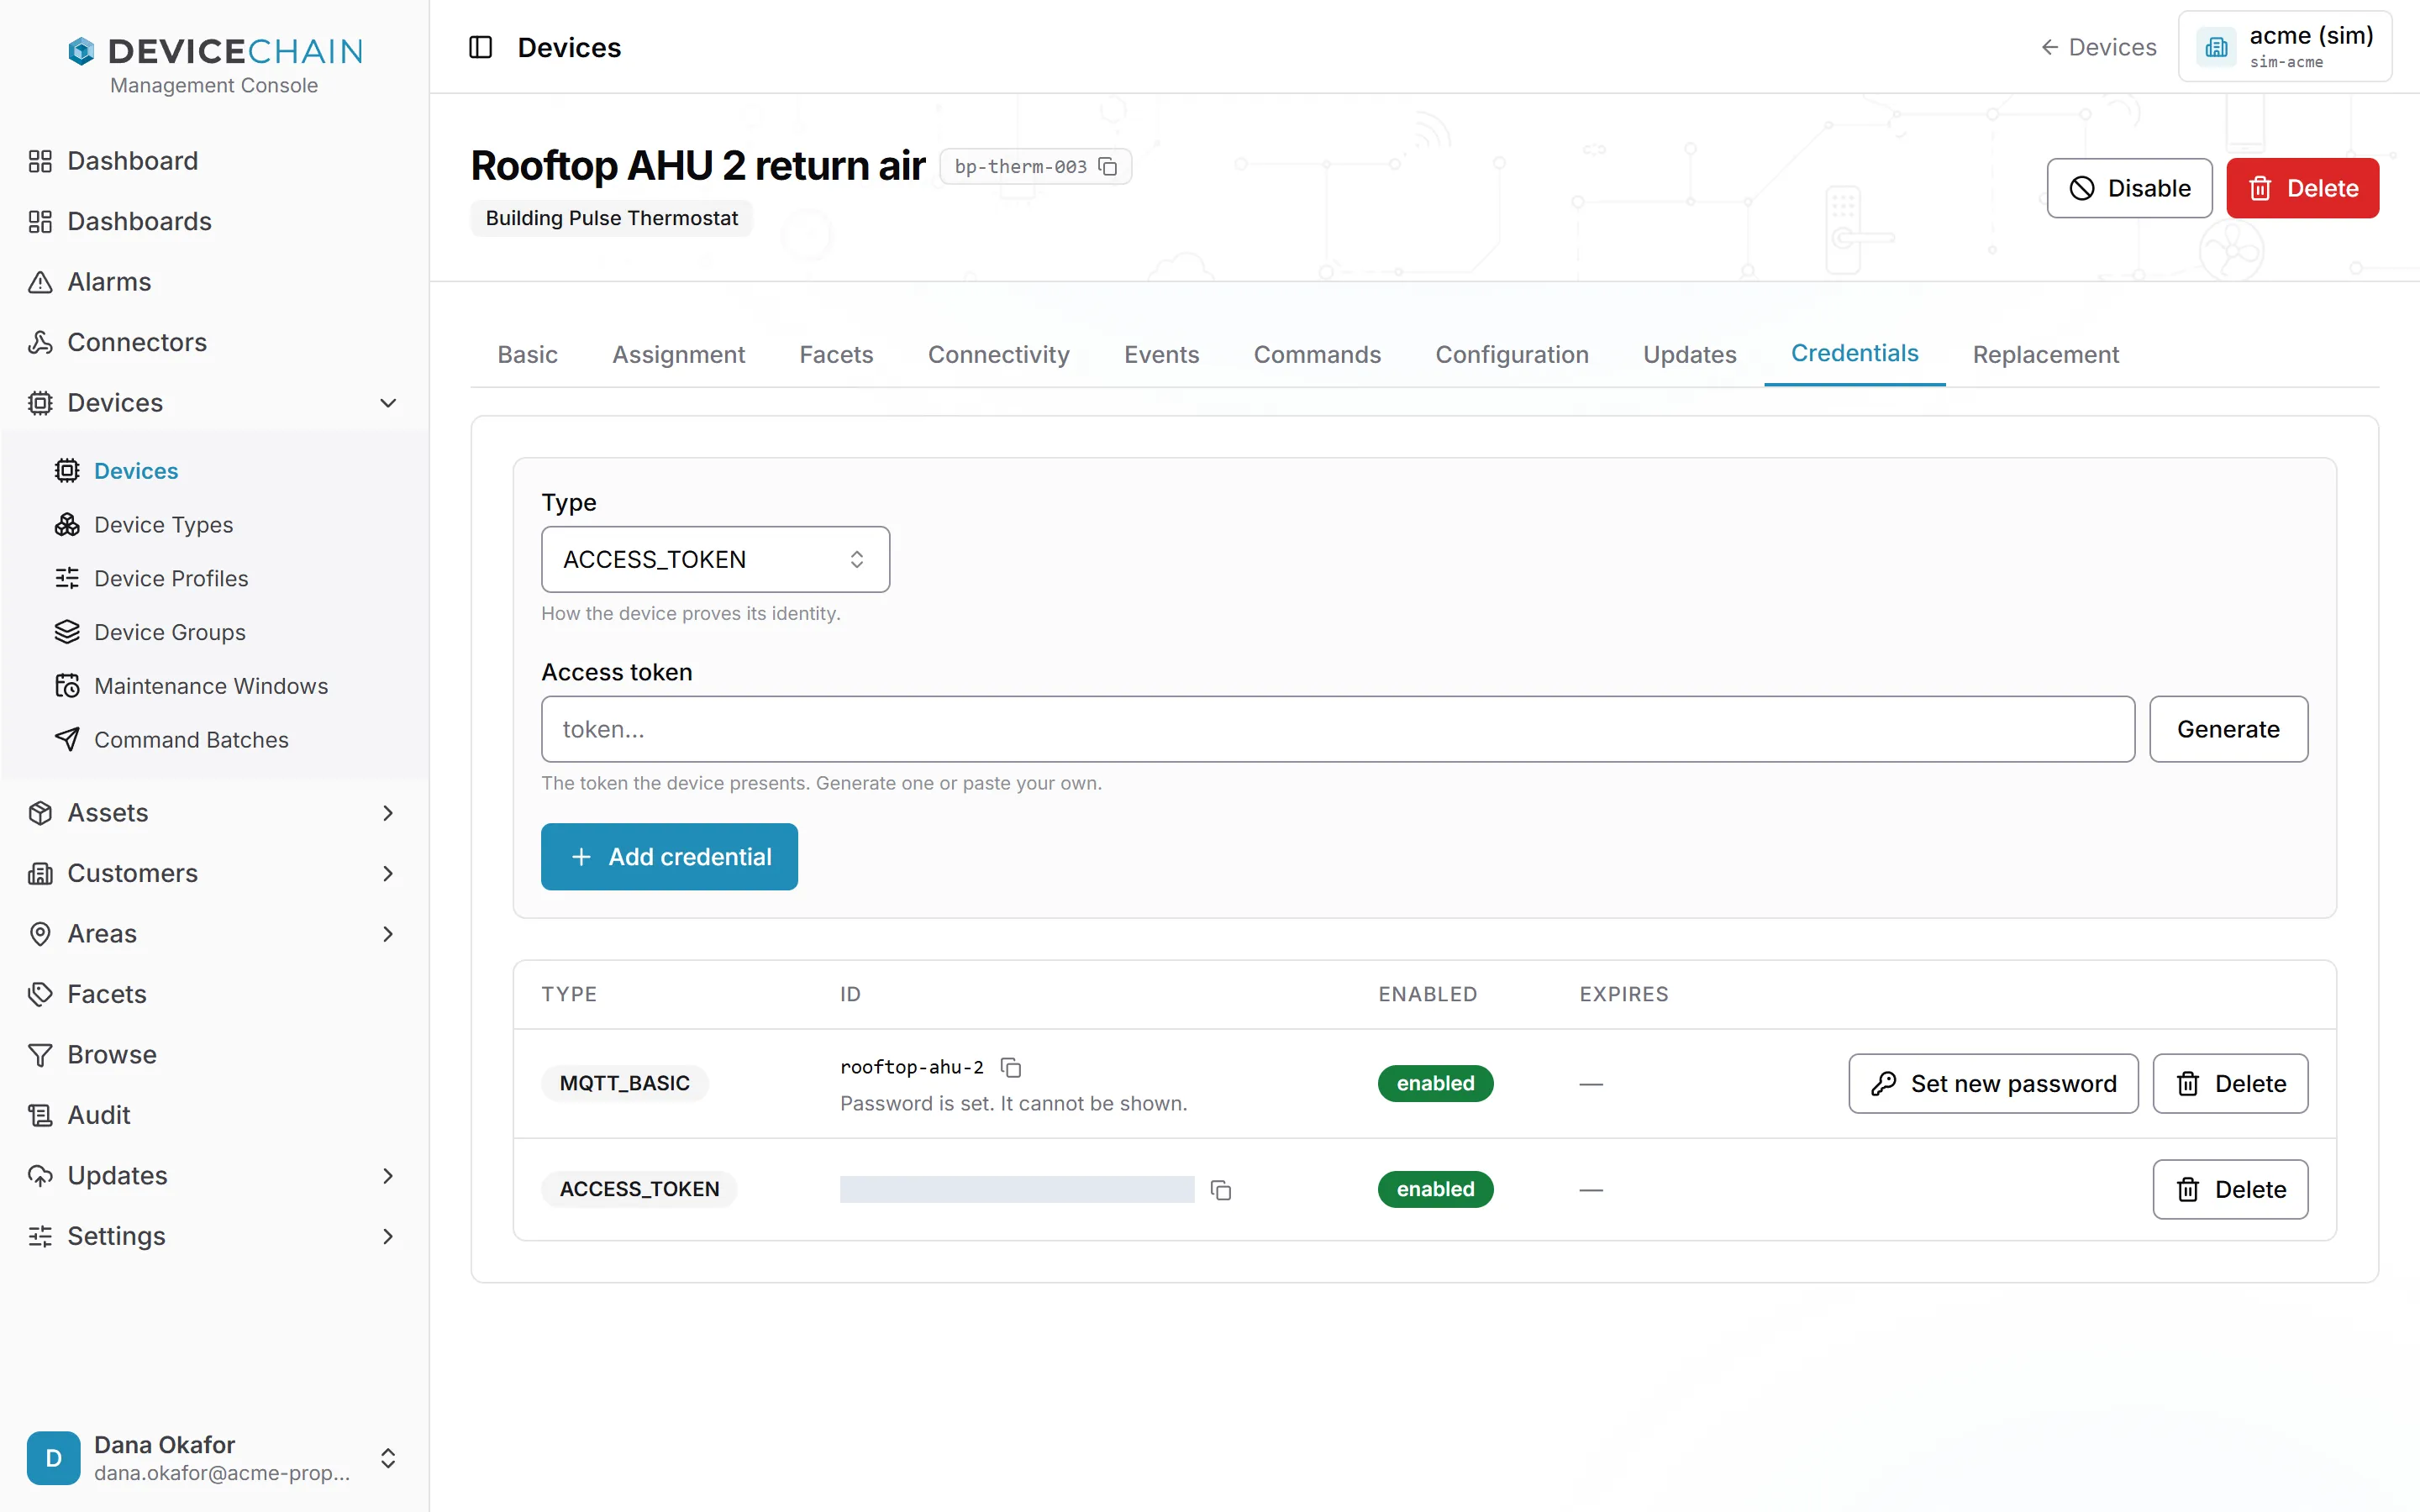
There are two types:
- ACCESS_TOKEN: the device presents a token. Paste your own or choose Generate.
- MQTT_BASIC: the device connects with a username and password.
Choose the Type, fill in the fields and choose Add credential. A device can hold more than one credential. Delete removes one, after which the device can no longer authenticate with it.
An MQTT password is shown only once: right after you add the credential, or after you choose Set new password to change it. The platform keeps only a one-way digest, so it can never show the password again.
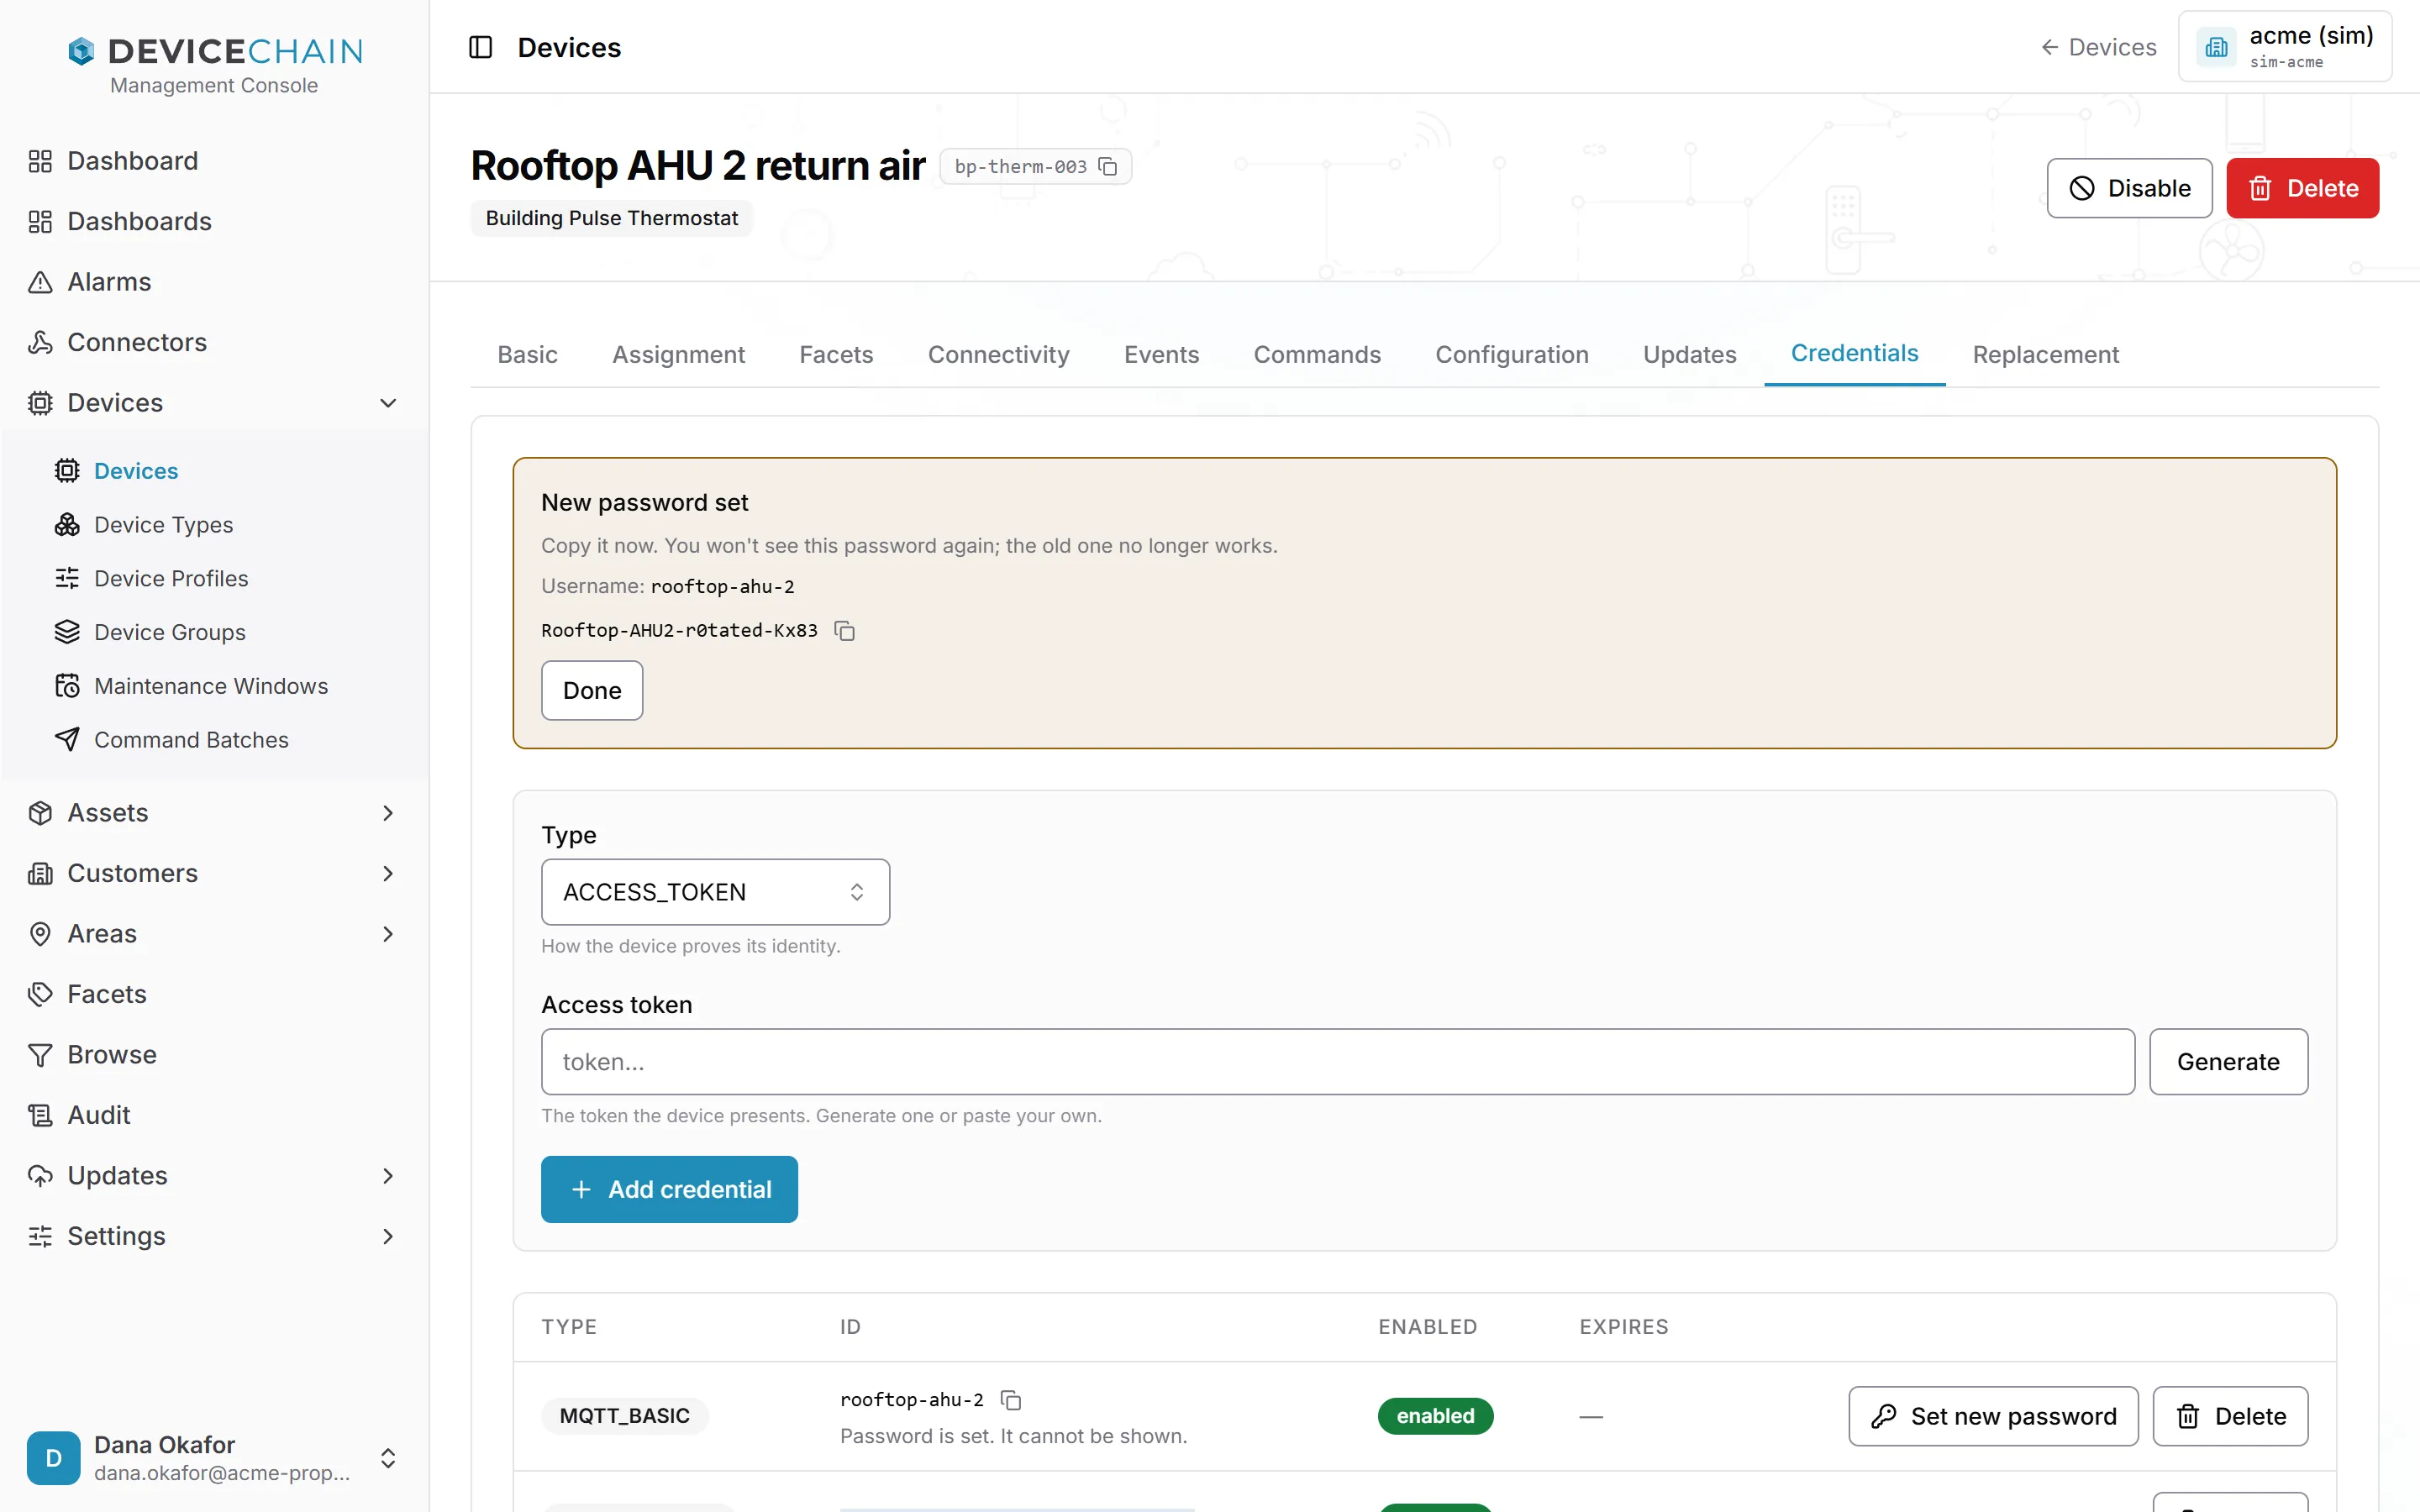
Copy the password and give it to the device, then choose Done. When you set a new password, the old one stops working as soon as you save.
See Device credentials.
Replacement
Replacement is for swapping the hardware: a unit has failed and a new one takes its place. The device keeps its identity, history, alarms, assignments and group membership. Only the credentials change.
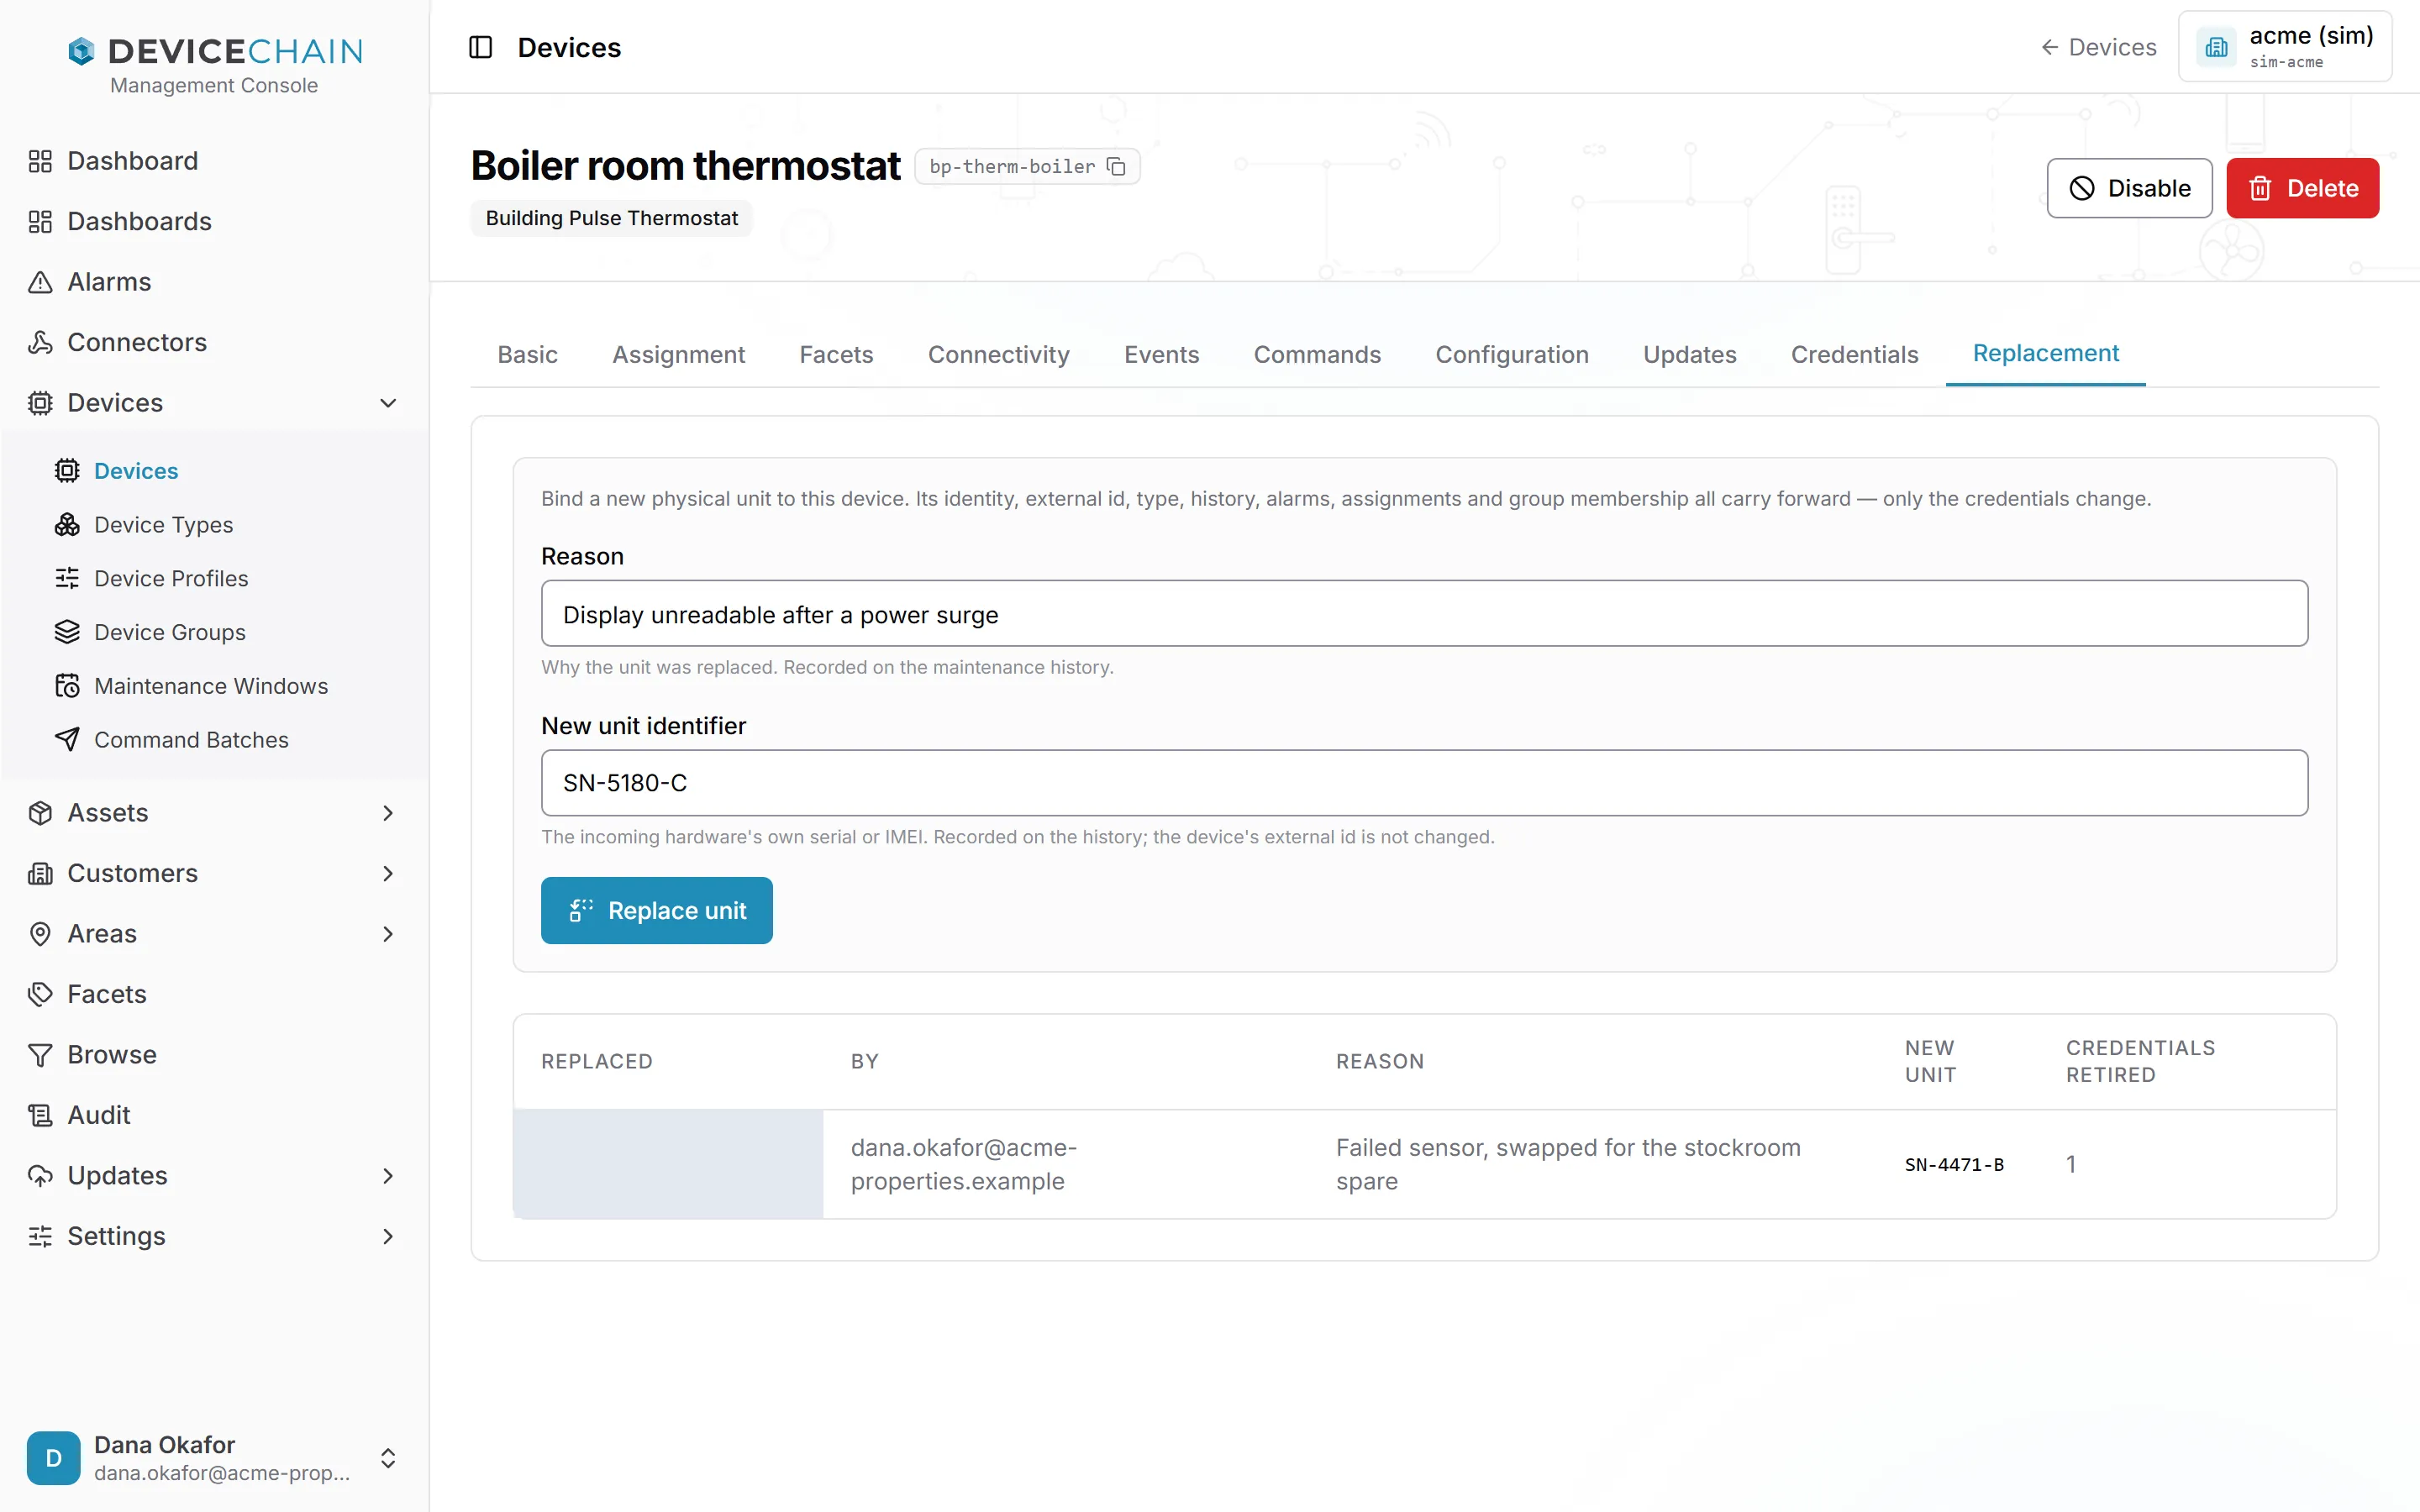
- Enter the Reason. It is recorded on the maintenance history.
- Enter the New unit identifier: the new hardware's own serial number or IMEI. It is recorded on the history. The device's external id does not change.
- Choose Replace unit and confirm.
Every credential the old unit could use is disabled, and a new credential is issued for the new unit. The new credential is shown once, so copy it before you choose Done. It cannot be read back from the history.
The table below lists earlier replacements: when, by whom, why, the new unit and how many credentials were retired.